
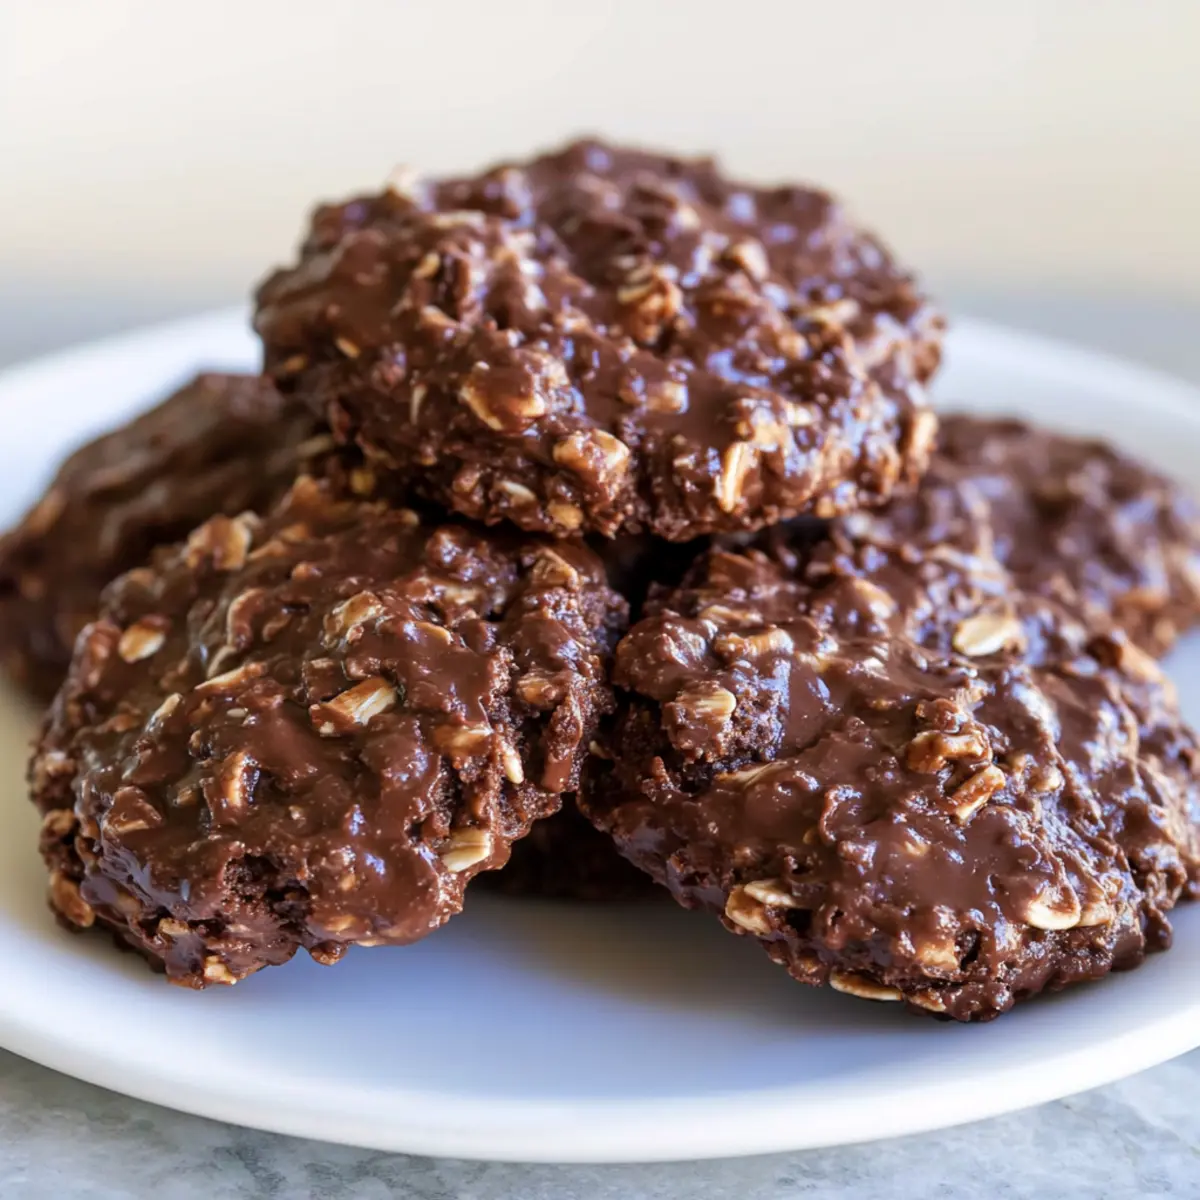
As I stood in my kitchen, the summer heat lingering just outside my door, a thought struck me: why not whip up a batch of No Bake Cookies? These delightful treats come together with little more than a saucepan and a spoon, making them an ideal choice for anyone who craves a quick dessert without turning on the oven. The blend of chewy oats, rich cocoa, and creamy peanut butter delivers both nostalgia and satisfaction, making this recipe a crowd-pleaser for all ages. Plus, since there’s no baking involved, you can enjoy these fudgy morsels in a matter of minutes—perfect for those hot days when the last thing you want is to heat up the kitchen. Curious about how to create this indulgent treat? Let’s dive in!
Why are No Bake Cookies so beloved?
Simplicity: With just a few pantry staples, you can whip up these indulgent cookies in no time.
Nostalgic Flavor: The combination of chocolate and peanut butter takes us back to childhood memories with every bite.
Quick and Convenient: Perfect for when you need a sweet fix without the hassle of baking—great for busy weeks!
Versatile Variations: Feel free to mix in your favorite ingredients like chocolate chips or nuts, making each batch uniquely yours.
Cool Treat: Ideal for hot summer days, these cookies don’t require an oven, keeping your kitchen cool and your cravings satisfied.
Pair them with a cold glass of milk or try other easy recipes like Tuna Pasta Bake for a complete snack experience!
No Bake Cookies Ingredients
For the Base
- Salted Butter – Provides richness and moisture; consider using unsalted butter if you prefer to control salt levels.
- Granulated Sugar – Adds sweetness and structure; coconut sugar is a great substitute for a healthier twist.
- Unsweetened Cocoa Powder – Delivers rich chocolate flavor; switch to Dutch-process cocoa for a smoother taste.
- Milk – Blends the ingredients together; almond or oat milk can work beautifully as a dairy-free alternative.
- Vanilla Extract – Enhances the overall flavor profile; using pure vanilla will create a more aromatic treat.
For the Creamy Element
- Creamy Peanut Butter – Infuses the cookies with creaminess and nutty goodness; try almond or sunflower butter for a change in flavor.
For the Chewy Texture
- Quick Oats – Provides that signature chewy texture; remember, old-fashioned oats won’t deliver the same results, so stick with quick oats.
Enjoy these No Bake Cookies that blend nostalgia and rich chocolate peanut butter flavor with simplicity!
Step‑by‑Step Instructions for Easy No Bake Chocolate Peanut Butter Oat Cookies
Step 1: Prepare Baking Surface
Begin by lining two baking sheets with parchment paper or arrange 29 cupcake liners on the countertop. This will serve as the base for your No Bake Cookies, ensuring they don’t stick. Make sure they’re evenly spaced to provide enough room for each cookie.
Step 2: Combine Ingredients
In a medium saucepan, add salted butter, granulated sugar, unsweetened cocoa powder, and milk. Mix these ingredients together over medium heat, stirring frequently until everything is well combined. You’re aiming for a smooth mixture; this should take about 3–5 minutes before it’s ready for the next step.
Step 3: Cook Mixture
Once your mixture is smooth, raise the heat slightly and bring it to a boil. Let it boil without stirring for a full minute, which is crucial for achieving the right texture in your No Bake Cookies. You’ll know it’s ready when you see small bubbles vigorously breaking the surface.
Step 4: Blend Additional Ingredients
Remove the saucepan from the heat and immediately stir in vanilla extract, creamy peanut butter, and quick oats. Mix thoroughly until everything is well combined and the oats are evenly coated. The mixture will be warm and aromatic, showcasing that delightful chocolate peanut butter flavor.
Step 5: Form Cookies
Using a medium cookie scoop or two spoons, drop heaping tablespoons of the cookie mixture onto the prepared sheets or into the liners. You should see some nice mounds forming, each around 2-3 inches apart for even setting. This process should go quickly, so work efficiently to keep the mixture from cooling and thickening too much.
Step 6: Set Cookies
Allow the cookies to sit at room temperature for 20–30 minutes until they firm up. If you’re in a hurry or want a quicker result, you can pop them in the refrigerator for about 10–15 minutes. They should be set and slightly shiny on the outside when done!
Step 7: Store
Once your No Bake Cookies are firm, transfer them to an airtight container. You can keep them at room temperature if you plan to eat them within a week, or refrigerate for an irresistibly chilly treat that can last up to two weeks. Enjoy your delicious creations!

No Bake Cookies Variations & Substitutions
Feel free to let your creativity shine by customizing these cookies to match your taste preferences!
-
Nut-Free: Substitute peanut butter with sunflower seed butter to create a nut-free version that still delivers on flavor.
-
Dairy-Free: Use coconut oil instead of butter and a non-dairy milk like almond milk for a decadent vegan twist. This keeps the cookies creamy without any dairy.
-
Gluten-Free: Swap quick oats with certified gluten-free oats to enjoy these cookies with the same delightful texture. Perfect for gluten-sensitive friends!
-
Spicy Kick: Add a teaspoon of cayenne pepper or cinnamon for a surprising burst of warmth. This unexpected twist brings depth to the chocolate peanut butter flavor.
-
Add Mix-ins: Incorporate mini chocolate chips, dried fruit, or toasted coconut for a pop of additional flavor and texture. These little surprises can elevate your cookies to new heights!
-
Flavor Infusion: Experiment by adding a splash of almond extract for a nutty twist or a tablespoon of coffee to enhance the chocolate taste. Coffee and chocolate are a match made in dessert heaven!
-
Chunky Texture: If you prefer a bit of crunch, mix in crushed nuts or seeds. This will give your cookies a delightful contrast to their fudgy consistency.
For even more delightful treats, consider pairing with Shortbread Cookies Perfectly or indulging in my favorite Christmas Cookies Festive. Happy baking!
What to Serve with Easy No Bake Chocolate Peanut Butter Oat Cookies
Pairing these delightful treats with complementary flavors and textures will elevate your dessert experience.
- Cold Glass of Milk: The classic pair! The creaminess of milk enhances the rich chocolate and peanut flavors, creating a nostalgic moment.
- Fresh Berries: A burst of tangy sweetness from strawberries or raspberries cuts through the richness of the cookies, offering a refreshing contrast.
- Creamy Vanilla Ice Cream: Serve these cookies on top of a scoop of vanilla ice cream for an indulgent treat that is sure to please the whole family!
- Chocolate Sauce Drizzle: For true chocolate lovers, a drizzle of warm chocolate sauce adds an extra layer of decadence to each bite.
- Iced Coffee: A chilled glass of iced coffee balances the sweetness of the cookies, making it a perfect afternoon snack or dessert.
- Crunchy Nuts: A sprinkle of chopped almonds or walnuts not only adds crunch but also complements the nutty flavor of the peanut butter.
- Coconut Flakes: Sweet, toasty coconut flakes bring an element of tropical flavor and texture, enhancing the overall taste experience.
- Fruit Smoothie: Pairing a berry smoothie gives a healthy touch. The freshness of fruit counteracts the sweetness, making it a delightful combination.
- Dark Chocolate Covered Pretzels: A sweet and salty combo; these pretzels offer a satisfying crunch to contrast with the chewy consistency of the cookies.
- Caramel Drizzle: For an extra treat, a caramel drizzle enhances the sweetness and adds a different flavor profile to savor with your cookies.
Expert Tips for the Best No Bake Cookies
-
Boil Time Matters: Ensure the mixture boils for a full minute. Underboiling can lead to cookies that are too soft and won’t set properly.
-
Nut Butter Choices: If you opt for non-creamy nut butters, make sure they have a high-fat content for the right consistency in your No Bake Cookies.
-
Oat Type Warning: Stick to quick oats for the perfect chewy texture. Old-fashioned oats will alter the cookie’s consistency, making them less enjoyable.
-
Sweetness Adjustment: If you’re aiming for a healthier treat, consider substituting granulated sugar with a lower-glycemic sweetener like coconut sugar; it changes the flavor slightly, which many find delightful!
-
Mix-in Ideas: Feel free to get creative! Add chocolate chips, nuts, or seeds to customize your No Bake Cookies for additional flavor and texture.
-
Cooling Quickly: For those impatient moments, refrigerate the cookies after shaping them for quicker setting. This also gives a nice chilled bite!
Make Ahead Options
These No Bake Cookies are a fantastic option for meal prep enthusiasts! You can prepare the cookie mixture up to 24 hours in advance, allowing it to chill and set in the refrigerator. To do this, simply follow the mixing instructions, and once combined, transfer it to an airtight container before refrigerating. This keeps the mixture fresh and ready to scoop when you’re ready to serve. When it’s time to enjoy, just scoop and shape your cookies, letting them set at room temperature or in the refrigerator for about 20-30 minutes until firm. With this simple make-ahead strategy, you’ll savor every delicious, chocolaty bite without the last-minute rush!
How to Store and Freeze No Bake Cookies
Room Temperature: Keep your No Bake Cookies in an airtight container at room temperature for up to 1 week. This keeps them chewy and flavorful without the need for refrigeration.
Fridge: For a chilled treat, store cookies in the refrigerator in an airtight container; they will last for up to 2 weeks and maintain their delicious chocolate peanut butter flavor.
Freezer: To extend their shelf life, freeze cookies for up to 3 months. Place them in a single layer in a freezer-safe container, separating layers with parchment paper to prevent sticking.
Reheating: If you prefer them warm, pop a frozen cookie in the microwave for about 10-15 seconds, just enough to soften them while preserving that chewy texture!
No Bake Cookies Recipe FAQs
How do I choose the right ripeness for ingredients?
When making No Bake Cookies, the ripeness of ingredients like peanut butter is less of a concern, as this recipe relies mostly on shelf-stable items. However, if you’re using other add-ins, such as bananas for banana-flavored varieties, choose fruits that are ripe but not overly mushy which can add excess moisture.
What’s the best way to store No Bake Cookies?
Absolutely! For optimal freshness, store your No Bake Cookies in an airtight container at room temperature for up to 1 week. If you prefer them chilled, they can be refrigerated for up to 2 weeks. If you notice any dark spots or changes in texture, it’s best not to eat them.
Can I freeze No Bake Cookies, and if so, how?
Very! To freeze your No Bake Cookies, first, let them cool completely. Arrange them in a single layer in a freezer-safe container, separating each layer with parchment paper to prevent sticking. They can be stored like this for up to 3 months. When you’re ready to enjoy, simply microwave them for about 10-15 seconds to bring back their chewy texture.
What should I do if my cookie mixture is too soft?
If your No Bake Cookies turn out too soft, it likely means the mixture wasn’t boiled long enough. To salvage them, allow the mixture to sit at room temperature longer to firm up. If it’s still too runny, you can stir in a bit more quick oats gradually until the desired consistency is reached.
Are No Bake Cookies safe for my pets or certain dietary restrictions?
These No Bake Cookies contain sugar and chocolate, both of which are not safe for pets, especially dogs. If you have someone with nut allergies in your household, consider making a variation without peanut butter, substituting with a seed butter like sunflower for a similar effect without the allergens. Always double-check ingredient labels if allergies are a concern.
What can I do if I don’t have all the ingredients?
No worries! You can get creative! For butter, try coconut oil for a vegan option, or swap granulated sugar with honey or maple syrup for a natural sweetener. Remember, though, adjustments in ingredients may slightly affect the texture and flavor, so keep that in mind as you experiment!
Nostalgic No Bake Cookies with Chocolate & Peanut Butter Bliss
Ingredients
Equipment
Method
- Prepare the baking surface by lining two baking sheets with parchment paper or arrange 29 cupcake liners on the countertop.
- In a medium saucepan, add salted butter, granulated sugar, unsweetened cocoa powder, and milk. Mix and cook over medium heat for 3–5 minutes until smooth.
- Raise the heat slightly, bring to a boil and let it boil without stirring for a full minute.
- Remove from heat and stir in vanilla extract, creamy peanut butter, and quick oats until well combined.
- Drop heaping tablespoons of the mixture onto the sheets or liners, spacing them 2-3 inches apart.
- Allow cookies to sit at room temperature for 20–30 minutes or refrigerate for 10–15 minutes to firm up.
- Once firm, transfer cookies to an airtight container for storage.
Leave a Reply