
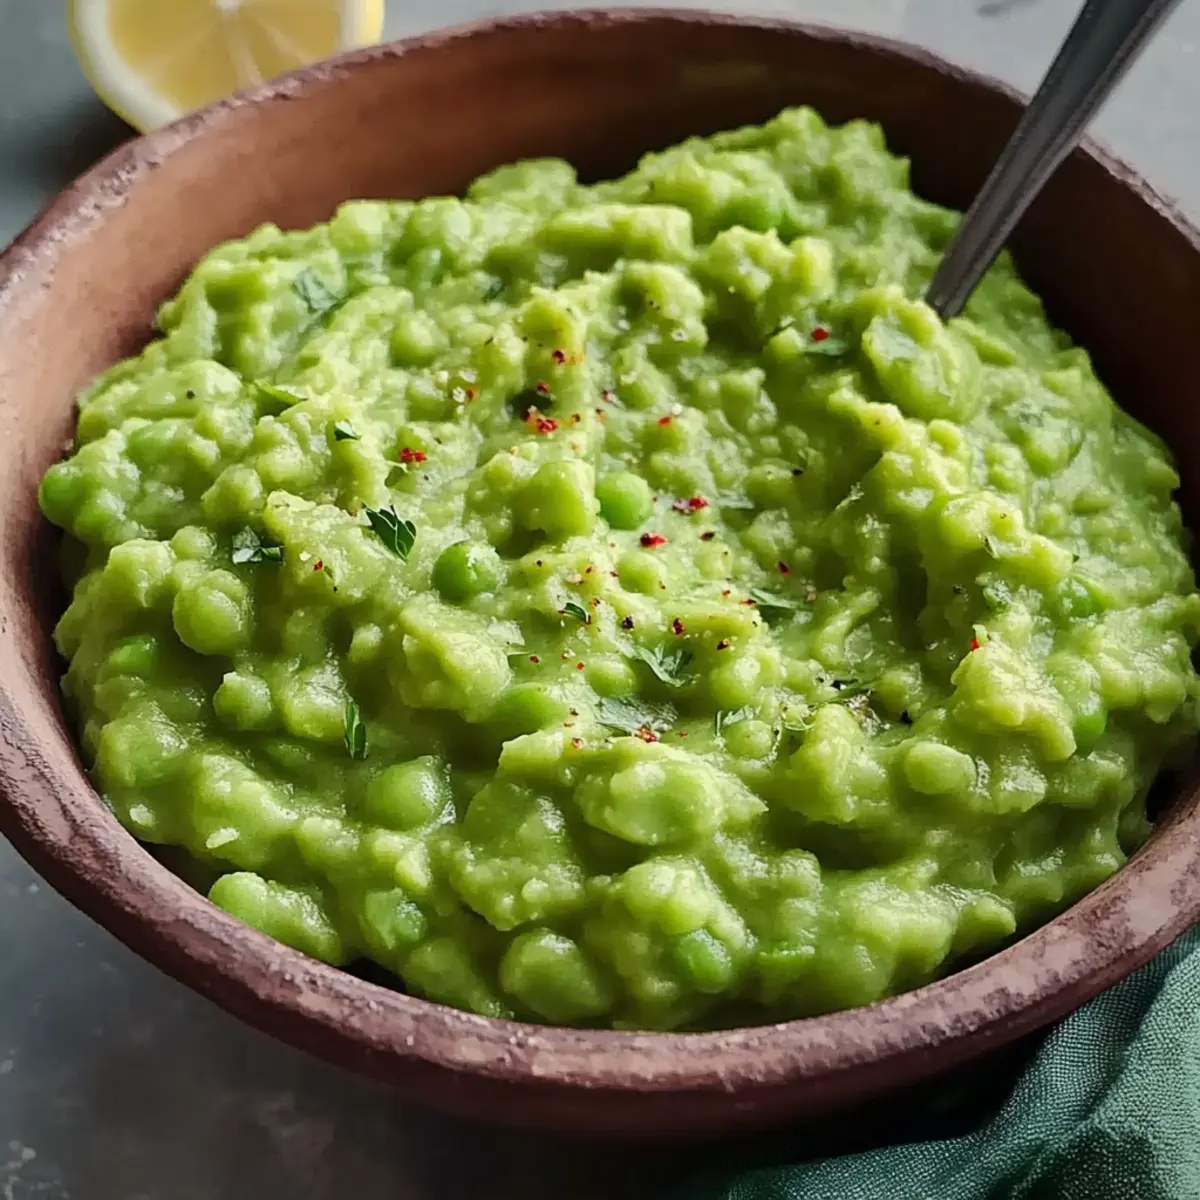
In the bustling rhythm of my kitchen, I often find myself vying for that perfect balance between simplicity and flavor. That’s where these creamy, dreamy Mushy Peas (with a Little Chaos) come in, offering a delightful burst of comfort food without the lengthy prep time. Ready in just a few minutes, this quick side is both versatile and easy to whip up, making it the ideal companion for any meal. The rich blend of heavy cream and butter brings a gorgeous creaminess, while the option to add a hint of garlic or a splash of lemon zest invites your culinary creativity to run wild. Finding enjoyment in cooking shouldn’t be complicated, and these peas demonstrate just that—delivering satisfaction with every scoop. Curious about how to elevate this classic dish to your next culinary adventure?
How can mushy peas transform your meals?
Quick Preparation: This recipe takes mere minutes, perfect for busy weekdays or unexpected guests.
Culinary Flexibility: With options to add garlic, lemon zest, or even cheese, you can customize your mushy peas to suit any occasion or palate.
Rich, Creamy Texture: The combination of heavy cream and butter gives these peas a luxurious mouthfeel that elevates any dish.
Healthy Boost: Packed with vitamins and fiber, these peas are a guilt-free indulgence that pairs beautifully with roasted meats or vegetarian options.
Crowd-Pleasing Side: Whether it’s a cozy family dinner or a casual gathering, this dish is sure to impress your guests. For more tips on creating delicious sides, check out our guide on elevating simple vegetables.
Mushy Peas (with a Little Chaos) Ingredients
For the Peas
• Frozen Peas – The main ingredient, providing a sweet flavor; fresh peas can be used but require less boiling time.
• Heavy Cream – Adds a rich and creamy texture; substitute with coconut cream for a vegan option.
• Butter – Enhances the creaminess; for a dairy-free alternative, use vegan butter.
For Seasoning
• Salt – Essential for enhancing flavors; adjust according to your taste.
• Pepper – Provides a mild heat; feel free to use freshly cracked pepper for added depth.
Optional Add-Ins
• Lemon Zest – Brightens the dish and adds a refreshing hint; perfect for those who enjoy a citrusy twist.
• Garlic – Introduces a savory depth; sautéed garlic can bring a lovely aroma.
• Fresh Mint – Adds a refreshing, herbal note that pairs beautifully with peas.
• Chili Flakes/Hot Sauce – For heat lovers; a little spice goes a long way!
• Cooked Spinach/Kale/Mashed Potato – Makes the dish heartier, perfect for a filling side.
These creamy Mushy Peas (with a Little Chaos) are not only quick to prepare but can be customized to fit any meal or taste preference! Enjoy exploring these delightful variations.
Step‑by‑Step Instructions for Mushy Peas (with a Little Chaos)
Step 1: Boil the Peas
Begin by bringing a pot of salted water to a rolling boil over medium-high heat. Once boiling, add 280g of frozen peas and cook them for about 3 minutes until they are tender and bright green. Keep an eye on the pot to avoid overflowing, and remove them from heat once the peas are soft but not mushy.
Step 2: Drain and Return
Carefully drain the peas using a colander, allowing the excess water to escape. Return the drained peas to the same pot, as this will help them retain some heat. The peas should look vibrant and fresh, setting the stage for your creamy Mushy Peas (with a Little Chaos).
Step 3: Add Cream and Butter
To the warm peas, add 60ml of heavy cream and 14g of butter. Stir gently to incorporate them, allowing the butter to melt into the mixture. The combination of these ingredients will create a luxurious creaminess that enhances the overall flavor and texture of the dish.
Step 4: Blend with Care
Using a hand blender, blend the pea mixture until you reach your desired consistency. Blend for about 30 seconds, ensuring you stop before it becomes completely smooth; you want to keep some texture for that rustic feel. The peas should appear creamy, yet retain tiny specks, showcasing their beautiful green color.
Step 5: Season to Taste
Taste your creamy Mushy Peas and season with additional salt, pepper, or a sprinkle of lemon zest to elevate the flavor, if desired. Stir everything together, ensuring a balanced taste that complements your meal. This step is essential, as it allows you to customize the dish to your personal preference.
Step 6: Serve and Enjoy
Serve your Mushy Peas (with a Little Chaos) immediately while they are warm, as the vibrant color and creamy texture are at their best. They make a delightful side for a variety of main courses or even as a topping for baked potatoes. If you’ve prepared them in advance, gently reheat on the stove before serving.
How to Store and Freeze Mushy Peas
Fridge: Store leftover mushy peas in an airtight container in the refrigerator for up to 3 days. Reheat gently on the stove with a splash of cream to restore creaminess.
Freezer: It’s not recommended to freeze mushy peas due to potential loss of texture and flavor, which can make them watery upon thawing.
Make-Ahead: If making in advance, prepare the mushy peas, cool them, and refrigerate. They can be easily reheated before serving to maintain their delightful consistency.
Serving Tips: For optimal taste, enjoy your mushy peas fresh; they shine best when served immediately after preparation!
Expert Tips for Mushy Peas (with a Little Chaos)
- Boiling Technique: Monitor the peas closely while boiling to prevent overflow, ensuring a tender yet vibrant texture.
- Creamy Consistency: Adjust the amount of heavy cream and butter to achieve your preferred level of creaminess without overpowering the peas.
- Batch Cooking: Avoid freezing mushy peas; their texture and flavor are best enjoyed fresh or reheated shortly before serving.
- Blending Caution: Blend just enough to maintain some texture; a few small chunks offer a delightful rustic feel enhancing the creamy experience.
Mushy Peas (with a Little Chaos) Variations
Feel free to play around with these mushy peas and transform them into something uniquely yours—each twist invites a new flavor adventure!
-
Fresh Peas: Swap frozen peas for fresh ones; just remember they’ll need less boiling time, making for an even sweeter bite.
-
Cheesy Delight: Incorporate grated Parmesan or cheddar for a cheesy twist that lends a savory depth—just imagine that creamy, cheesy goodness melting into the peas!
-
Vegan Option: Replace heavy cream with coconut cream for a vegan-friendly take that still delivers luscious creaminess.
-
Garlic Infusion: Sauté some garlic until golden before mixing it with the peas for a rich, aromatic depth that will elevate every spoonful.
-
Herbaceous Touch: Try adding fresh chopped basil or mint to bring a refreshing herbaceous note that pairs beautifully with the peas’ sweetness.
-
Spicy Kick: Add a pinch of chili flakes or a dash of hot sauce for those who crave a little heat—spice things up and enjoy the warmth it brings!
-
Heartier Version: Mix in some cooked spinach or kale to make this dish even heartier. It’s a delicious way to sneak in more nutrients.
For additional ideas to enhance your side dishes, check out our guide on elevating simple vegetables or discover how to create flavorful dairy-free options with vegan substitutes.
What to Serve with Mushy Peas (with a Little Chaos)
Elevate your meal with these delightful pairings that complement the creamy goodness of your mushy peas.
-
Buttery Mashed Potatoes: Creamy and fluffy, they create a perfect texture contrast, soaking up all the flavors from the peas.
-
Grilled Chicken: Juicy and tender, this protein adds heartiness to your plate, balancing the lightness of the peas beautifully.
-
Roasted Salmon: The rich flavors of salmon, enhanced with herbs, harmonize wonderfully with the freshness of mushy peas.
-
Savory Meat Pies: The flaky crust and delicious filling make for a cozy meal where the sweetness of peas cuts through the richness.
-
Fresh Garden Salad: Crisp and bright, a salad with mixed greens and a zesty dressing offers a refreshing counterpoint to the creamy dish.
-
Garlic Bread: Crunchy and flavorful, it invites you to scoop up those creamy peas, making every bite irresistibly delightful.
-
Chilled White Wine: A glass of chilled Sauvignon Blanc or Chardonnay refreshes the palate while enhancing the meal’s experience.
-
Warm Apple Crisp: For dessert, the sweetness of baked apples and crunchy topping create a lovely finish, making it a truly comforting meal.
Make Ahead Options
These creamy Mushy Peas (with a Little Chaos) are perfect for busy weeknights, allowing you to save time while still enjoying a delicious side dish. You can prep the peas up to 24 hours in advance; just cook and blend them, then refrigerate in an airtight container. To maintain their vibrant color and creamy texture, avoid over-blending, ensuring you keep a bit of that rustic finish. When it’s time to enjoy, simply reheat gently on the stove and add any desired seasonings, such as additional salt, pepper, or a squeeze of lemon zest before serving. This way, you’ll have a flavorful dish ready without any last-minute fuss!
Mushy Peas (with a Little Chaos) Recipe FAQs
How do I select the best frozen peas for this recipe?
When choosing frozen peas, look for bags that specify “sweet green peas” or “baby peas.” Higher-quality brands will usually have vibrant green color and minimal ice crystals inside the bag, indicating freshness. Avoid packages with visible freezer burn or dark spots, as they may be older and lacking in flavor.
How should I store leftover mushy peas, and how long will they last?
Absolutely! Leftover mushy peas should be stored in an airtight container in the refrigerator for up to 3 days. Make sure they are completely cool before sealing to prevent condensation. When you’re ready to enjoy them again, just reheat gently on the stove, adding a splash of cream or water to restore their creamy texture.
Can I freeze mushy peas for later use?
It’s not advisable to freeze mushy peas due to potential loss of texture and flavor. When thawed, they can become watery and grainy, which compromises the dish’s appeal. If you must freeze them, spoon the cooled mushy peas into airtight freezer bags, removing as much air as possible. Keep for up to 2 months, but you’ll want to use them in soups or dips rather than as a standalone side.
What should I do if the peas become too watery or lose their texture during cooking?
If your mushy peas turn watery, don’t fret! You can salvage them by cooking them over low heat in a saucepan to reduce the moisture. If you’ve blended them too much or they feel too smooth, simply stir in some fresh peas that have been lightly steamed to add back some texture. Remember, the key is to blend just enough to maintain that delightful rustic feel!
Are there any dietary considerations for this recipe, especially for allergies?
For those with dairy allergies, it’s easy to make this dish vegan! Simply substitute heavy cream with coconut cream or a plant-based alternative and replace the butter with vegan butter. If you’re preparing your mushy peas for kids or pets, always ensure that no added ingredients such as salt or garlic are used, as those can be harmful. Always check the labels on any substitutes you use to avoid allergens.
What variations can I try for different dietary preferences?
The more the merrier! You can easily customize these mushy peas to fit various dietary preferences. For instance, if you’re looking for a cheesy version, add grated vegan cheese or nutritional yeast for a nutty, cheesy flavor. If you’re interested in a protein boost, consider mixing in some cooked and mashed chickpeas. Fresh herbs or spices can also enhance the dish, inviting even more flavor into this comforting side.
Creamy Mushy Peas with a Little Chaos for Easy Comfort
Ingredients
Equipment
Method
- Begin by bringing a pot of salted water to a rolling boil over medium-high heat. Once boiling, add the frozen peas and cook for about 3 minutes.
- Carefully drain the peas using a colander and return to the same pot.
- To the warm peas, add the heavy cream and butter, stirring gently to incorporate.
- Using a hand blender, blend the pea mixture until you reach your desired consistency, maintaining some texture.
- Taste and season with additional salt, pepper, or a sprinkle of lemon zest as desired.
- Serve immediately while warm as a delightful side for various main courses.
Leave a Reply