
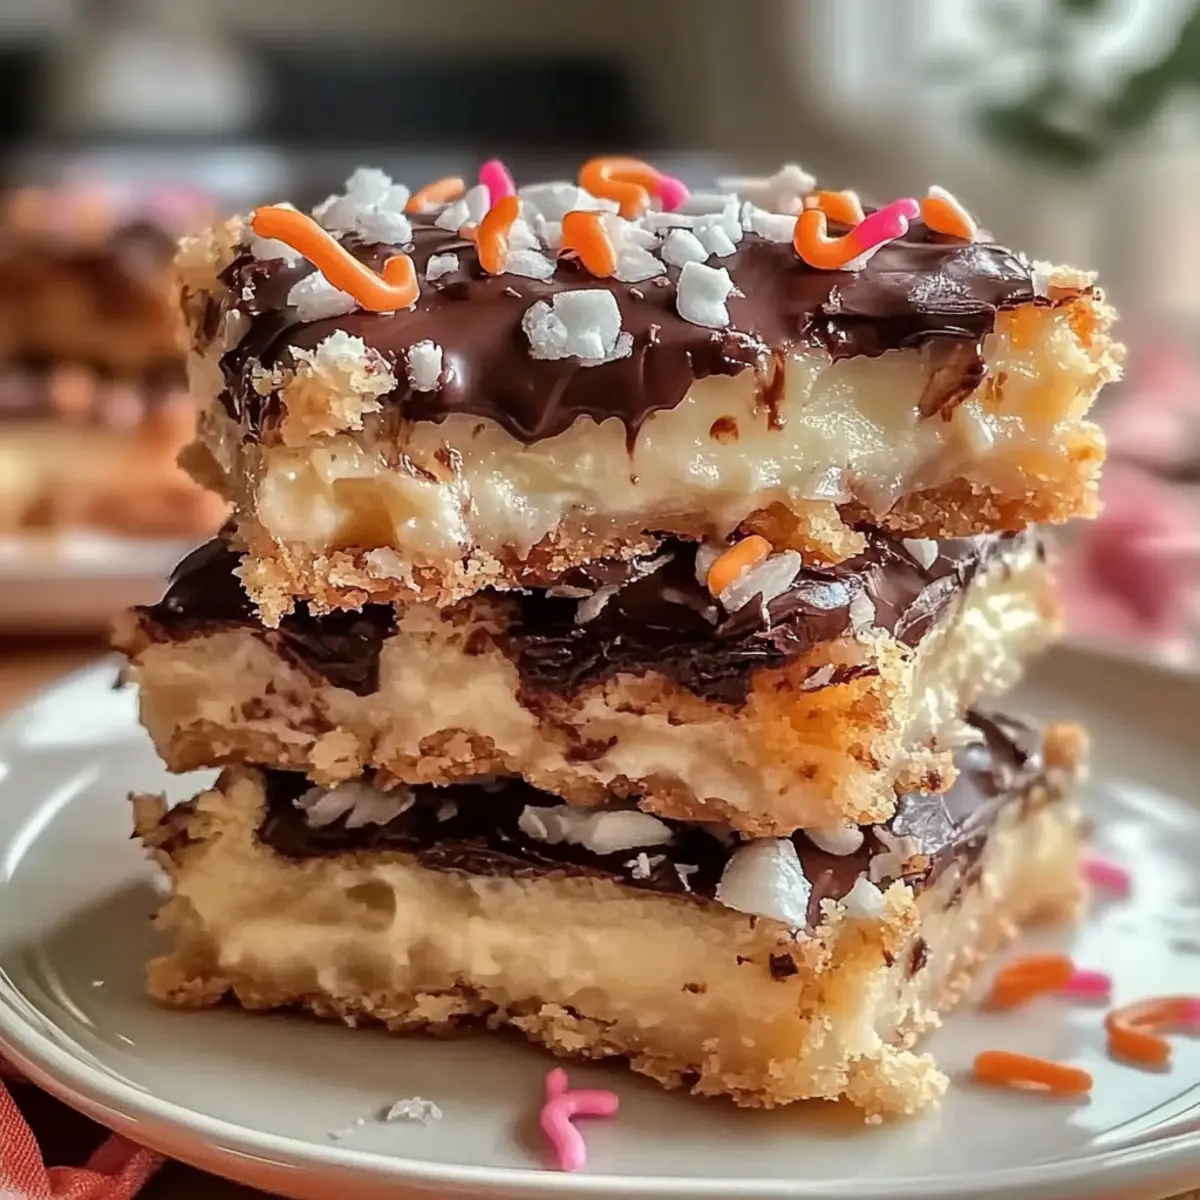
As I stood gazing at a pile of colorful dessert bars, the Enchanted Magic Cookie Bars immediately caught my eye. They’re a delightful fusion of a buttery shortbread crust and a luscious vanilla custard, topped off with a shiny chocolate drizzle that feels like magic in every bite. The best part? This recipe is not only incredibly easy to whip up, but it also offers make-ahead convenience—perfect for those busy weekends when you want a sweet indulgence without the fuss. Whether you’re planning a casual brunch or an elegant gathering, these bars are sure to impress both kids and adults alike. Intrigued about how to create these whimsical treats? Let’s dive into the recipe and unveil the secrets to their enchanting charm!
Why Are These Cookie Bars So Special?
Versatile Variations: You can easily customize Enchanted Magic Cookie Bars by swapping ingredients, like using a gluten-free flour blend or plant-based cream cheese for a vegan option.
Quick and Easy: This recipe requires minimal effort, making it perfect for home cooks looking to create delicious desserts without extensive preparation.
Rich, Layered Flavors: The combination of buttery crust, creamy custard, and glossy chocolate delivers a flavor experience that’s simply irresistible.
Impressively Elegant: These bars are visually stunning, making them a great choice for potlucks and gatherings, as they look just as good as they taste.
Make-Ahead Friendliness: You can prepare these bars in advance, allowing you to serve a delightful treat without the last-minute stress.
For other easy home-made delights, be sure to check out my Ranch Beef Corn or consider baking Shortbread Cookies Perfectly for your next gathering!
Enchanted Magic Cookie Bars Ingredients
For the Crust
- All-purpose flour – Provides structure for the crust; use a gluten-free blend for a gluten-free option.
- Granulated sugar – Adds sweetness to the crust and custard.
- Salt – Enhances flavor and balances sweetness.
- Unsalted butter (melted) – Binds crust ingredients for a tender base; ensure butter is at room temperature for easy mixing.
For the Custard Layer
- Cream cheese (softened) – Creates a rich and creamy custard layer; substitute with plant-based cream cheese for a vegan option.
- Powdered sugar – Sweetens the custard, creating a fluffy texture.
- Large eggs – Acts as a binder for the custard, helping it to set.
- Pure vanilla extract – Provides aromatic flavor in both the custard and the bars.
- Heavy cream – Adds richness to the custard layer; coconut cream can be used for a dairy-free option.
For the Chocolate Glaze
- Dark chocolate chips (70% cacao) – For a gorgeous rich chocolate glaze atop the bars; white chocolate is an excellent substitution for a sweeter glaze.
- Unsalted butter (for glaze) – Melts to combine with chocolate for a smooth drizzle.
- Light corn syrup (optional) – Enhances the shine of the chocolate glaze.
These Enchanted Magic Cookie Bars are as delightful to create as they are to eat! Enjoy every step of the process and the magic of sharing them with others.
Step‑by‑Step Instructions for Enchanted Magic Cookie Bars
Step 1: Prepare the Crust
In a medium bowl, combine all-purpose flour, granulated sugar, and salt. Drizzle in the melted unsalted butter, mixing until crumbly texture forms. Press this mixture evenly into the bottom of a greased 9×13-inch pan to create a ¼-inch thick layer. Bake the crust in a preheated oven at 350°F for 12-15 minutes, or until it turns lightly golden around the edges.
Step 2: Make the Custard
While the crust is baking, prepare the custard layer. In a large mixing bowl, beat the softened cream cheese until smooth and creamy. Gradually add in the powdered sugar, mixing until fully combined. Next, incorporate the large eggs, pure vanilla extract, and heavy cream, blending until the mixture is silky and well combined. Pour this creamy custard over the baked crust, ensuring an even distribution.
Step 3: Bake the Cookie Bars
Carefully place the pan back in the oven and bake the Enchanted Magic Cookie Bars for an additional 25-30 minutes, or until the custard is set and no longer jiggles in the center. The edges should begin to puff slightly and turn a light golden color. Once baked, remove the pan from the oven and let it cool at room temperature.
Step 4: Chill the Bars
After the bars have cooled, place them in the refrigerator for at least 2 hours to chill completely. Chilling helps to firm up the custard, making it easier to cut smoother squares later. While the bars chill, you can prepare the chocolate glaze for that final touch of indulgence.
Step 5: Prepare the Chocolate Glaze
In a microwave-safe bowl, combine dark chocolate chips and unsalted butter for the glaze. Microwave in 30-second intervals, stirring in between until the mixture is completely melted and smooth. If desired, add light corn syrup to enhance the shine. Remove the chilled bars from the refrigerator and drizzle the warm chocolate glaze over the top, making sure to cover them nicely.
Step 6: Set and Serve
Allow the glaze to set at room temperature for about 15-20 minutes, or refrigerate for 10 minutes for a quicker set. Once the chocolate is firm, use a warm knife to cut the Enchanted Magic Cookie Bars into squares or rectangles. Serve chilled, and revel in the delightful combination of flavors and textures that will impress everyone!
Enchanted Magic Cookie Bars Variations
Feel free to add your unique twist to the Enchanted Magic Cookie Bars with these delightful variations that will spark your creativity!
-
Gluten-Free: Substitute all-purpose flour with a 1-to-1 gluten-free flour blend to accommodate gluten sensitivities while maintaining that magic texture.
-
Vegan Delight: Use plant-based cream cheese and coconut cream in place of cream cheese and heavy cream for a delicious vegan twist that doesn’t compromise flavor.
-
Nutty Flavors: Stir in roasted chopped nuts like pecans or walnuts into the crust for extra crunch and a delightful nutty flavor that complements the creamy custard.
-
Choco-White Twist: Swap dark chocolate for white chocolate for a sweeter glaze that adds a lovely contrast to the rich custard beneath. Ideal for those who prefer a creamier chocolate taste!
-
Berry Bliss: Top the cooled bars with fresh berries like raspberries or strawberries for a beautiful burst of color and contrasting tartness that plays delightfully against the sweetness.
-
Espresso Infusion: Mix in a teaspoon of espresso powder into the custard for a depth of flavor that coffee lovers will adore. This adds a sophisticated touch to every bite!
-
Coconut Dreams: Add shredded toasted coconut to the crust for a tropical flair, giving your bars an extra layer of sweetness and texture, perfect for summer gatherings.
Feel inspired? Let these variations guide you to create Enchanted Magic Cookie Bars that reflect your taste! And for more sweet moments, you might enjoy making Shortbread Cookies Perfectly or exploring my festive Christmas Cookies Festive for those holiday celebrations!
Make Ahead Options
These Enchanted Magic Cookie Bars are perfect for busy cooks looking to save time without sacrificing flavor! You can prepare the crust and custard layer up to 24 hours in advance. To do this, bake the crust and allow it to cool completely before swirling on the custard layer. Once assembled, refrigerate the bars, covered tightly to maintain their freshness. When you’re ready to serve, drizzle the chocolate glaze before slicing into squares. This prep method ensures that the bars remain just as delicious and magical, allowing you to impress your guests with minimal last-minute effort!
How to Store and Freeze Enchanted Magic Cookie Bars
-
Room Temperature: These cookie bars can be kept at room temperature for up to 2 days in an airtight container, ensuring they retain their delightful texture.
-
Fridge: Store the Enchanted Magic Cookie Bars in the fridge for up to 4 days. This helps keep the custard layer fresh and creamy; simply cover them tightly.
-
Freezer: For longer storage, freeze the bars for up to 2 months. Wrap them in plastic wrap and place in an airtight container to prevent freezer burn.
-
Reheating: When ready to enjoy, warm the frozen bars in the oven at 350°F for 10 minutes or microwave for 20-30 seconds until just warm for optimal texture.
What to Serve with Enchanted Magic Cookie Bars
Looking to create a magical meal experience? Let’s explore delightful pairings that will elevate your Enchanted Magic Cookie Bars!
-
Whipped Cream: A light dollop of homemade whipped cream adds a heavenly texture that complements the creamy custard beautifully.
-
Vanilla Ice Cream: Serve alongside a scoop of creamy vanilla ice cream for a classic dessert duo; the cold ice cream contrasts perfectly with the warm bars.
-
Fresh Berries: Bright strawberries or tart raspberries add a fresh burst of flavor, balancing the sweetness of the bars and enhancing their presentation.
-
Chocolate Sauce: Drizzling extra chocolate sauce on top can take indulgence to the next level, perfect for serious chocolate lovers looking for extra richness.
-
Coffee or Espresso: A cup of rich coffee or espresso makes for a wonderful pairing, cutting through the sweetness while enhancing the flavor of the chocolate.
-
Mint Chocolate Tea: A soothing cup of mint chocolate tea can refresh the palate while providing a light herbal touch that beautifully complements the dessert.
-
Caramel Drizzle: For those who crave extra sweetness, a drizzle of caramel sauce over each serving adds a luscious, buttery contrast to the bars.
These pairings not only enhance the experience of the Enchanted Magic Cookie Bars but will surely impress family and friends at your next gathering!
Expert Tips for Enchanted Magic Cookie Bars
-
Use Room Temperature Butter: Ensure your butter is at room temperature for seamless mixing, resulting in a tender and well-combined crust.
-
Avoid Over-Mixing Custard: Mix your custard gently to maintain its silky texture. Over-mixing can lead to cracks on the surface when baked.
-
Blind-Bake the Crust: Don’t skip this essential step! Blind-baking prevents a soggy base, ensuring your Enchanted Magic Cookie Bars have a perfectly crisp bottom.
-
Chill Before Glazing: Allow the bars to chill adequately before applying the chocolate glaze for better adherence and a professional finish.
-
Warm Knife for Cutting: Use a warm knife when cutting the bars to achieve clean, beautiful slices, making presentation effortless.
Enchanted Magic Cookie Bars Recipe FAQs
How do I choose the best ingredients for Enchanted Magic Cookie Bars?
Absolutely! For the crust, use all-purpose flour for the best structure; however, a 1-to-1 gluten-free blend works beautifully if you’re looking for a gluten-free option. When selecting butter, make sure it’s unsalted and at room temperature to help it mix evenly. For the custard layer, opt for softened cream cheese and heavy cream—fresh ingredients will yield the creamiest texture. If you’re going vegan, look for quality plant-based versions of cream cheese and heavy cream for the same luscious results.
How should I store my Enchanted Magic Cookie Bars?
Very! To keep these bars fresh, store them in an airtight container in the refrigerator for up to 4 days. Simply cover them tightly to maintain their creamy texture. If you want to enjoy them longer, they can be frozen for up to 2 months. Just wrap them in plastic wrap and place them in an airtight container to prevent freezer burn.
Can I freeze Enchanted Magic Cookie Bars, and if so, how?
Of course! Freezing is a great way to enjoy these delectable bars later. To freeze, wrap each individual bar tightly in plastic wrap or foil, ensuring they are well-protected from air. Then, place them in a freezer-safe airtight container. They’ll maintain their deliciousness for up to 2 months! When you’re ready to enjoy, just thaw them in the fridge overnight or warm them in the oven at 350°F for about 10 minutes.
What should I do if my custard layer cracks while baking?
Don’t fret! If your custard layer develops cracks, it could be due to over-mixing. Always mix gently until just combined. If you notice cracks after baking, consider dusting the top with powdered sugar or drizzling it with extra chocolate glaze to give your bars a beautiful finish!
Are there any dietary considerations I should keep in mind for Enchanted Magic Cookie Bars?
Absolutely! If you have allergies or dietary restrictions, there are easy alternatives to customize the recipe. For a gluten-free option, use a gluten-free flour blend in place of all-purpose flour. For vegan adaptations, swap the cream cheese and heavy cream with plant-based alternatives. Always check the labels on any chocolate used, as some brands may contain allergens like nuts or dairy. Enjoy experimenting with variations that fit your needs!
Can I add other ingredients or customize these bars?
The more, the merrier! You can customize your Enchanted Magic Cookie Bars by swapping dark chocolate with white chocolate for a sweeter glaze, or by adding nuts, shredded coconut, or even a splash of espresso powder to the custard for that extra kick. Fresh berries can also be a delightful addition on top before serving, adding a splash of color and a hint of tartness!
Enchanting Magic Cookie Bars for Irresistible Sweet Bliss
Ingredients
Equipment
Method
- Prepare the Crust: In a medium bowl, combine all-purpose flour, granulated sugar, and salt. Drizzle in the melted unsalted butter, mixing until crumbly texture forms. Press this mixture evenly into the bottom of a greased pan to create a ¼-inch thick layer. Bake in a preheated oven at 350°F for 12-15 minutes until lightly golden.
- Make the Custard: In a large bowl, beat softened cream cheese until smooth. Gradually add powdered sugar, and mix until combined. Incorporate large eggs, vanilla extract, and heavy cream, blending until silky. Pour over baked crust evenly.
- Bake the Cookie Bars: Bake for an additional 25-30 minutes or until the custard is set and no longer jiggles.
- Chill the Bars: Cool at room temperature then refrigerate for at least 2 hours.
- Prepare the Chocolate Glaze: In a microwave-safe bowl, melt chocolate chips with butter in 30-second intervals, stirring until smooth. Add corn syrup if desired. Drizzle over chilled bars.
- Set and Serve: Allow glaze to set at room temperature for 15-20 minutes or refrigerate for 10 minutes before cutting into squares.
Leave a Reply