
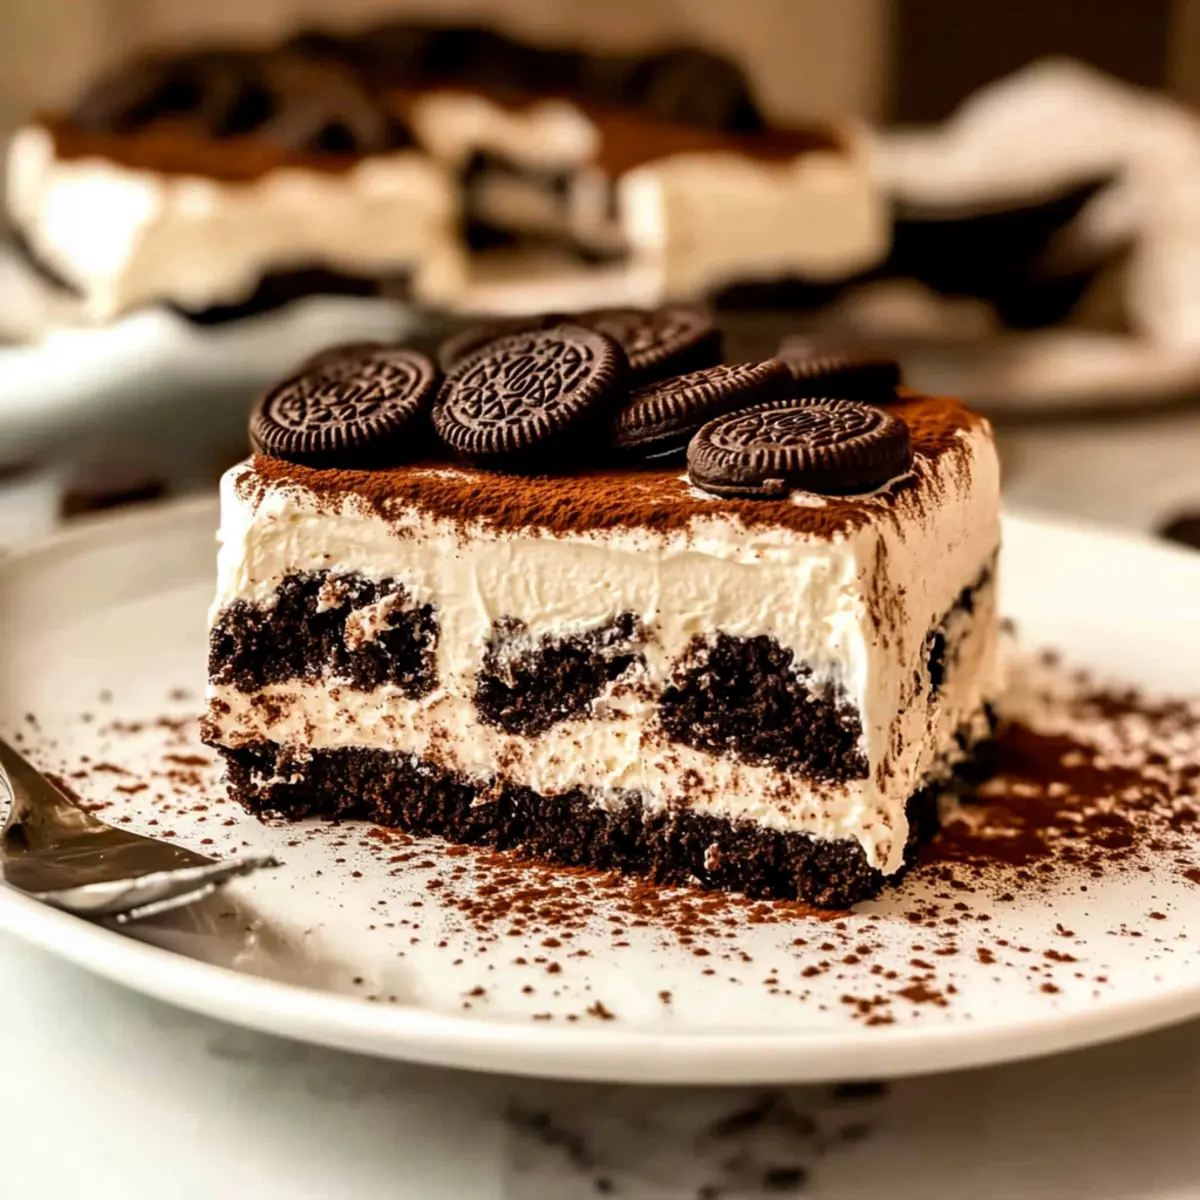
Imagine stepping into a cozy café in Italy, the rich aroma of coffee swirling in the air, as you take your first bite of a dessert that feels like a warm hug. That’s the essence of my Oreo Tiramisu, a no-bake masterpiece that redefines the classic Italian favorite with a delightful twist. This scrumptious dessert features espresso-soaked Oreos layered with velvety mascarpone cream, offering an irresistible cookies-and-cream experience. Whether you’re celebrating a birthday, a holiday gathering, or simply indulging in a sweet craving, this Oreo Tiramisu is not only a crowd-pleaser but also a breeze to whip up. With minimal effort, you can create a decadent dessert that impresses and delights. So, are you ready to elevate your dessert game and bring a taste of Italy home? Let’s dive into this creamy delight!
Why is Oreo Tiramisu a Must-Try?
Decadent Flavor: This dessert beautifully blends the classic flavors of tiramisu with the irresistible crunch of Oreos, creating a unique take on a beloved favorite.
No-Bake Convenience: Perfect for busy home chefs, this no-bake recipe requires minimal time and skills while delivering maximum flavor!
Versatile Variations: Experiment with different Oreo flavors to suit your taste or make it gluten-free with a simple swap.
Crowd-Pleasing Delight: Ideal for gatherings, this dessert is sure to impress guests and spark delightful conversations about your culinary skills.
For another delightful twist on a classic, you might enjoy my Italian Tiramisu Bake. It’s a cozy and festive alternative to serve at any occasion!
Oreo Tiramisu Ingredients
For the Cream Layer
- Heavy Cream – Must be cold to whip properly for a light and airy texture.
- Granulated Sugar – Sweetens the mascarpone cream without overpowering its delicate flavor.
- Vanilla Extract – Enhances the overall flavor; a must for depth and richness.
- Mascarpone Cheese – The star of the dessert; let it sit at room temperature for easy mixing. Substitute with cream cheese if needed for a similar creamy texture.
For the Base
- Oreo Cookies – Replace traditional ladyfingers; these bring that delightful cookies-and-cream flavor.
For Dipping
- Espresso – Provides a rich depth; can also use strong instant coffee mixed with hot water if you’re in a pinch.
For Dusting
- Cocoa Powder – Adds a touch of bitterness to balance sweetness; Dutch-process is preferable for a richer taste.
Enjoy making your delicious Oreo Tiramisu!
Step‑by‑Step Instructions for Oreo Tiramisu
Step 1: Prepare the Cream Mixture
In a mixing bowl, pour in 1 cup of cold heavy cream, ½ cup of granulated sugar, and 1 teaspoon of vanilla extract. Use an electric hand mixer to beat the mixture on medium speed until soft peaks form, about 2-3 minutes. You’ll know it’s ready when the cream holds its shape but is still smooth. This creamy base will elevate your Oreo Tiramisu!
Step 2: Combine with Mascarpone
Gently fold in 1 cup of room-temperature mascarpone cheese into the whipped cream mixture. Using a spatula, mix until it’s smooth and creamy, being careful not to overmix, which can deflate the whipped cream. The goal is a light and airy texture that will contrast beautifully with the soaked Oreos in your Oreo Tiramisu.
Step 3: Dip the Oreos
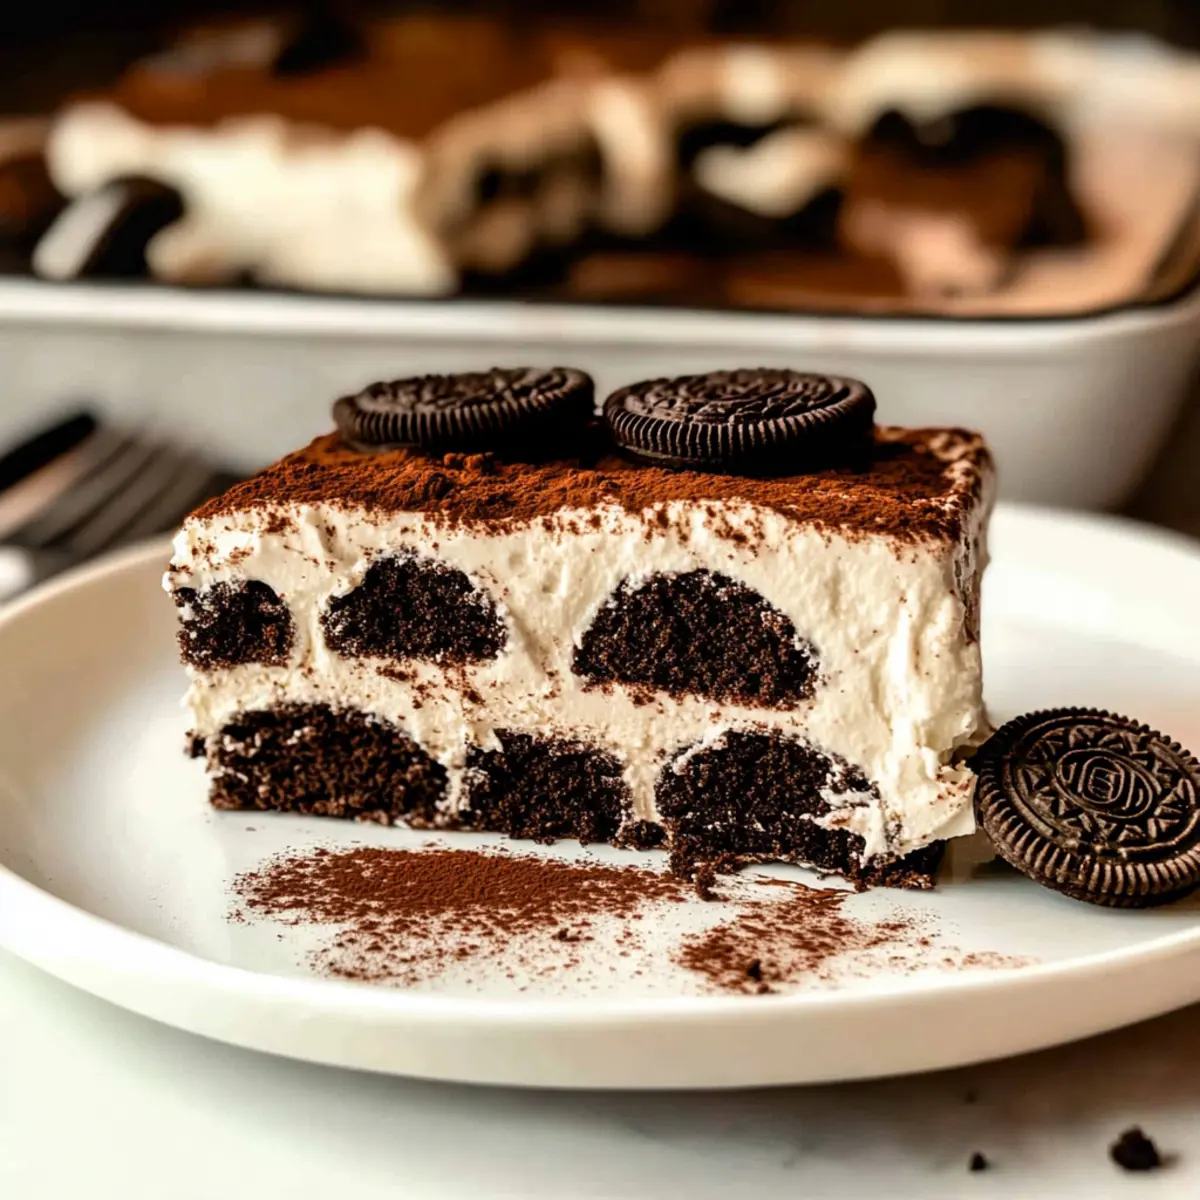
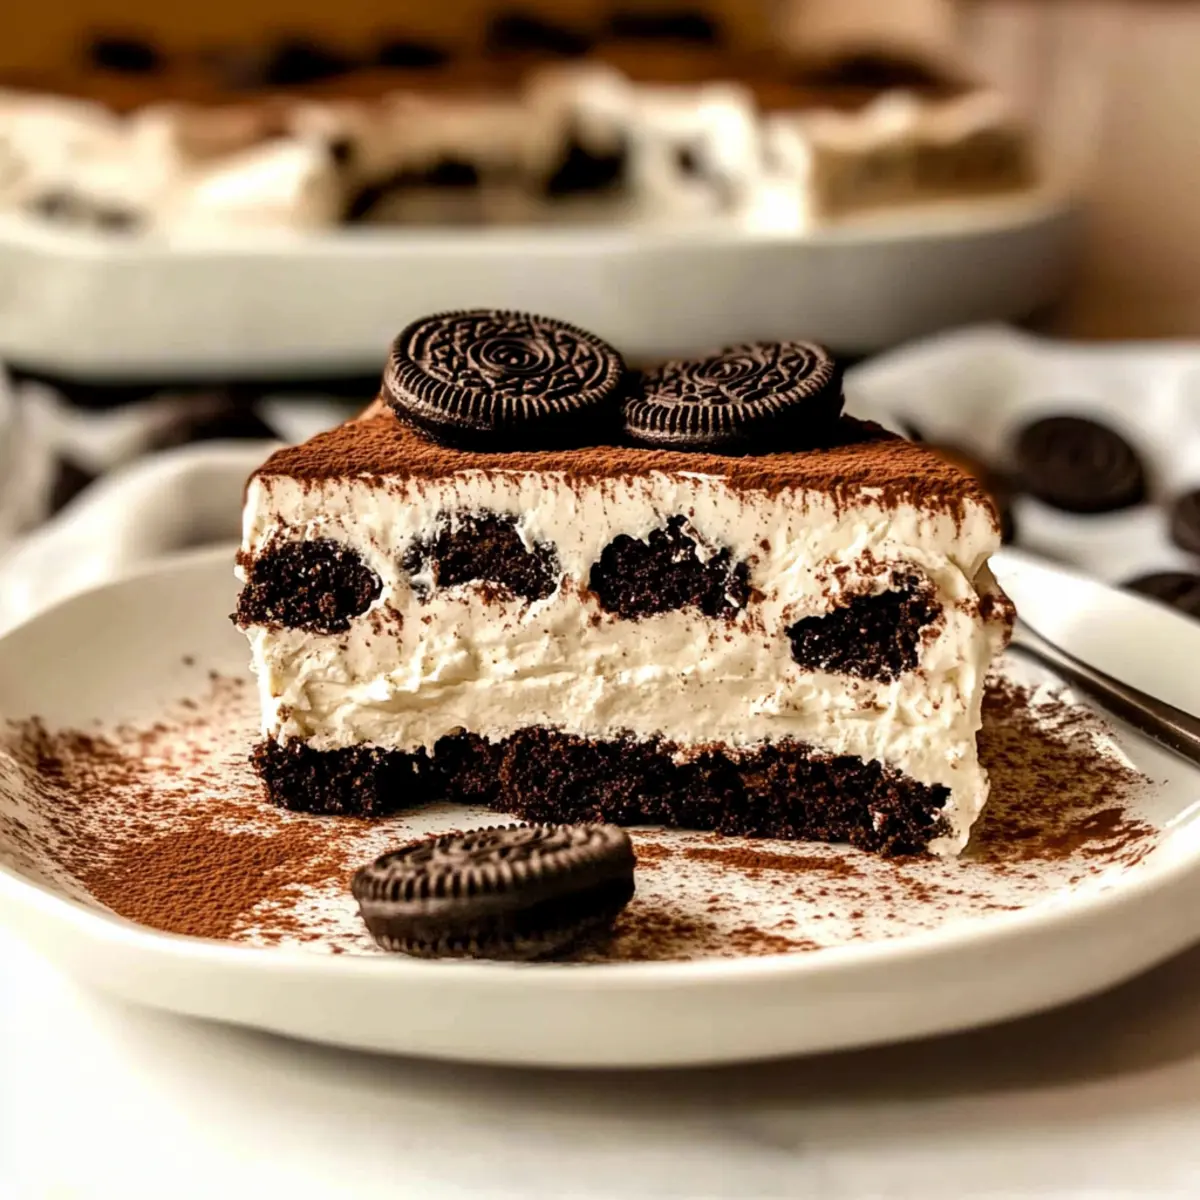
Quickly dip 12 Oreo cookies into 1 cup of prepared espresso for about 2-3 seconds. Ensure they’re just moistened but not soggy, as you need them to maintain their structure in your Oreo Tiramisu. Arrange half of the dipped Oreos in a single layer in a 13×9-inch dish, creating a solid base for your dessert.
Step 4: Layer the Cream
Spread half of the mascarpone cream mixture over the layer of soaked Oreos, using a spatula to smooth it out evenly. Ensure the cream mixture fills in the gaps between cookies without disturbing the layer too much. This rich layer complements the cookies perfectly, bringing the Oreo Tiramisu together beautifully.
Step 5: Repeat the Process
Repeat the dipping process with another 12 Oreos, layering them on top of the mascarpone cream. Once the second layer of cookies is in place, spread the remaining mascarpone mixture over the top, smoothing it evenly for a polished finish. This second layer gives a satisfying build-up to your dessert masterpiece.
Step 6: Chill and Set
Cover the Oreo Tiramisu with plastic wrap and refrigerate it for at least 4 hours, or preferably overnight. This chilling time allows the flavors to meld and the cream to set, giving it that perfect texture. When ready, the layers will come together delightfully, making every bite irresistible.
Step 7: Dust with Cocoa
Just before serving, unveil your Oreo Tiramisu and dust the top generously with cocoa powder using a fine-mesh sieve. This adds a beautiful visual contrast and deepens the chocolate flavor. Serve chilled for the best taste experience and watch as your guests indulge in this delightful dessert!

Expert Tips for Making Oreo Tiramisu
-
Room Temperature Mascarpone: Ensure mascarpone cheese is at room temperature for the best mixing. Cold cheese can create lumps in your creamy layer.
-
Quick Dips Only: Do not oversoak the Oreos! A quick 2-3 second dip in espresso keeps them structurally sound, preventing a mushy base for your Oreo Tiramisu.
-
Chill for Best Results: Refrigerate your dessert for at least 4 hours, ideally overnight. This resting period allows the flavors to meld beautifully.
-
Fresh Cocoa Dusting: Dust cocoa powder just before serving to keep it looking fresh and vibrant. This way, your Oreo Tiramisu maintains its appealing appearance!
-
Try Different Flavors: Don’t hesitate to experiment! Use flavored Oreos or add a hint of liqueur to the espresso for a unique twist on this classic dessert.
Make Ahead Options
These Oreo Tiramisu are perfect for anyone looking to save time during busy weeknights! You can prepare the entire dessert up to 24 hours in advance by following these instructions: First, complete all the layering steps of your Oreo Tiramisu, then cover the dish tightly with plastic wrap and refrigerate. This extended chilling time helps the flavors meld for a richer taste and ensures the cream sets beautifully. Just remember to dust with cocoa powder just before serving to maintain its fresh appearance. Enjoy the convenience of this delicious dessert ready to impress your guests with minimal effort!
Storage Tips for Oreo Tiramisu
Fridge: Keep your Oreo Tiramisu covered in the refrigerator for up to 4 days. This ensures it stays fresh and the flavors continue to meld beautifully.
Freezer: For longer storage, you can freeze the dessert without the cocoa powder for up to 2 months. Just cover it tightly to avoid freezer burn.
Defrosting: When ready to enjoy, move the frozen Oreo Tiramisu to the fridge to thaw overnight. Dust with cocoa powder just before serving for a lovely finish.
Serving Suggestions: This dessert is best served chilled. Allow it to set for at least 4 hours before serving to enjoy the full deliciousness of your Oreo Tiramisu!
Oreo Tiramisu: Customization Ideas
Feel free to let your creativity shine by putting your own twist on this delightful dessert!
- Gluten-Free: Substitute with gluten-free Oreo cookies to make this dessert accessible for everyone.
- Flavor Variations: Use different flavored Oreos, like mint or peanut butter, to create a unique flavor experience.
- Crunchy Topping: Add chopped Oreo pieces on top for an exciting crunch that contrasts with the creamy layers.
- Individual Servings: Layer in dessert cups for a beautiful presentation and easier serving at gatherings.
- Dairy-Free Option: Try coconut cream and dairy-free cream cheese for a vegan-friendly version that still offers a rich texture.
- Coffee Flavors: Introduce a splash of coffee liqueur to the espresso for an adults-only twist that enhances the dessert’s boldness.
- Fruity Touch: Incorporate layers of fresh berries, like raspberries or strawberries, to brighten up the flavors and add a pop of color.
- Syrup Drizzle: Drizzle a chocolate or caramel sauce on top before serving for an extra indulgent finish.
And if you’re eager to explore more inventive desserts, don’t miss out on my scrumptious Italian Tiramisu Bake! Each alternative serves to enhance your dessert while keeping that signature flavor of traditional tiramisu alive. Happy cooking!
What to Serve with Oreo Tiramisu
Elevate your dessert experience by pairing this creamy delight with delicious accompaniments that complement its rich flavors.
- Fresh Berries: A medley of raspberries and strawberries adds a tart contrast, balancing the sweetness of the tiramisu beautifully.
- Espresso Martini: This coffee-flavored cocktail echoes the espresso in the dessert, creating a sophisticated yet playful pairing.
- Chocolate Sauce: Drizzling warm chocolate sauce over each slice enhances the indulgence, making each bite a chocolate lover’s dream.
- Whipped Cream: A dollop of lightly sweetened whipped cream provides an airy texture, harmonizing with the creamy layers of the tiramisu.
- Mini Biscotti: Crunchy biscotti on the side offers a satisfying contrast and an extra touch of Italian flair to your dessert spread.
- Vanilla Ice Cream: A scoop of rich vanilla ice cream melts against the tiramisu, adding a cool creaminess that pairs perfectly with every decadent bite.
For an unforgettable touch, serve your Oreo Tiramisu with a fragrant cup of Italian espresso to round out the dining experience!
Oreo Tiramisu Recipe FAQs
What type of Oreos should I use for this recipe?
I recommend using classic Oreo cookies for the best flavor and texture, as they provide the perfect chocolatey base for the dessert. However, feel free to get creative! Different Oreo flavors, like mint or peanut butter, can add a fun twist to your Oreo Tiramisu.
How long can I store Oreo Tiramisu in the fridge?
You can keep your Oreo Tiramisu covered in the refrigerator for up to 4 days. This allows the flavors to meld beautifully while ensuring it remains fresh and delicious. Just remember to cover it tightly to maintain its texture and taste!
Can I freeze Oreo Tiramisu?
Absolutely! For longer storage, you can freeze your Oreo Tiramisu without the cocoa powder for up to 2 months. When ready to enjoy, simply cover it tightly and place it in the freezer. When it’s time to serve, move it to the fridge to thaw overnight, and dust with cocoa powder just before indulging for the best presentation.
What if my mascarpone cheese is too cold or lumpy?
If your mascarpone cheese is too cold, it can be difficult to mix smoothly, resulting in lumps. To avoid this, let it sit at room temperature for about 30 minutes before using. If you still find lumps while mixing, use a whisk or fork to break them up gently, ensuring a smooth and creamy consistency in your Oreo Tiramisu.
Are there any dietary restrictions I should keep in mind?
This Oreo Tiramisu is vegetarian-friendly, but it does contain dairy and sugar. If you’re looking for a gluten-free version, simply swap out the regular Oreo cookies for gluten-free Oreos. As always, check labels to ensure all ingredients meet your dietary needs.
How can I make my Oreo Tiramisu look more appealing for serving?
To elevate your presentation, consider layering the Oreo Tiramisu in individual dessert cups instead of a large dish. This not only makes serving easier but also adds a beautiful visual appeal. Additionally, you can sprinkle some crushed Oreos on top along with the cocoa powder for a delightful touch!
Oreo Tiramisu: Your New Favorite No-Bake Dessert Delight
Ingredients
Equipment
Method
- In a mixing bowl, pour in 1 cup of cold heavy cream, ½ cup of granulated sugar, and 1 teaspoon of vanilla extract. Beat on medium speed until soft peaks form, about 2-3 minutes.

- Gently fold in 1 cup of room-temperature mascarpone cheese into the whipped cream mixture until smooth and creamy.
- Quickly dip 12 Oreo cookies into 1 cup of prepared espresso for about 2-3 seconds and arrange half in a layer in a 13x9-inch dish.
- Spread half of the mascarpone cream mixture over the layer of soaked Oreos.
- Repeat the dipping process with another 12 Oreos and layer them on top of the mascarpone cream. Spread the remaining mascarpone over the top.
- Cover the Oreo Tiramisu with plastic wrap and refrigerate for at least 4 hours, or preferably overnight.
- Dust the top with cocoa powder just before serving.
Leave a Reply