
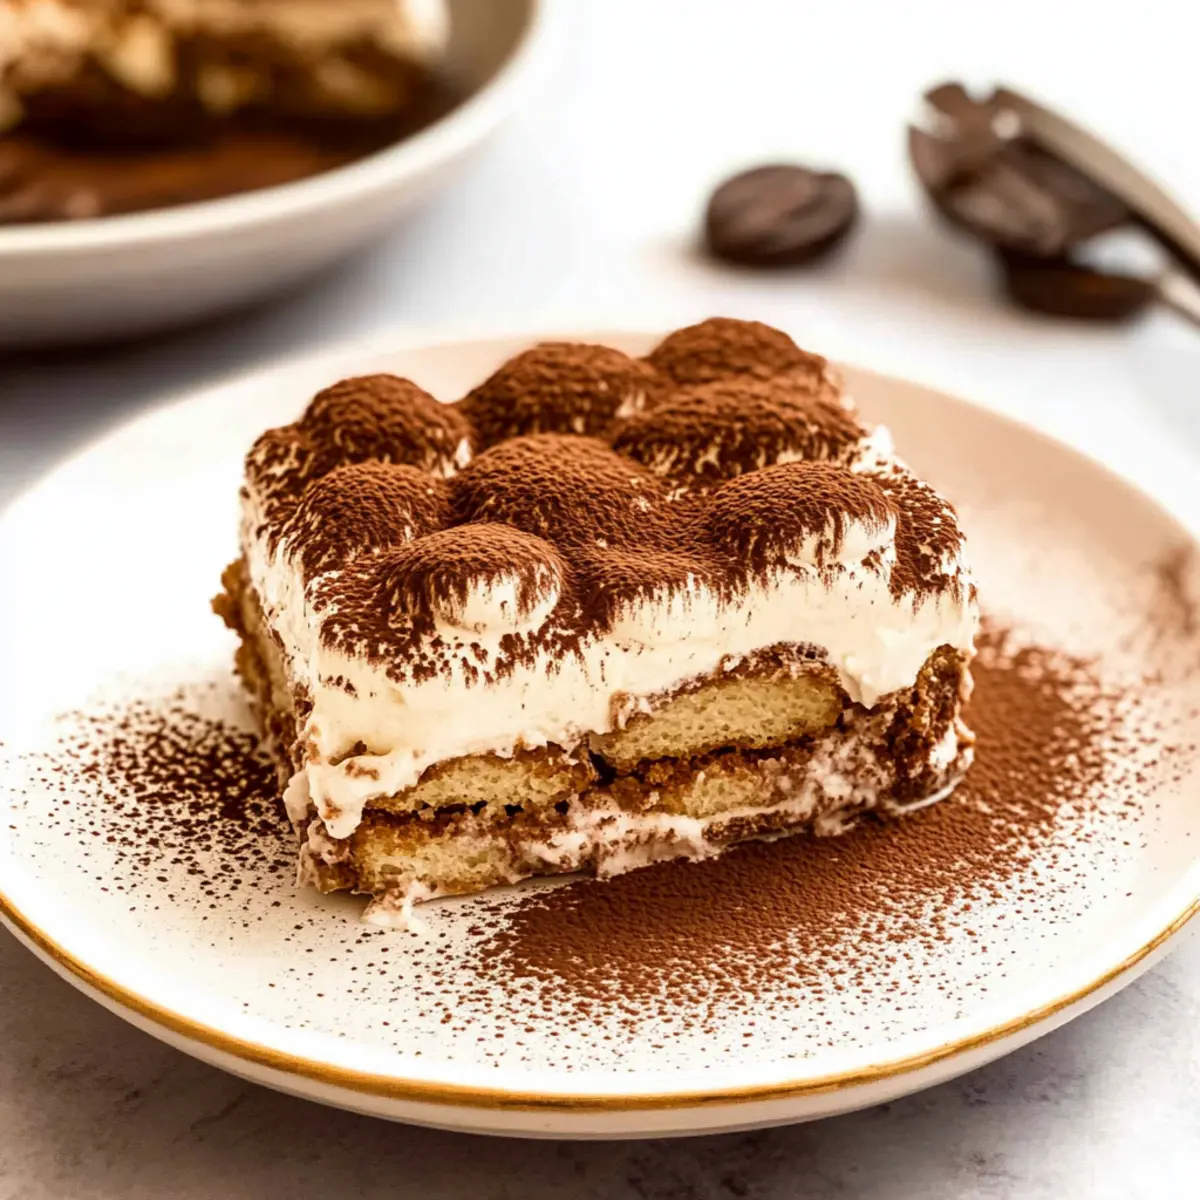
As I sank my spoon into the luscious layers of a classic Italian tiramisu, the rich aroma of espresso danced in the air, transporting me straight to a sun-drenched café in Italy. This no-bake delight features the perfect harmony of creamy mascarpone, silky ladyfingers, and a dusting of cocoa that makes each bite a little slice of heaven. Not only is making this authentic dessert a breeze—perfect for busy lives or spontaneous gatherings—but it also easily accommodates variations like gluten-free and alcohol-free options, ensuring everyone can enjoy it. Whether you’re a seasoned chef or just venturing into the world of homemade treats, this classic Italian tiramisu is bound to impress. Curious about how to craft this indulgent dessert that will leave your guests asking for seconds? Let’s dive into the recipe!
Why is Tiramisu a Must-Try Dessert?
Decadent Layers: Experience the richness of layering coffee-soaked ladyfingers with fluffy mascarpone cream, offering a texture that melts in your mouth.
Effortless Preparation: Enjoy the convenience of a no-bake recipe that requires minimal time and effort, making it perfect for busy weekdays or impromptu gatherings.
Versatile Options: From gluten-free to alcohol-free variations, this recipe adapts to suit everyone’s dietary preferences, allowing all guests to savor a classic treat.
Crowd-Pleaser: Tiramisu is a dessert that always wows at parties, reminiscent of celebratory Italian feasts. Its elegance and delightful flavors ensure it’s the star of any table.
Make-Ahead Magic: Prepare your tiramisu a day in advance to let the flavors meld beautifully, meaning less stress when hosting friends—just like with Grandmas Thanksgiving Stuffing for your holiday gatherings.
Treat yourself and your loved ones to this delightful Italian classic; you won’t regret it!
Classic Italian Tiramisu Ingredients
For the Cream Mixture
- Mascarpone Cheese – Provides a rich creamy texture and flavor. Make sure it’s at room temperature for easy mixing.
- Heavy Cream – Used for aeration and texture. Ensure it’s cold for optimal whipping.
- Granulated Sugar – Sweetens the mascarpone cream. Use exact measurements for balance.
- Vanilla Extract – Enhances flavor. Use vanilla bean extract for a stronger taste.
- Egg Yolks – Form the base of the mascarpone mixture. Carefully separate to ensure yolks are pure.
For the Ladyfingers
- Ladyfingers – Create the structure of the dessert by being soaked in coffee. Store-bought or homemade can be used; ensure they are dry.
- Espresso Coffee – Acts as the soak for the ladyfingers, imparting rich coffee flavor. Freshly brewed is preferred, or strong instant coffee mixed with hot water can substitute.
- Kahlua (optional) – Adds depth and richness. Use additional espresso for a non-alcoholic version.
For the Topping
- Dutch-process Cocoa Powder – Topping for flavor and aesthetic. Dust before serving to maintain appearance.
- Powdered Sugar – Used in optional Chantilly cream for decoration. Sift to prevent lumps.
Step‑by‑Step Instructions for Classic Italian Tiramisu
Step 1: Prepare the Egg Mixture
In a double boiler, combine the egg yolks, granulated sugar, and vanilla extract. Whisk continuously for about 4–5 minutes until the mixture becomes pale, thick, and doubles in volume. Once done, remove it from heat and let it cool completely. This creates a luscious base for your classic Italian tiramisu.
Step 2: Make the Mascarpone Cream
While the egg mixture cools, whip the cold heavy cream in a large mixing bowl until stiff peaks form. Gradually fold in the room temperature mascarpone cheese until smooth and combined. Finally, gently add the cooled egg mixture into the mascarpone and cream, ensuring a silky, luscious texture for your tiramisu layers.
Step 3: Assemble the Tiramisu
In a shallow dish, mix your freshly brewed espresso and Kahlua (if using). Quickly dip each ladyfinger in this coffee mixture for 1–2 seconds—you want them moist but not soggy. Arrange half of the soaked ladyfingers in a baking dish in a single layer, then spread half of the mascarpone cream over them, smoothing it out evenly.
Step 4: Layer More Ladyfingers
Repeat the process with another layer of dipped ladyfingers, similarly soaking them briefly in the coffee mixture. Once layered, dollop the remaining mascarpone mixture over the ladyfingers, spreading it smoothly to seal in the flavors. You should now have beautiful alternating layers of coffee-infused ladyfingers and creamy mascarpone.
Step 5: Chill the Tiramisu
Cover the assembled tiramisu with plastic wrap and place it in the refrigerator for at least 4 hours, but preferably overnight. This chilling time allows the flavors to meld beautifully, resulting in a more delicious classic Italian tiramisu that will impress your guests.
Step 6: Prepare the Chantilly Cream (Optional)
If you wish to add a touch of elegance, whip cold heavy cream with powdered sugar and a splash of vanilla until soft peaks form. This optional chantilly cream can be piped decoratively on top of the chilled tiramisu just before serving, adding an extra layer of sweetness and creaminess.
Step 7: Serve and Enjoy
Just before serving, dust the top generously with Dutch-process cocoa powder, ensuring an even coating for that classic finish. Slice the tiramisu into portions, and present this indulgent dessert to your friends and family, inviting them to savor this delightful classic Italian tiramisu that’s sure to delight every palate.
Make Ahead Options
These Classic Italian Tiramisu are perfect for meal prep, allowing you to enjoy a stress-free dessert for your gatherings! You can prepare the mascarpone cream mixture and layer the ladyfingers up to 24 hours in advance; just cover the assembled tiramisu tightly with plastic wrap to maintain moisture and avoid any fridge odors. Chill it overnight to let the flavors meld beautifully, ensuring a delectably rich taste that’s just as delicious as when freshly made. When ready to serve, simply dust the top with cocoa powder and, if desired, add the optional Chantilly cream. This streamlined approach saves you time and lets you focus on enjoying yourself with family and friends!
Classic Italian Tiramisu Variations
Feel free to play around with your classic Italian tiramisu recipe to suit your tastes and dietary needs!
-
Gluten-Free: Use gluten-free ladyfingers to accommodate dietary restrictions without sacrificing flavor.
-
Alcohol-Free: Simply skip the Kahlua and double the espresso for a kid-friendly version that still packs a punch.
-
Chocolate Tiramisu: Add cocoa powder to the mascarpone mixture and garnish with chocolate shavings for a rich twist. This variation is perfect for chocolate lovers looking for a sweet delight.
-
Fruit-Infused: Layer in fresh raspberries or strawberries between mascarpone layers for a fruity burst that complements the coffee beautifully. The combination of flavors creates a refreshing twist that brightens this classic dessert.
-
Nutty Flavor: Fold in crushed hazelnuts or almonds into the mascarpone cream for a delightful crunch and added depth. The nuts introduce a beautiful texture and a nutty aroma that elevates the entire tiramisu experience.
-
Dairy-Free: Substitute the mascarpone with a dairy-free cream cheese alternative and use coconut cream for the whipped topping. This way, those with dairy sensitivities can still indulge in a delicious dessert.
-
Spicy Kick: Add a dash of cinnamon or nutmeg to the coffee soaking mixture or mascarpone cream for an unexpected twist that warms the palate. This is similar to my favorite secret in Grandmas Thanksgiving Stuffing that adds a comforting spice kick to the dish.
-
Caramel Drizzle: Drizzle caramel sauce over the layers before adding the final layer of mascarpone cream for a sweet surprise in every bite. It brings a luxurious feel to your classic Italian tiramisu; you won’t want to miss this one!
Storage Tips for Classic Italian Tiramisu
Fridge: Store leftover tiramisu in an airtight container in the refrigerator for up to 4 days. Make sure it’s fully chilled before covering to prevent condensation.
Freezer: If you need to store classic Italian tiramisu for longer, it can be frozen for up to 2 months. Cut into individual portions and wrap tightly in plastic wrap before placing in an airtight container.
Thawing: To enjoy your frozen tiramisu, transfer it to the fridge a few hours before serving. Avoid refreezing once thawed for best texture.
Serving: Just before serving, dust with cocoa powder to refresh its appearance and flavor.
Helpful Tricks for Classic Italian Tiramisu
-
Room Temperature Cheese: Always use mascarpone at room temperature for easier mixing and a smoother consistency in your classic Italian tiramisu.
-
Avoid Soggy Layers: Dip ladyfingers quickly, just 1-2 seconds in coffee, to prevent them from becoming too soggy while retaining their structure.
-
Chilling Time: For the best flavor, chill your tiramisu overnight. This allows the layers to marry beautifully, making every bite more delightful.
-
Whip Wisely: Be cautious not to overwhip the cream; stop as soon as you reach stiff peaks to ensure a light and airy texture.
-
Cocoa Dusting: Dust cocoa powder right before serving to keep that beautiful finish intact, giving your classic Italian tiramisu a perfect presentation.
What to Serve with Classic Italian Tiramisu
Imagine the perfect end to your meal, where coffee, cream, and chocolate create a symphony of flavors that lingers long after.
-
Rich Espresso: This bold coffee pairing enhances the coffee flavors in the tiramisu, providing a perfect balance of warmth and richness.
A small cup of freshly brewed espresso will harmonize beautifully with the dessert, making each bite taste even richer. -
Chocolate-Dipped Strawberries: These sweet and juicy fruits create a stunning contrast, adding a fresh element to the creamy dessert.
Pairing tiramisu with these delightful treats elevates your dining experience, adding a touch of romance to your meal. -
Italian Sparkling Wine: The bubbles cleanse your palate while complementing the creaminess of the tiramisu, making each forkful irresistible.
The effervescence offers the perfect festive touch, ideal for celebrations or gatherings with your loved ones. -
Spiced Biscotti: These crunchy, flavorful cookies provide a delightful textural contrast to the creamy layers of tiramisu.
Enjoying a biscotti alongside your dessert allows for a delightful dip, soaking in the flavors for an enhanced experience. -
Vanilla Ice Cream: A scoop of this creamy delight adds a cool touch, balancing the coffee flavors while creating a heavenly combination.
The melt-in-your-mouth texture will elevate the dessert, making each spoonful a creamy delight. -
Chocolate Mousse: This velvety dessert echoes the chocolate notes in your tiramisu while adding an indulgent element to your meal.
Serving both allows guests to choose their own indulgence, promising a rich and satisfying experience.
Classic Italian Tiramisu Recipe FAQs
How do I choose the right ladyfingers for tiramisu?
Absolutely! For the best results, you want to use dry ladyfingers, which hold their shape when soaked. Look for ones labeled as “savoiardi” in stores. If you can make your own, that’s wonderful as well, but ensure they have time to dry out completely for that divine texture!
What’s the best way to store leftover tiramisu?
Very good question! Leftover tiramisu should be placed in an airtight container in the refrigerator, where it will stay fresh for up to 4 days. If you cover it with plastic wrap, make sure it’s fully chilled first to avoid condensation.
Can I freeze classic Italian tiramisu?
Absolutely, you can! To freeze, cut the tiramisu into individual portions, wrap tightly in plastic wrap, and place them in an airtight container. It can be stored in the freezer for up to 2 months. When you’re ready to enjoy, simply transfer your desired portion to the fridge and let it thaw for a few hours.
What should I do if my mascarpone cream is too runny?
If you find that your mascarpone cream is slightly runny, it’s essential to check if the heavy cream is whipped correctly; it should be at stiff peaks. If it’s already mixed, you can try folding in additional whipped cream to thicken it. Alternatively, give it a little time to chill in the refrigerator before assembling to help it firm up.
Is there a way to make this tiramisu gluten-free?
Very much so! For a gluten-free version of classic Italian tiramisu, simply substitute the traditional ladyfingers with gluten-free varieties. There are plenty available today that provide the same texture and taste. Just ensure they’re sufficiently dry for an optimal experience.
Can I make tiramisu without eggs?
Certainly! If you prefer an egg-free tiramisu, simply use whipped cream mixed with mascarpone cheese, and add some sweetened condensed milk for creaminess. Although the texture will differ slightly, you’ll still get that delightful coffee flavor!
Classic Italian Tiramisu: A No-Bake Dreamy Delight
Ingredients
Equipment
Method
- Prepare the Egg Mixture: In a double boiler, combine the egg yolks, granulated sugar, and vanilla extract. Whisk continuously for about 4–5 minutes until pale and thick.
- Make the Mascarpone Cream: Whip the cold heavy cream until stiff peaks form. Gradually fold in the mascarpone cheese, then gently add the cooled egg mixture.
- Assemble the Tiramisu: Mix the espresso and Kahlua. Dip ladyfingers for 1–2 seconds and arrange half in a baking dish. Spread half of the mascarpone cream over them.
- Layer More Ladyfingers: Repeat with another layer of dipped ladyfingers and the remaining mascarpone mixture.
- Chill the Tiramisu: Cover with plastic wrap and refrigerate for at least 4 hours, preferably overnight.
- Prepare the Chantilly Cream (Optional): Whip heavy cream with powdered sugar and vanilla until soft peaks form. Pipe on top before serving.
- Serve and Enjoy: Dust with cocoa powder, slice, and serve the tiramisu to guests.
Leave a Reply