
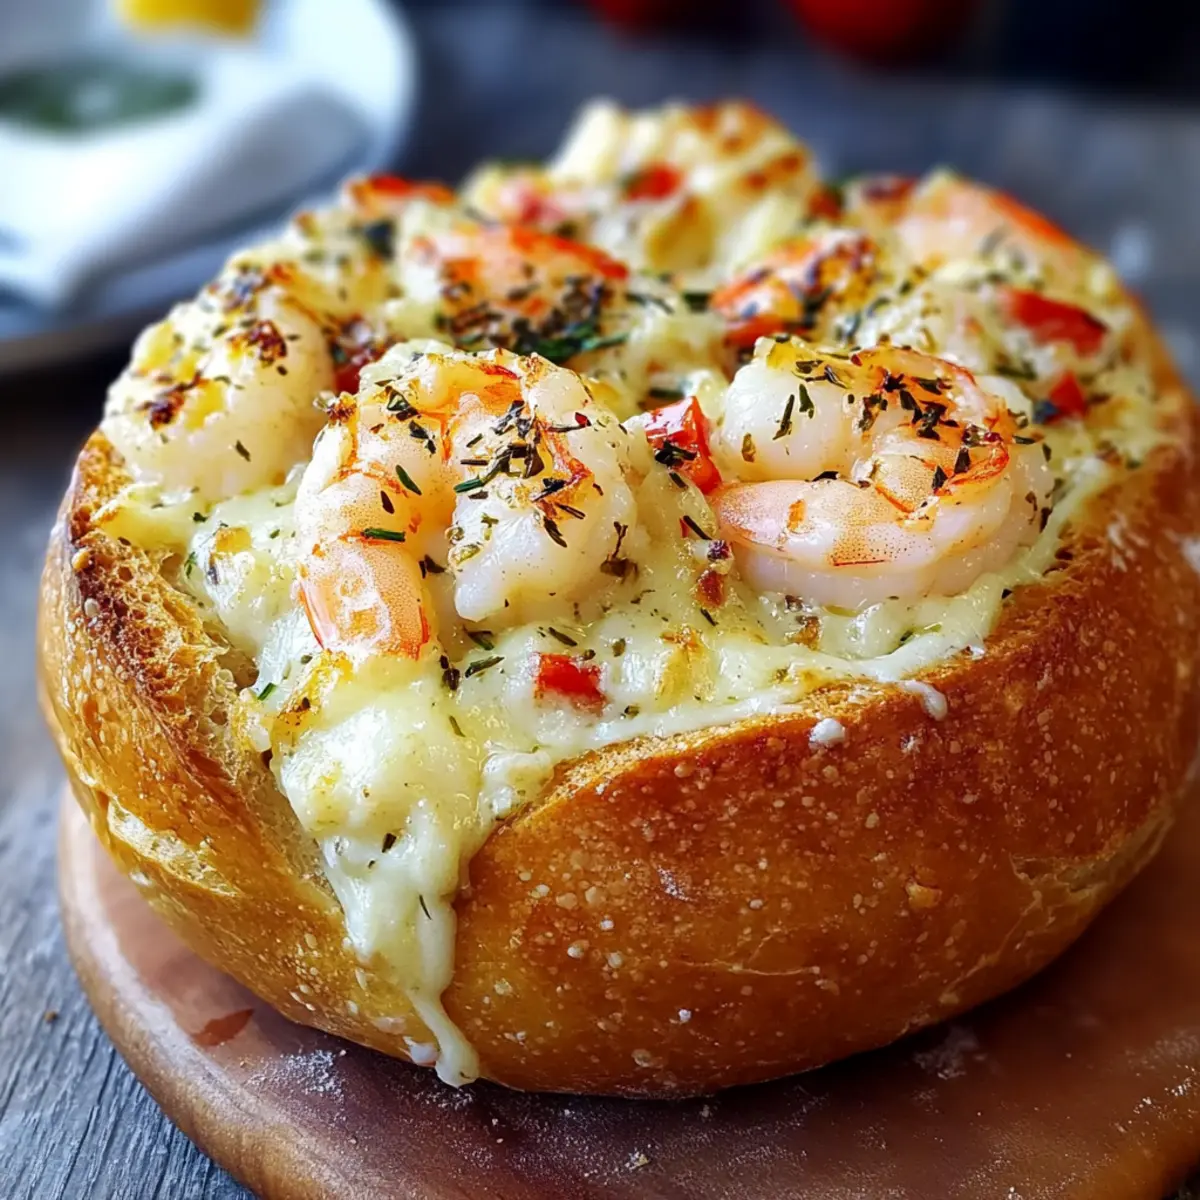
The tantalizing aroma of garlic and seafood wafting through the kitchen always sparks the joy of cooking for me. Today, I’m excited to share my recipe for a Cheesy Garlic Shrimp Bread Bowl, a pull-apart delight that transforms simple ingredients into a show-stopping dish! This recipe marries the rich creaminess of cheese with succulent shrimp, making it a perfect choice for both busy weeknights and festive gatherings. In less than an hour, you’ll have a warm centerpiece ready to share, providing a cozy and interactive dining experience. Plus, it’s wonderfully versatile—swap shrimp for crab or mushrooms to suit your palate. Who can resist tearing off chunks of crispy bread to scoop up that cheesy goodness? Let’s dive into this delicious adventure together!
Why is Garlic Shrimp Bread Bowl a Must-Try?
Irresistible Flavor Combination: This dish brings together sweet shrimp, aromatic garlic, and creamy cheese, creating a burst of flavor in every bite.
Interactive Dining Experience: Perfect for gatherings, guests can tear at the bread to scoop up the cheesy filling, making it a social delight.
Quick and Easy Preparation: Ready in just under an hour, you can easily whip up this dish for a weeknight dinner or impress friends at a gathering.
Versatility at Its Best: With the option to substitute shrimp for crab, lobster, or even sautéed mushrooms, there’s something for everyone.
Comfort Food Made Fun: This pull-apart bread bowl takes comfort food to another level—enjoy it as a warm, shareable centerpiece.
For those who love cozy cooking, this Garlic Shrimp Bread Bowl is your new favorite recipe!
Garlic Shrimp Bread Bowl Ingredients
-
For the Bread Bowl
• Large round loaf of sourdough or Italian bread – Acts as the perfect structure for holding the cheesy goodness inside; gluten-free bread can be used for a gluten-free option.
• Olive oil – Enhances flavor while helping to crisp the bread; consider using flavored oils for extra depth. -
For the Filling
• Minced garlic – Provides rich aroma and deep flavor; fresh garlic is preferable for the best taste.
• Unsalted butter – Adds richness and moisture to the shrimp mixture; vegan butter is an excellent alternative for dairy-free options.
• Shrimp – The star of the show, contributing sweetness and a satisfying texture; seafood lovers can substitute with crab or lobster, while vegetarians might enjoy sautéed mushrooms.
• Red pepper flakes – Infuses a pleasant heat; adjust according to your spice preference.
• Diced roasted red peppers – Adds sweetness and vibrant color; feel free to use fresh bell peppers if roasted are not available.
• Cream cheese – Creates the creamy, dreamy filling; swap for vegan cream cheese to keep it dairy-free.
• Sour cream or mayonnaise – Introduces tanginess and creaminess; Greek yogurt can serve as a healthier alternative.
• Shredded mozzarella cheese – Provides that glorious melty texture; vegan cheese can substitute for a dairy-free option.
• Parmesan cheese – Enhances flavor and richness; nutritional yeast can be a satisfying vegan substitute.
• Salt and pepper – Essential for elevating the overall flavor profile; season to your preference.
Step‑by‑Step Instructions for Garlic Shrimp Bread Bowl
Step 1: Preheat the Oven
Begin by preheating your oven to 375°F (190°C), ensuring it reaches the perfect temperature for baking. This step will create a warm environment for your Garlic Shrimp Bread Bowl, helping to achieve that golden, crispy exterior. Gather your baking sheet, as you’ll place the bread bowl on it later for easy transferring.
Step 2: Prepare the Bread Bowl
Slice the top off your large round loaf of sourdough or Italian bread and hollow out the center, leaving about an inch of thick walls to maintain structure. Brush the inside generously with olive oil mixed with minced garlic, ensuring even coverage. Place the bread bowl on a baking sheet and bake it in the preheated oven for 10 minutes, until it’s lightly crisped.
Step 3: Sauté the Aromatics
In a large skillet over medium heat, melt a mix of unsalted butter and olive oil. Once bubbly, add minced garlic and sauté for 1-2 minutes until fragrant, being careful not to burn it. The aroma will fill your kitchen, setting the stage for the delicious filling. Make sure to stir occasionally for even cooking.
Step 4: Cook the Shrimp
Add the shrimp to the skillet along with red pepper flakes and diced roasted red peppers, cooking everything for about 3-4 minutes. Stir frequently until the shrimp turn pink and opaque, indicating they are cooked through. Chop the cooked shrimp into smaller pieces, but reserve a few whole for garnishing later, adding depth to your Garlic Shrimp Bread Bowl.
Step 5: Mix the Filling
In a separate mixing bowl, combine softened cream cheese, sour cream or mayonnaise, shredded mozzarella, Parmesan cheese, and the sautéed shrimp mixture. Stir thoroughly until you achieve a creamy, well-integrated filling. The mixture should be luscious and smooth, ready to fill your toasted bread bowl.
Step 6: Assemble the Bowl
Spoon the creamy shrimp filling generously into the hollowed-out bread bowl, leveling it off as you go. For a touch of elegance, arrange the reserved whole shrimp on top, creating a beautiful presentation. This step not only enhances aesthetics but also tempts your guests with a hint of what’s inside.
Step 7: Bake to Perfection
Return the assembled Garlic Shrimp Bread Bowl to the oven and bake for 20–25 minutes. Keep an eye out for the cheese to be bubbly and golden on top. The enticing aroma will permeate your kitchen, letting you know that your dish is nearing completion and adding an inviting vibe to your meal.
Step 8: Serve and Enjoy
Once baked, carefully remove the bread bowl from the oven and let it rest briefly. Serve the Garlic Shrimp Bread Bowl hot, inviting your guests to tear off chunks of crispy bread to scoop up the cheesy filling. This interactive experience is sure to delight everyone at the table, making it a truly memorable dish!
Make Ahead Options
These Garlic Shrimp Bread Bowls are perfect for meal prep enthusiasts! You can prepare the shrimp mixture up to 24 hours in advance; simply sauté the ingredients as directed and allow the mixture to cool, then store it in an airtight container in the refrigerator. The bread bowl can be hollowed out the same day or left for up to 3 days as long as you keep it in a plastic bag to prevent it from drying out. When you’re ready to serve, just fill the bread bowl with the shrimp mixture and bake at 375°F (190°C) for 20-25 minutes until bubbly and golden. This approach not only saves you time on busy evenings but also ensures your Garlic Shrimp Bread Bowl remains just as delicious!
What to Serve with Cheesy Garlic Shrimp Bread Bowl
Creating a delightful meal around your cheesy, seafood-filled bread bowl is easy with these perfect pairings.
-
Lemon Wedges:
A splash of lemon juice brightens the flavors of the garlic shrimp, enhancing the seafood’s sweetness and adding a refreshing zing. -
Mixed Greens Salad:
A crisp salad with a zesty vinaigrette adds a nice contrast to the creamy bread bowl, balancing the richness with fresh greens and textures. -
Garlic Butter Roasted Vegetables:
Roasted veggies drizzled with garlic butter echo the dish’s flavors while providing a hearty, healthy side that complements the shrimp. -
Crispy Potato Wedges:
These satisfyingly crunchy wedges pair wonderfully, allowing you to scoop up the cheesy filling or enjoy with your favorite dip on the side. -
Mango Salsa:
A vibrant mango salsa brings a tropical twist to the table, adding sweetness and a hint of spice that harmonizes beautifully with the dish. -
Chardonnay or Sauvignon Blanc:
A chilled glass of white wine pairs perfectly, enhancing the seafood flavors while complementing the dish’s creamy, cheesy notes for a delightful meal experience.
Expert Tips for Garlic Shrimp Bread Bowl
• Cook Shrimp Carefully: Ensure shrimp is just cooked until pink to prevent a rubbery texture; timing is key for the best results.
• Pre-bake the Bowl: Don’t skip baking the bread bowl first! This step keeps the walls crispy and prevents them from getting soggy during baking.
• Cream Cheese Warm-Up: Let cream cheese come to room temperature before mixing; this makes it easier to blend into a creamy filling without lumps.
• Taste as You Go: Adjust seasoning with salt and pepper to suit your taste; this will enhance the overall flavor of the Garlic Shrimp Bread Bowl.
• Reheat for Crispiness: If storing leftovers, reheat in the oven rather than the microwave to maintain the delicious crunch of the bread.
Garlic Shrimp Bread Bowl Variations
Feel free to get creative and personalize your Garlic Shrimp Bread Bowl to suit your family’s taste and dietary needs!
-
Dairy-Free: Substitute cream cheese and mozzarella with vegan cream cheese and vegan cheese for a delicious dairy-free option.
-
Spicy Twist: Add jalapeños or crushed red pepper for an extra kick to your filling. This touch elevates the flavor profile beautifully, especially for heat lovers.
-
Seafood Medley: Replace shrimp with a mix of crab, lobster, or scallops for a luxurious seafood twist. Each variant will provide its own unique flavor while keeping that delightful creaminess intact.
-
Vegetarian Option: Try using sautéed mushrooms, artichokes, or spinach for a hearty vegetarian alternative. These ingredients offer depth and flavor, creating a satisfying bite.
-
Herbaceous Kick: Enhance flavor with fresh herbs like dill, parsley, or chives in the filling. They add a refreshing note that brightens the dish and complements the richness wonderfully.
-
Gluten-Free: Use a gluten-free bread option while maintaining the same delicious filling for those with dietary restrictions. This way, everyone can enjoy your creation!
-
Texture Varieties: Incorporate sautéed onions or bell peppers for added crunch and sweetness. These vegetables can elevate the overall texture of your dish, creating a thrilling experience with every bite.
-
Cheesy Extravaganza: Consider mixing in a variety of cheeses beyond mozzarella and parmesan, such as cheddar or gouda, to create an even richer flavor profile. Who doesn’t love the extra cheesiness?
These ideas will transform your Garlic Shrimp Bread Bowl into a personalized masterpiece, perfect for any occasion! If you’re also intrigued by other comforting recipes, check out my Moist Banana Bread or indulge in some delightful Cheesy Garlic Bread to enhance your cozy cooking repertoire.
How to Store and Freeze Garlic Shrimp Bread Bowl
Fridge: Store leftovers in an airtight container for up to 2 days. To keep the bread from becoming soggy, try to consume it quickly.
Freezer: You can freeze the unbaked shrimp filling in a separate container for up to 3 months. Thaw in the fridge overnight before using.
Reheating: When ready to enjoy leftovers, reheat your Garlic Shrimp Bread Bowl in a preheated oven at 350°F (175°C) for about 15-20 minutes, until warmed through and the bread is crispy again.
Make-Ahead Tip: Prepare the shrimp mixture a day in advance and refrigerate it. Assemble and bake just before serving for a fresh, delightful dish.
Garlic Shrimp Bread Bowl Recipe FAQs
How do I choose the best shrimp for the Garlic Shrimp Bread Bowl?
Absolutely! Look for shrimp that is firm with a slightly translucent appearance and a mild, briny smell. Avoid shrimp with dark spots all over, as they indicate spoilage. Fresh shrimp is preferable, but frozen shrimp works well too; just ensure to thaw it completely before cooking.
Can I store leftovers of the Garlic Shrimp Bread Bowl?
Yes! Leftovers can be stored in an airtight container in the refrigerator for up to 2 days. To maintain the bread’s texture, I recommend reheating it in the oven rather than the microwave, which can make it soggy. Just pop it in a preheated oven at 350°F (175°C) for about 15-20 minutes until warmed through and crispy again.
How do I freeze the Garlic Shrimp Bread Bowl filling?
To freeze, allow the shrimp filling to cool completely before transferring it to an airtight container. You can freeze it for up to 3 months. When you’re ready to use it, thaw the container in the refrigerator overnight. When reassembling the dish, be sure to bake the filling in a prepped bread bowl right after thawing for freshness.
I’m concerned about allergies. Can I make this dish gluten-free?
Very! You can easily make this Garlic Shrimp Bread Bowl gluten-free by substituting the bread with a large gluten-free sourdough or Italian loaf. Just check that all other ingredients, especially sauces, are gluten-free as well. Always read labels to ensure they are safe for your dietary needs.
What should I do if my shrimp turns out rubbery?
The more the merrier! To avoid rubbery shrimp, make sure you only cook it until it turns pink and opaque—about 3-4 minutes in the skillet. If they are overcooked, they can become tough. Next time, keep a close eye on the shrimp and remove them from heat as soon as they’re done for perfect texture.
Can I use other fillings in the Garlic Shrimp Bread Bowl?
Definitely! This recipe is wonderfully versatile. If you’re not a fan of shrimp, try substituting with crab or lobster for a different seafood flair. If you prefer a vegetarian option, sautéed mushrooms, artichokes, or spinach would also work beautifully. Just remember to adjust cooking times for different fillings!
Garlic Shrimp Bread Bowl: Cheesy, Creamy Seafood Comfort
Ingredients
Equipment
Method
- Preheat your oven to 375°F (190°C).
- Slice the top off the bread and hollow out the center, leaving about an inch of thick walls. Brush inside with olive oil mixed with minced garlic.
- In a skillet, melt butter and olive oil over medium heat. Add minced garlic and sauté for 1-2 minutes until fragrant.
- Add shrimp, red pepper flakes, and roasted red peppers to the skillet, cooking for 3-4 minutes until shrimp are pink and opaque.
- In a bowl, mix cream cheese, sour cream or mayo, mozzarella, Parmesan, and the shrimp mixture until creamy.
- Fill the hollowed-out bread bowl with the shrimp mixture, leveling it off.
- Bake the filled bread bowl for 20-25 minutes until the cheese is bubbly and golden.
- Serve hot, inviting guests to tear off chunks of bread to scoop up the filling.
Leave a Reply