
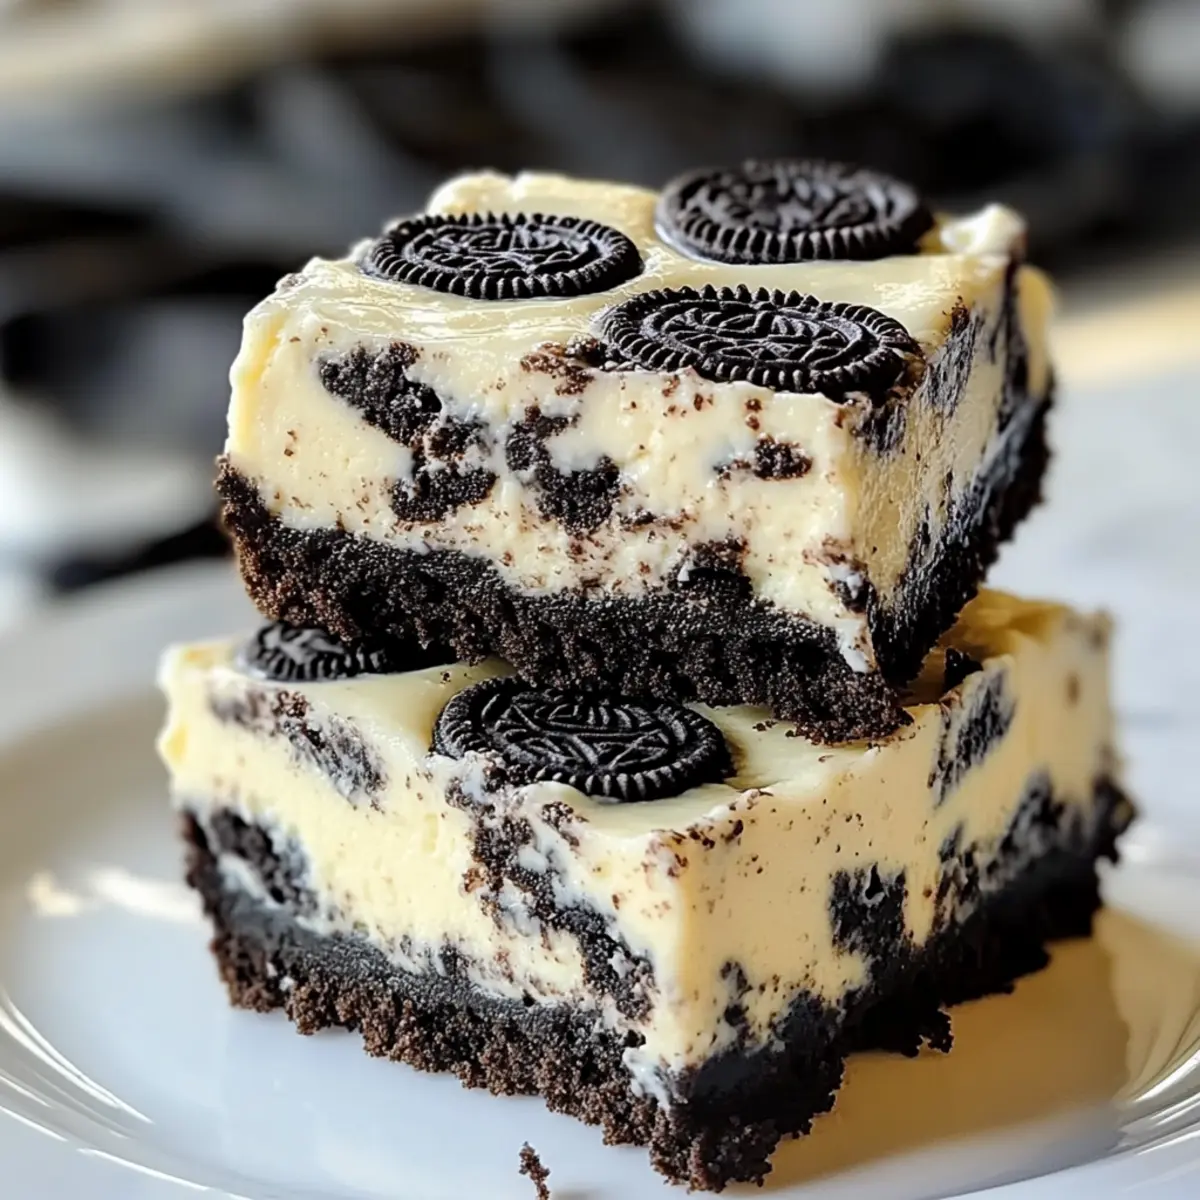
There’s a certain magic that happens when you blend the creamy richness of cheesecake with the beloved crunch of Oreo cookies. Today, I’m delighted to share a recipe that marries these two delights: Easy Oreo Cheesecake Bars. This dessert is not just scrumptious; it’s a total crowd-pleaser and incredibly easy to whip up, making it perfect for both novice and experienced bakers alike. With just a handful of ingredients, you can create a luscious treat that balances a silky cheesecake filling with delightful bits of Oreo throughout. Imagine serving these chilled bars at your next gathering—guests will rave about them! Curious to learn how to make these irresistible brownies? Let’s dive right in!
Why Are These Bars So Irresistible?
Decadent Delight: The rich cream cheese base paired with crushed Oreos creates a heavenly balance of flavors that will have everyone coming back for seconds.
Easy to Make: With minimal effort, you can deliver a stunning dessert that looks and tastes gourmet. Even beginner bakers will shine!
Crowd-Pleasing Treat: Perfect for parties, these bars become the star of any dessert table—your friends and family will adore them!
Versatile Options: Feel free to swap in different cookies or add toppings like fresh fruit or whipped cream for a personalized touch.
Make-Ahead Magic: These bars can be made in advance, allowing you to enjoy quality time with your guests instead of stressing in the kitchen.
Try serving them alongside our Korean Ground Beef for a well-rounded meal option that will truly impress!
Easy Oreo Cheesecake Bars Ingredients
For the Crust
• Oreo Cookies – Creates a chocolatey, crunchy base; use any chocolate cookie if desired.
• Butter – Binds the Oreo crust together; margarine can be used as a substitute.
For the Filling
• Cream Cheese (softened) – The star ingredient provides a creamy texture; make sure it’s at room temperature to avoid lumps.
• Sugar – Sweetens the filling; opt for a sugar alternative if you’re looking to reduce calories.
• Eggs – Adds richness and structure; ensure they are at room temperature for best results.
• Sour Cream – Adds moisture and tanginess to the filling; Greek yogurt can be swapped in for a lighter option.
• Vanilla Extract – Enhances the overall flavor; no suggested substitutions.
• Whole Oreos (folded into batter) – Adds delightful crunchy bits throughout the cheesecake; consider mini Oreos for a more uniform texture.
Prepare these ingredients and get ready to whip up your Easy Oreo Cheesecake Bars that will surely captivate all dessert lovers!
Step‑by‑Step Instructions for Easy Oreo Cheesecake Bars
Step 1: Prepare the Oreo Crust
Begin by preheating your oven to 325°F (163°C). In a mixing bowl, crush 24 Oreo cookies into fine crumbs, then combine them with melted butter until you achieve a wet sand-like consistency. Grease a 9×9-inch baking pan with cooking spray or parchment paper, and firmly press the cookie mixture into the bottom of the pan to create a nice even layer.
Step 2: Make the Cheesecake Filling
In a large mixing bowl, beat softened cream cheese with sugar using an electric mixer on medium speed until smooth and creamy, about 2-3 minutes. Gradually add room-temperature eggs one at a time, mixing well after each addition. Pour in sour cream and vanilla extract, mixing until fully combined and the batter is silky with no lumps, which will create the rich filling for your Easy Oreo Cheesecake Bars.
Step 3: Fold in Oreos
Next, chop the remaining 16 Oreo cookies into chunks and gently fold them into the cheesecake batter using a rubber spatula. Be careful not to overmix; you want to keep those delightful cookie bits intact. This will ensure a delightful crunch throughout your cheesecake filling, balancing perfectly with the creamy base.
Step 4: Assemble and Bake
Pour the luscious cheesecake filling over the prepared Oreo crust, using a spatula to spread it evenly. Place the baking pan in the preheated oven and bake for 40-45 minutes. You’ll know it’s done when the edges are set, and the center has a slight jiggle. This creates the ideal texture for your Easy Oreo Cheesecake Bars.
Step 5: Cool and Chill
Once baked, remove the pan from the oven and allow the bars to cool at room temperature for about 1 hour. After cooling, transfer the pan to the refrigerator and chill for at least 4 hours—or preferably overnight—so the cheesecake has time to set completely and develop its flavors.
Step 6: Slice and Serve
When you’re ready to serve the Easy Oreo Cheesecake Bars, use a warm damp knife to slice them into squares for clean edges. These bars are best enjoyed chilled. Serve them on a decorative platter, and watch your friends and family rave about how delicious these decadent treats are!
Expert Tips for Easy Oreo Cheesecake Bars
Room Temperature Ingredients: Ensure that your cream cheese and eggs are at room temperature before mixing; this helps create a smooth and creamy batter without lumps.
Watch the Bake Time: Avoid overbaking! The key is to pull the bars from the oven when the edges are set and the center is slightly jiggly. This ensures a creamy texture in your Easy Oreo Cheesecake Bars.
Clean Slicing: Use a warm, damp knife to slice the bars for perfectly clean edges. This will make your presentation look professional and appealing.
Chill Time: Don’t skip the chilling step! Allow the cheesecake to set in the fridge for at least 4 hours or overnight for the best flavor and texture.
Crust Customization: You can swap out standard Oreos for flavored varieties like mint or peanut butter for an exciting twist on your cheesecake bars!
Storing Leftovers: Keep the bars in an airtight container in the refrigerator for up to 5 days to maintain their freshness. Freeze for longer storage and enjoy later!
Make Ahead Options
These Easy Oreo Cheesecake Bars are perfect for meal prep, allowing you to enjoy delicious, homemade dessert without the last-minute rush! You can prepare the Oreo crust and filling up to 24 hours in advance; simply keep the crust stored in the refrigerator. After assembling, bake and cool the bars, then refrigerate them for at least 4 hours or overnight to set. This ensures the flavors meld beautifully while keeping the bars just as delightful when served. When it’s time to enjoy, slice them with a warm, damp knife for clean edges. These make-ahead tips will save you time and stress, letting you focus on sharing sweet moments with loved ones!
How to Store and Freeze Easy Oreo Cheesecake Bars
Fridge: Keep the bars in an airtight container in the refrigerator for up to 5 days, ensuring they stay fresh and delicious for every indulgent bite.
Freezer: For longer storage, wrap the sliced bars individually in plastic wrap and place them in a freezer-safe container. They can last for up to 2 months without losing flavor.
Thawing: When you’re ready to enjoy your frozen Easy Oreo Cheesecake Bars, transfer them to the fridge the night before. This gentle thawing method helps maintain their creamy texture.
Reheating: These bars are best enjoyed chilled, but if you prefer them slightly warm, microwave for about 10-15 seconds—just enough to take the chill off without cooking them.
What to Serve with Easy Oreo Cheesecake Bars
Creating a complete meal is easy when you have these delicious cheesecake bars to win everyone over.
- Fresh Berries: Sweet and tangy strawberries or raspberries add a bright, refreshing contrast to the rich cheesecake flavors.
- Chocolate Drizzle: A simple melted chocolate drizzle elevates these bars, enhancing the chocolatey goodness of the Oreo crust.
- Whipped Cream: Light and airy, a dollop of whipped cream balances the rich creaminess of the cheesecake for a perfect bite.
- Coffee or Espresso: The bold flavors of coffee or espresso complement the dessert beautifully, making for a cozy treat after dinner.
- Nutty Brownies: Serve with fudgy brownies for a double chocolate treat that will satisfy every sweet tooth at your gathering.
- Ice Cream: Pair with a scoop of vanilla or mint ice cream for a delightful contrast in temperature and texture that everyone will love.
- Mint Tea: For something refreshing, serve with a warm cup of mint tea that can cleanse the palate and enhance the overall dining experience.
- Chocolate-Covered Pretzels: The salty crunch of chocolate-covered pretzels provides a delightful contrast to the rich dessert, enhancing the overall texture and flavor palette.
Let these pairing ideas inspire you to create a memorable meal that everyone will adore!
Easy Oreo Cheesecake Bars Variations
Feel free to personalize these delightful bars with tasty twists and substitutions that will elevate your dessert experience!
-
Dairy-Free: Use coconut cream and vegan cream cheese for a dairy-free version that retains blissful creaminess.
-
Flavor Boost: Add a tablespoon of espresso powder to the cheesecake batter for a delightful coffee twist—perfect for coffee lovers!
-
Gluten-Free: Swap Oreo cookies with gluten-free chocolate cookies to enjoy these bars without the gluten.
-
Nutty Crunch: Incorporate crushed nuts, such as pecans or almonds, into the crust for added texture and a nutty flavor.
-
Fruity Delight: Mix in fresh raspberries or strawberries into the cheesecake filling for a fruity, vibrant treat. The tartness will beautifully balance the sweetness.
-
Minty Fresh: Use mint Oreos for a refreshing minty twist that tastes like a chocolate mint dessert—perfect for those who love peppermint!
-
Seasonal Flavors: During the holidays, consider adding pumpkin spice or a touch of grated orange zest to the batter for a seasonal vibe.
If you’re looking for more delicious dessert ideas, consider pairing these bars with our Tomato Bisque Amp for a delightful meal combo!

Easy Oreo Cheesecake Bars Recipe FAQs
How do I choose the best Oreo cookies for the crust?
Absolutely! To create the best crust for your Easy Oreo Cheesecake Bars, look for fresh Oreo cookies without any dark spots or signs of moisture. Regular Oreos are perfect for a traditional taste, but you could also experiment with flavored varieties like mint or birthday cake Oreos for a fun twist!
What is the best way to store my Easy Oreo Cheesecake Bars?
I recommend storing your cheesecake bars in an airtight container in the refrigerator for up to 5 days. This keeps them fresh and delicious! If you want to store them longer, wrap them tightly in plastic wrap and place them in a freezer-safe container. They can last up to 2 months in the freezer.
How do I freeze Easy Oreo Cheesecake Bars?
Very simple! First, ensure the bars are completely cool. Slice them into portions and individually wrap each piece in plastic wrap. Then place the wrapped slices into a freezer-safe bag or container. When you’re ready to enjoy, thaw them in the refrigerator overnight for the best texture.
What should I do if my cheesecake bars crack on top?
Don’t worry, it happens! If your Easy Oreo Cheesecake Bars crack, it’s likely due to overbaking or not letting them cool slowly. To avoid this, keep an eye on the bake time; the edges should be set while the center is still slightly jiggly. After baking, turn off the oven and let the bars cool inside for about 30 minutes before removing them.
Can I make these cheesecake bars gluten-free?
While this recipe is not specifically gluten-free, you can easily make it so by using gluten-free chocolate sandwich cookies instead of regular Oreos for the crust. These alternatives will still give you the delicious, chocolatey flavor while accommodating gluten sensitivities.
Is it safe to share cheesecake bars with my pets?
I strongly advise against it! Ingredients like sugar and chocolate can be harmful to pets. It’s best to keep your Easy Oreo Cheesecake Bars just for human enjoyment—your furry friends will thank you for staying safe!
Creamy Easy Oreo Cheesecake Bars That Wow Every Bite
Ingredients
Equipment
Method
- Preheat oven to 325°F (163°C). Crush 24 Oreo cookies and mix with melted butter until wet sand-like. Press into the bottom of a greased 9x9-inch pan.
- Beat softened cream cheese with sugar until smooth. Gradually add eggs one at a time, mix in sour cream and vanilla until creamy.
- Chop remaining 16 Oreos and fold into the batter gently while keeping the cookie bits intact.
- Pour filling over the crust and spread evenly. Bake for 40-45 minutes until edges are set and center jiggles slightly.
- Cool for 1 hour at room temperature, then chill for at least 4 hours or overnight.
- Slice into squares with a warm damp knife for clean edges. Serve chilled.
Leave a Reply