
Summer is just around the corner, and that means it’s time to whip up some delightful treats that invoke sunny days and carefree moments! This Easy No-Bake Orange Creamsicle Pie is the perfect dessert to celebrate the season—imagine a creamy filling where tangy orange meets sweet vanilla goodness, all waiting in a buttery crust. The best part? This decadent dessert requires minimal effort, making it ideal for gatherings or simply enjoying a sweet respite at home. Plus, it’s a freezer-friendly delight, so you can prepare it ahead of time and have it ready for those last-minute cravings or surprise guests. Who wouldn’t want to dive into a slice of this creamy dream? Let’s get started on making this nostalgic favorite together!

Why is this pie a must-try?
No-Bake Convenience: This Easy Orange Creamsicle Pie is a breeze to whip up without any baking required, making it a time-saver for busy days.
Nostalgic Flavor: Reminiscent of summer treats, the delightful combination of orange and vanilla brings back childhood memories in every bite.
Versatile Options: You can easily adapt ingredients for dietary needs, whether it’s gluten-free graham crackers or vegan substitutes, allowing everyone to enjoy this dessert.
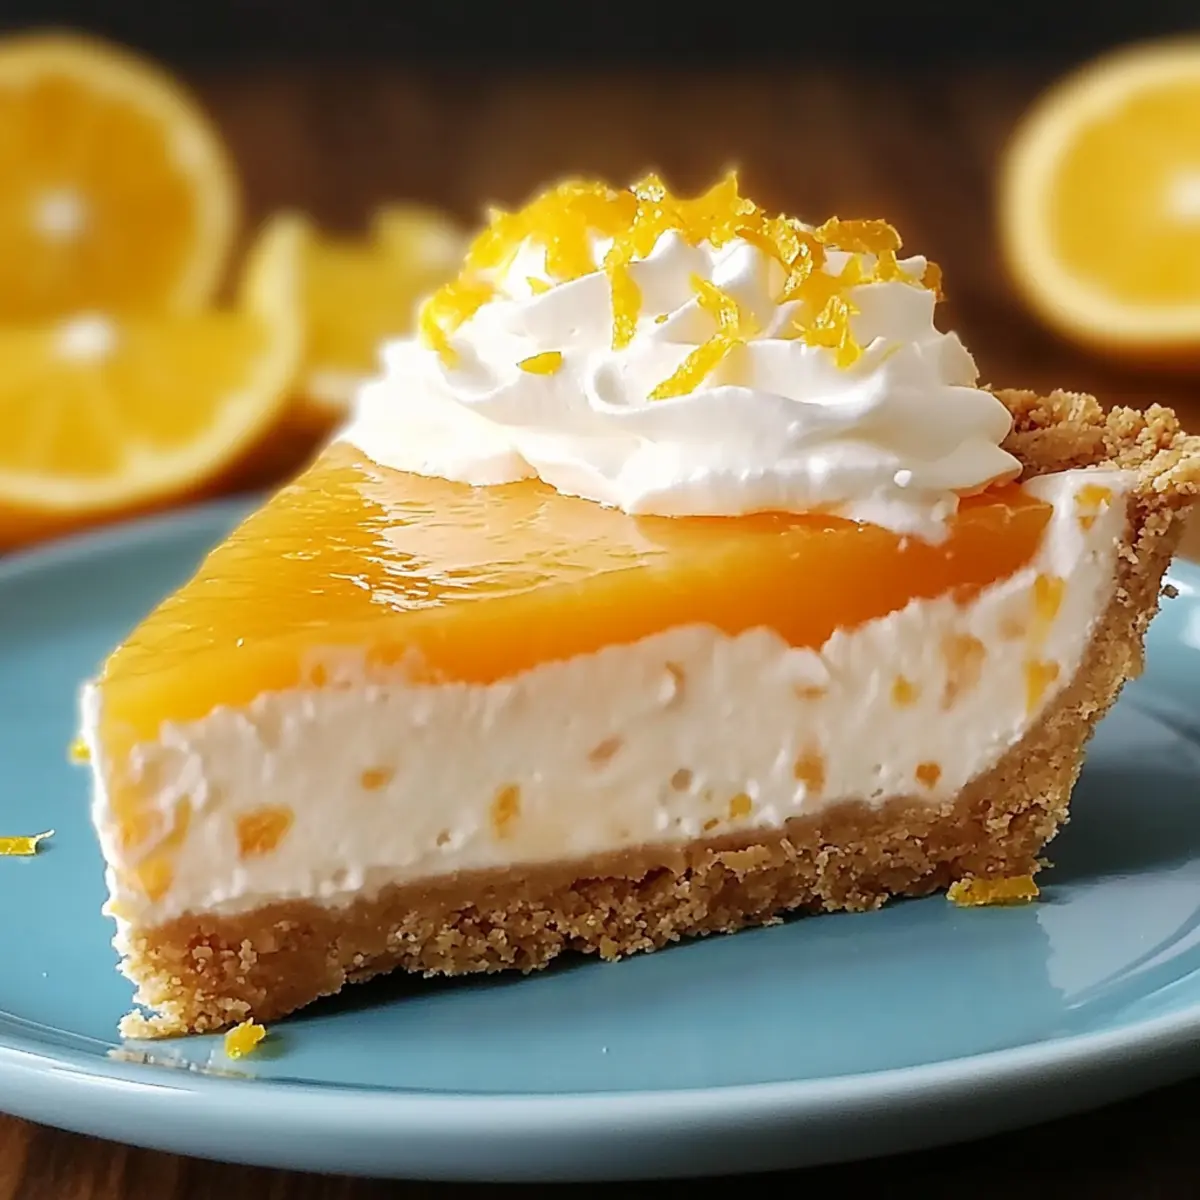
Impressive Presentation: Garnished with fresh orange slices and zest, this pie looks beautiful on any table, making it perfect for gatherings or family dinners.
Quick Chill: With a refrigerating time of just 4 hours (or overnight for best results), this dessert can be prepared ahead of time, alleviating last-minute stress.
For more delightful no-bake treats, check out my Tuna Pasta Bake or indulge in the Cheese Egg Bake for another easy and delicious option!
Easy Orange Creamsicle Pie Ingredients
For the Crust
• Graham Cracker Crumbs – Provide structure and a sweet base for the crust; substitute with gluten-free graham crackers for a GF option.
• Unsalted Butter – Binds the crumbs together and adds richness; coconut oil can work for a dairy-free option.
• Granulated Sugar – Sweetens the crust; use a sugar alternative for a lower-calorie version.
For the Filling
• Orange Jell-O Gelatin (2 oz) – Adds vibrant orange flavor and helps to set the filling; replace with agar-agar for a vegetarian option.
• Cream Cheese (12 oz) – Contributes creaminess and richness to the filling; use vegan cream cheese to make it dairy-free.
• Peeled Orange – Enhances flavor and adds real fruit essence; substitute with mandarin segments for ease.
• Vanilla Extract (1 tsp) – Adds depth of flavor; skip if allergic, or use a vanilla-flavored extract alternative.
• Orange Juice (1/4 cup) – Provides additional citrus flavor; freshly squeezed is preferred for taste.
• Orange Zest (2 tbsp) – Intensifies the orange flavor; can be omitted if not available.
• Cool Whip (12 oz) – Offers lightness and fluffiness to the filling; dairy-free whip can be used for vegan versions.
• Sweetened Condensed Milk (14 oz can) – Sweetens and thickens the filling, important for texture; substitute with coconut condensed milk for a dairy-free option.
For Topping
• Heavy Whipping Cream – Used for topping; keep it chilled before whipping for best results.
• Fresh Orange Slices & Zest – For garnish, enhancing visual appeal and citrus aroma.
This Easy Orange Creamsicle Pie recipe is a delightful spring and summer treat that everyone will love!
Step‑by‑Step Instructions for Easy Orange Creamsicle Pie Recipe-No Bake Dessert
Step 1: Prepare the Crust
In a medium bowl, combine graham cracker crumbs, melted unsalted butter, and granulated sugar until well mixed. Press this crumb mixture firmly into the bottom and up the sides of a 9-inch pie plate, creating an even layer. Place the crust in the freezer for 10-15 minutes to set, giving it a crisp texture that will support the creamy filling.
Step 2: Create the Filling Base
In a separate bowl, dissolve the orange Jell-O in 1 cup of hot water until fully melted. Allow it to cool slightly. Meanwhile, beat the cream cheese with an electric mixer on medium speed until smooth and creamy. Gradually add the sweetened condensed milk, mixing until combined, then stir in the peeled orange, vanilla extract, orange juice, and orange zest until the mixture is homogeneous.
Step 3: Incorporate Jell-O and Cool Whip
Once the Jell-O has cooled to room temperature, gently fold it into the cream cheese mixture until just combined, being careful not to deflate the filling. Next, take the Cool Whip and fold it into the mixture using a spatula, ensuring no streaks remain. This process keeps the filling light and airy, essential for the Easy Orange Creamsicle Pie.
Step 4: Whip Cream and Assemble
In a chilled bowl, whip the heavy cream until stiff peaks form; this will add a decadent topping to the pie. Carefully spoon the orange filling into the chilled crust, spreading it evenly with a spatula. Top the filling with the whipped cream, smoothing it out or piping it decoratively for an impressive finish.
Step 5: Chill the Pie
Cover the assembled pie loosely with plastic wrap or aluminum foil, placing it in the refrigerator for at least 4 hours, but for best results, allow it to chill overnight. This chilling time helps the Easy Orange Creamsicle Pie set properly, creating a luscious texture that melts in your mouth.
Step 6: Garnish and Serve
Once chilled, remove the pie from the refrigerator and garnish with fresh orange slices and a sprinkle of orange zest on top. You can add more whipped cream if desired to enhance the visual appeal and richness. Slice and serve this delightful no-bake dessert to enjoy a taste of summer in every bite!

Easy Orange Creamsicle Pie Variations
Feel free to get creative with these delightful twists on this creamy delight!
-
Dairy-Free: Substitute cream cheese with vegan cream cheese and use coconut condensed milk for a luscious dairy-free option. This keeps the same creamy texture without the dairy!
-
Gluten-Free: Swap graham cracker crumbs for gluten-free graham crackers, ensuring everyone can enjoy this treat. It’s a delightful way to cater to those with dietary restrictions!
-
Fruit Explosion: Add a layer of raspberry or strawberry preserves beneath the orange filling for a vibrant flavor contrast. This sweet touch enhances the pie’s aesthetic and boosts its fruity goodness!
-
Flavor Adventure: Experiment with different flavored gelatin like peach or lemon for a refreshing twist. Each version tells a new story while maintaining that beloved, creamy base.
-
Toasted Coconut: Top with a sprinkle of toasted coconut for a crunchy texture that adds an island flair. This complement brings a delightful surprise to every bite!
-
Zesty Kick: Mix in a teaspoon of lime juice alongside the orange juice for an extra citrus zing. The vibrant tang elevates the overall flavor and keeps things exciting!
-
Chocolate Delight: Drizzle chocolate sauce over the whipped cream topping for a decadent finish. This twist takes a refreshing pie into indulgence territory—who could resist?
-
Spicy Kick: For those who love heat, incorporate a pinch of cayenne pepper into the filling. It adds a surprising kick that harmonizes beautifully with the orange’s sweetness!
With these variations, you can customize your Easy Orange Creamsicle Pie to suit your taste and impress your guests. And if you’re in the mood for more easy and delicious recipes, consider checking out my Easy Creamy Tuna Pasta Bake or try a comforting Cheese Egg Bake for more inspiration!
What to Serve with Easy Orange Creamsicle Pie
This vibrant dessert calls for complementary flavors and textures to create the perfect summer feast.
- Fresh Fruit Salad: A medley of seasonal berries and citrus fruits provides a refreshing contrast, helping to brighten the overall flavor of the meal.
- Crispy Spring Rolls: The crunchy outer layer packs a flavorful bite, pairing beautifully with the creamy richness of the pie and adding an exciting texture twist.
- Grilled Chicken Skewers: Marinated in citrusy herbs, these savory bites echo the pie’s flavors while adding a heartiness to the meal.
- Lemonade or Orangeade: Refreshing, fruity drinks enhance the nostalgic theme, serving as a perfect palate cleanser between bites of this creamy dessert.
- Chocolate Ice Cream: Rich and creamy, it creates a delightful contrast to the citrus notes of the Easy Orange Creamsicle Pie, perfect for indulgent moments.
- Coconut Macaroons: These chewy treats complement the pie’s creamy texture while bringing a tropical flair that elevates the dessert experience.
- Frozen Margaritas: Tangy and icy, these drinks provide a fun twist that aligns with summer vibes, making every bite and sip a joyful celebration!
Expert Tips for Easy Orange Creamsicle Pie
-
Soften Cream Cheese: Ensure your cream cheese is fully softened at room temperature to avoid lumps and achieve a silky filling in your Easy Orange Creamsicle Pie.
-
Press Evenly: Use a measuring cup or flat-bottomed glass to compact the crust evenly, ensuring that it holds its shape and provides a sturdy base for your creamy filling.
-
Gentle Folding: Be cautious not to overmix when folding in the Cool Whip; this keeps the filling airy and light. Aim for a seamless blend without losing that fluffy texture.
-
Chill Adequately: Allow the pie to chill for at least 4 hours or overnight for best results. This time is crucial for the filling to set properly, allowing those delightful flavors to meld.
-
Decorative Garnishes: For an impressive presentation, pipe the whipped cream topping instead of spreading it, and don’t shy away from adding fresh orange slices for a vivid pop.
How to Store and Freeze Easy Orange Creamsicle Pie
Fridge: Store the pie in the refrigerator, covered with plastic wrap, for up to 3-4 days to maintain its creamy texture and flavor.
Freezer: If you want to keep it longer, you can freeze the pie for up to 2 months. Wrap it tightly in plastic wrap and aluminum foil to prevent freezer burn.
Thawing: When ready to enjoy, transfer the pie from the freezer to the fridge and let it thaw overnight.
Reheating: There’s no need to reheat this Easy Orange Creamsicle Pie; serve it chilled for the best experience!
Make Ahead Options
This Easy Orange Creamsicle Pie is perfect for meal prep enthusiasts! You can prepare the crust and filling up to 24 hours in advance, ensuring you save precious time during busy days. Simply make the crust and freeze it, then mix the filling and refrigerate it separately. To maintain quality, keep the crust covered in plastic wrap and refrigerate the filling in an airtight container, preventing any unwanted moisture. When you’re ready to serve, simply spoon the filling into the chilled crust and top with freshly whipped cream. This way, you’ll relish a delightful dessert that’s just as delicious, with minimal effort required right before serving!
Easy Orange Creamsicle Pie Recipe FAQs
What should I look for when selecting oranges?
Absolutely! When choosing oranges for your Easy Orange Creamsicle Pie, look for ones that are bright in color and feel heavy for their size. A good orange should have smooth skin without any dark spots or blemishes. These minor details can indicate freshness and juiciness, which are crucial for the vibrant flavor in your pie.
How should I store leftover pie?
Very good question! Store any leftover Easy Orange Creamsicle Pie in the refrigerator, covered with plastic wrap or in an airtight container. It will maintain its creamy texture and flavor for up to 3-4 days. This way, you can enjoy a sweet treat whenever the craving strikes!
Can I freeze the pie? How?
Absolutely! Freezing this pie is a fantastic option if you want to enjoy it later. To freeze, wrap the pie tightly with plastic wrap and then with aluminum foil to prevent freezer burn. It can be stored in the freezer for up to 2 months. When you’re ready to enjoy it, simply transfer the pie to the refrigerator to thaw overnight before serving. This helps ensure the texture remains as delightful as when first made.
What if my filling doesn’t set properly?
Don’t worry! If your filling doesn’t set as expected, it may be that the Jell-O wasn’t fully cooled before mixing. Be sure to chill it to room temperature! If you encounter this issue, you can try transferring the pie back to the fridge and allowing it extra time to set. If it remains too soft, consider carefully refrigerating it once again for an additional 1-2 hours, making sure to cover it gently to avoid condensation.
Can I make this pie dairy-free?
Absolutely! There are many ways to adapt this Easy Orange Creamsicle Pie for dietary needs. Use vegan cream cheese and dairy-free whipped topping for a delightful, creamy consistency. Substitute heavy cream with a coconut-based alternative for that whipped finishing touch. Ensure that your Jell-O is also suitable for your dietary preferences, like opting for agar-agar for a vegetarian-friendly version. Enjoy your pie while catering to varied dietary requirements!

Easy Orange Creamsicle Pie Recipe - No Bake Dessert Bliss
Ingredients
Equipment
Method
- In a medium bowl, combine graham cracker crumbs, melted unsalted butter, and granulated sugar until well mixed. Press this mixture into the bottom and sides of a 9-inch pie plate.
- Place the crust in the freezer for 10-15 minutes to set.
- In a separate bowl, dissolve the orange Jell-O in 1 cup of hot water until fully melted. Allow it to cool slightly.
- Beat the cream cheese with an electric mixer on medium speed until smooth and creamy. Gradually add the sweetened condensed milk, mixing until combined, then stir in the peeled orange, vanilla extract, orange juice, and orange zest until homogeneous.
- Once the Jell-O has cooled to room temperature, gently fold it into the cream cheese mixture until just combined.
- Next, fold in the Cool Whip, ensuring no streaks remain.
- In a chilled bowl, whip the heavy cream until stiff peaks form. Spoon the orange filling into the chilled crust, spreading it evenly.
- Top the filling with whipped cream, smoothing it out for an impressive finish.
- Cover the pie loosely with plastic wrap or aluminum foil and refrigerate for at least 4 hours, preferably overnight.
- Remove the pie from the refrigerator and garnish with fresh orange slices and a sprinkle of orange zest. Slice and serve.
Leave a Reply