
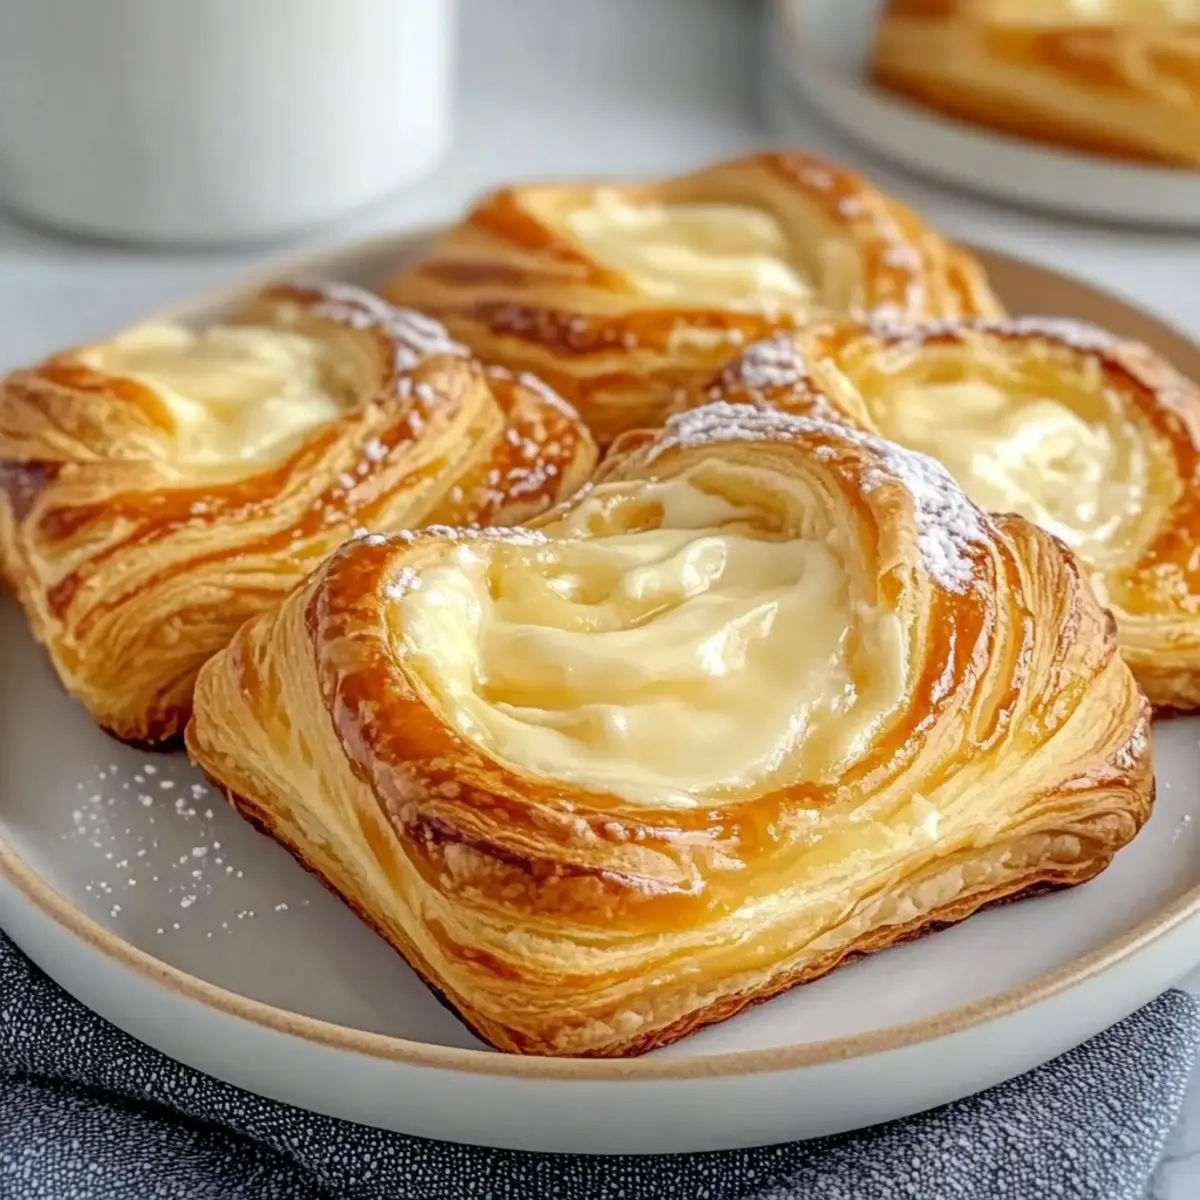
Bright morning light dances through the kitchen as I pull fresh pastries from the oven, their golden edges calling for attention. If you’ve ever craved the comforting warmth of homemade treats, this Cheese Danish recipe you’ll actually make will quickly become a staple in your home. With a flaky pastry base and a creamy filling that’s just the right amount of tangy, I promise you’ll be tempted to have more than one! Plus, you have the option to whip up these delights either with a convenient puff pastry method or indulge your inner baker with a traditional homemade dough approach. Perfect for brunch or when you need a sweet pick-me-up, this irresistible recipe transforms everyday ingredients into something truly special. Ready to unlock the secret to pastry perfection? Let’s dive in!
Why Is This Cheese Danish Recipe Special?
Deliciousness in Every Bite: With its flaky pastry and creamy filling, each bite delivers a delightful blend of textures that will impress your family and friends.
Flexible Options: Whether you’re in a hurry or have time to spare, choose between the quick puff pastry method or the classic homemade dough for a tailored experience.
Perfect for Any Occasion: This recipe shines at brunch, coffee breaks, or as a sweet comfort snack, making it a versatile favorite you’ll turn to time and again.
Homemade Happiness: Ditch the fast food and treat yourself to a homemade indulgence that transforms simple ingredients into a bakery-quality delight you’ll be proud to serve.
Endless Customizations: Add your favorite flavors like fruit jams, chocolate, or even savory fillings to suit your taste buds or those of your guests. Check out my recipe for Wonton Soup for another delightful homemade treat that pairs well with this delicious pastry!
Cheese Danish Ingredients
• Everything you need to create this flaky delight!
For the Cream Cheese Filling
- Cream Cheese – Provides the filling’s smooth texture and tangy flavor; use full-fat for best results.
- Granulated Sugar – Adds sweetness to the cream cheese filling; can be substituted with a sweetener of your choice.
- Vanilla Extract – Enhances the filling’s flavor profile; replace with almond extract for a different twist.
- Lemon Juice (Optional) – Brightens the filling’s flavors; omit if you prefer a more classic taste.
- Egg Yolk – Adds richness and helps bind the filling; replace with a flax egg for a vegan version.
- Salt – Balances sweetness in the filling.
For the Pastry
- Puff Pastry – The fast method for flaky layers; can substitute with homemade dough for a classic experience.
- Large Egg (for Egg Wash) – Gives the pastry a golden finish; skip for a vegan option, using olive oil instead.
- Water (for Egg Wash) – Helps combine the egg wash mixture.
For Homemade Dough
- All-Purpose Flour – Gives structure to the pastry; can substitute with pastry flour for lighter results.
- Sugar – Adds sweetness and aids fermentation in the dough.
- Salt – Enhances flavor in the homemade dough.
- Active Dry Yeast – Helps dough rise for a delightful airy texture.
- Whole Milk – Gives richness to the dough; can use almond milk for a dairy-free version.
- Unsalted Butter – Creates flaky layers; must be cold for effective lamination.
For Optional Glaze
- Powdered Sugar – Adds sweetness and a decorative touch; adjust with milk or lemon juice for desired consistency.
Feel inspired? Give this Cheese Danish recipe you’ll actually make a try, and watch how it transforms a simple gathering into a cozy moment!
Step‑by‑Step Instructions for Cheese Danish Recipe You’ll Actually Make
Step 1: Prepare Cream Cheese Filling
In a medium bowl, combine softened cream cheese, granulated sugar, vanilla extract, lemon juice (if using), egg yolk, and salt. Using a hand mixer or whisk, blend until the mixture is smooth and creamy, with no lumps remaining. Set aside the filling while you prepare your puff pastry or homemade dough, ensuring it’s ready for the delightful Cheese Danish assembly.
Step 2: Puff Pastry Method
Preheat your oven to 400°F (200°C) and line a baking sheet with parchment paper. On a lightly floured surface, roll out the puff pastry and cut it into eight equal squares. Arrange the squares on the baking sheet, folding the edges slightly inward to create a border. This shape will hold your creamy filling beautifully, ready for the next delicious step.
Step 3: Fill the Pastry
Spoon a generous amount of the prepared cream cheese filling into the center of each puff pastry square, being careful not to overfill. The filling should sit comfortably within the edges you’ve folded, leaving room for expansion while baking. For a golden and appetizing finish, gently brush the exposed edges with an egg wash made from a beaten egg and a splash of water.
Step 4: Bake Until Golden
Place the baking sheet in the preheated oven and bake for 15 to 18 minutes, or until the Cheese Danish pastries are puffed up and golden brown. As they bake, keep an eye on them; you want beautifully flaky layers that look appetizing. Once they are perfectly baked, remove them from the oven and let them cool slightly before moving on to the glazing.
Step 5: Glaze for Finish (Optional)
While the Cheese Danish cool, prepare a simple glaze by whisking together powdered sugar with a splash of milk or lemon juice until smooth. Once the pastries have cooled for about 10 minutes, drizzle the glaze over the top for an extra touch of sweetness and visual appeal. The addition of glaze is entirely up to your taste, enhancing both the flavor and the presentation.
Step 6: Serve and Enjoy
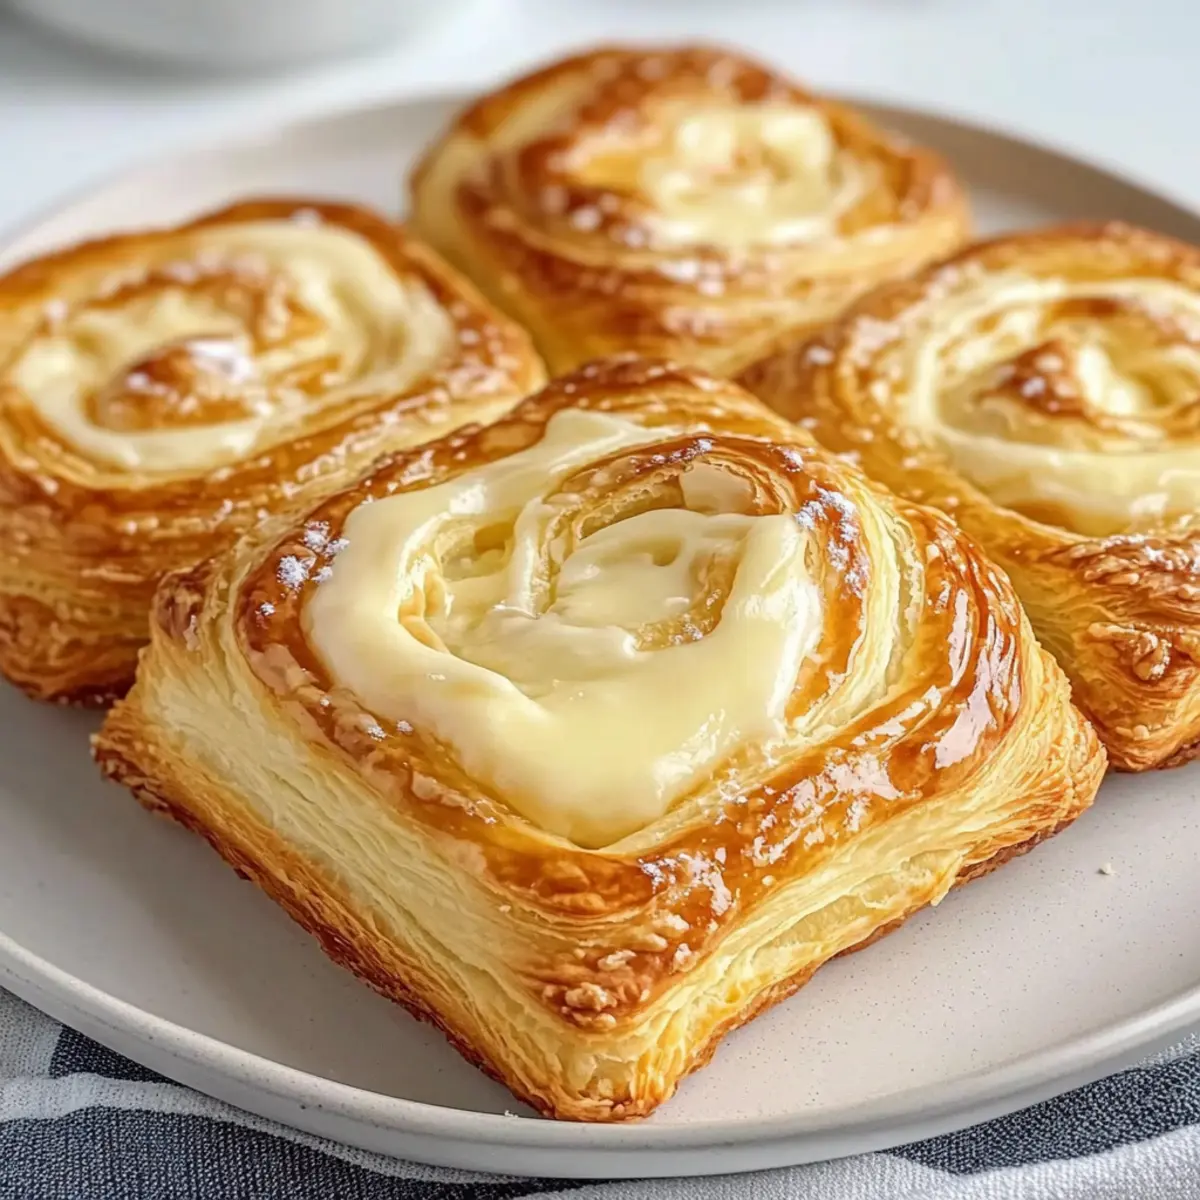
Once glazed, your Cheese Danish are ready to be served warm, with a steaming cup of coffee or tea. Set them on a platter, and watch as your family or guests delight in the flaky pastry hugging that creamy filling. These delightful treats are perfect for brunch or a special treat any time of the day, making this a Cheese Danish recipe you’ll actually make time and time again!

Storage Tips for Cheese Danish
-
Room Temperature: Store cooled Cheese Danish at room temperature in an airtight container for up to 2 days. This keeps them fresh while maintaining their flaky texture.
-
Fridge: For longer storage, place the Cheese Danish in the refrigerator in an airtight container. They will stay fresh for up to 4 days, but be aware they may lose some flakiness.
-
Freezer: To freeze, wrap individual Cheese Danish tightly in plastic wrap and then place them in a freezer-safe bag. They can be stored for up to 1 month; bake directly from frozen, adding a few extra minutes to the baking time.
-
Reheating: For the best taste experience, reheating in an oven at 350°F (175°C) for about 5-7 minutes will restore that delightful crispy texture—perfect for this Cheese Danish recipe you’ll actually make!
Expert Tips for Cheese Danish Recipe
-
Use Cold Ingredients: Always start with cold butter and chilled dough for flaky layers; this ensures they rise beautifully and remain light.
-
Egg Wash Essentials: Brush the pastries with egg wash before baking for a glossy, golden finish. It’s a small step that elevates your Cheese Danish!
-
Mind the Filling: Avoid overfilling to prevent leaks during baking. A heaping spoonful is perfect—just enough to ensure that creamy center shines!
-
Cool Before Glazing: Allow your pastries to cool for about 10 minutes before glazing. This makes for better adhesion and a prettier presentation.
-
Experiment with Flavors: Feel free to customize your Cheese Danish by adding fruit preserves, nuts, or chocolate chips to the filling—let your creativity shine!
What to Serve with Flaky Homemade Cheese Danish?
Warm, flaky pastries filled with creamy goodness are just the beginning of a delightful brunch experience!
-
Fresh Fruit Salad: A colorful medley of seasonal fruits complements the richness of the Cheese Danish, adding a refreshing balance on the plate. The sweetness and acidity of fruits like berries or citrus will make each bite even more vibrant.
-
Rich Coffee: A steaming cup of coffee enhances the pastry’s creaminess, creating a cozy pairing. The deep flavors of a good brew perfectly contrast the sweet notes of the Danish.
-
Flavored Tea: A fragrant herbal or fruity tea can lighten the richness of the Cheese Danish, offering a delicate palate cleanser while enjoying the treat. Choose chamomile or berry blends for warmth.
-
Greek Yogurt with Honey: The creamy texture of yogurt drizzled with honey adds another layer of indulgence. This duo provides a delightful tartness that pairs beautifully with the Danish’s sweetness.
-
Savory Quiche: A slice of quiche brings a savory element to your brunch table, creating an inviting balance of flavors, textures, and colors. The lightness of a spinach quiche, for example, contrasts well with the soft, creamy filling of the Danish.
-
Mini Smoothies: Smoothies are a fun way to incorporate greens and fruits for a healthy dish that complements your sweet treat. Try a spinach-banana blend for a refreshing counterpoint to the pastry’s richness.
-
Eggs Benedict: This classic breakfast dish offers a luxurious experience, alongside the cheesy delight of the Danish, appealing to the heartiness of brunch lovers.
-
Chocolate Drizzle: A simple drizzle of melted chocolate over the Danish can add an extra indulgent touch, transforming it into a dessert-worthy treat perfect for sweet cravings.
-
Buttery Croissants: If you want to indulge, pair with additional pastries like buttery croissants to create a pastry platter that invites leisurely enjoyment. The flaky layers will echo the texture of the Danish.
Make Ahead Options
These Cheese Danish are perfect for busy home cooks looking to save time during the week! You can prepare the cream cheese filling and store it in an airtight container in the refrigerator for up to 3 days. Additionally, you can cut your puff pastry or homemade dough in advance, tightly wrap it in plastic, and keep it in the fridge for 24 hours before baking. Just make sure to let the filling come to room temperature before assembling your danishes to ensure even baking. When you’re ready to serve, simply fill the pastries, brush with egg wash, and bake as directed for delicious treats that taste freshly made!
Cheese Danish Recipe Variations
Feel free to customize your Cheese Danish to suit your taste and dietary needs!
-
Fruit-Infused: Spread raspberry or apricot jam on top of the filling before baking for a sweet fruity layer. These flavors will add a delightful zing, elevating the classic taste of the Cheese Danish.
-
Chocolate Delight: Fold in mini chocolate chips into the cream cheese filling for a rich, indulgent treat. Imagine the moment you bite into that luscious filling bursting with gooey chocolate goodness – pure bliss!
-
Nuts For Crunch: Sprinkle chopped nuts, like pecans or almonds, on top of the filling for added texture. The combination of creamy filling and crunchy nuts delivers a satisfying contrast in each bite.
-
Savory Twist: Substitute the sweet cream cheese filling with ricotta mixed with sharp cheese or sautéed vegetables for a savory take. A Cheese Danish can be versatile enough to serve at brunch or as a light lunch option.
-
Dairy-Free Version: Swap cream cheese for a dairy-free cream cheese alternative and use almond milk in the pastry. Enjoy the same beloved flavors while catering to dietary needs.
-
Spice It Up: Add a pinch of cinnamon or nutmeg to your cream cheese filling for a warm, aromatic twist. These spices will enhance the overall flavor profile, making each bite a cozy experience.
-
Glazed Goodness: Drizzle a lemon glaze made from powdered sugar and lemon juice over the top after cooling for extra sweetness and brightness. The glaze enhances the visual appeal and invites you to dig in!
-
Herbal Infusion: Incorporate fresh herbs like rosemary or thyme into a savory cheese filling for an unexpected savory twist. This unique flavor combination can surprise your guests and elevate your brunch table.
If you love baking, you might want to check out my recipes for Moist Banana Bread or sweet & savory Candied Yams Sweet for even more delicious homemade fun! Enjoy the journey of making this recipe your own!
Cheese Danish Recipe You’ll Actually Make Recipe FAQs
What type of cream cheese should I use for the filling?
Absolutely! For the best results, I recommend using full-fat cream cheese. It provides a rich, creamy texture that holds up beautifully during baking, creating that delightful filling we all love. Low-fat cream cheese may compromise the creaminess and taste of the filling, so stick to full-fat for that bakery-quality experience.
How should I store my leftover Cheese Danish?
To keep your Cheese Danish fresh, store them at room temperature in an airtight container for up to 2 days. If you want to extend their shelf life, move them to the refrigerator in an airtight container where they will stay fresh for up to 4 days—though they may lose a bit of that lovely flakiness. Ensure they’re completely cooled before storing to avoid excess moisture!
Can I freeze Cheese Danish?
Certainly! You can freeze unbaked Cheese Danish by wrapping each one tightly in plastic wrap, then placing them in a freezer-safe bag. They’ll be good for up to a month. When you’re ready to bake them, there’s no need to thaw; just pop them directly into the oven from frozen, adding a few extra minutes to the baking time for perfect results.
What should I do if my pastry doesn’t puff up as expected?
If your pastries don’t puff up, it might be due to a few factors, such as using warm ingredients or the dough being too soft. Always start with cold butter and chilled dough. If you notice your dough feels too soft, refrigerate it for about 20-30 minutes before rolling out. Additionally, ensure your oven is preheated adequately so they get that quick burst of steam needed for puffiness!
Are there dietary considerations I should keep in mind?
Yes! If you’re making this Cheese Danish for someone with dietary restrictions or allergies, you can easily adjust the recipe. For a vegan version, replace the cream cheese with cashew cream or a store-bought dairy-free cream cheese alternative, and use a flax egg instead of the egg yolk. Be conscious of any gluten allergies by using gluten-free pastry dough, and feel free to customize the filling to accommodate any additional dietary needs!
Can I use store-bought dough instead of making my own?
Absolutely! Using store-bought puff pastry is a fantastic shortcut and saves time, especially for busy mornings. It still allows you to whip up delicious Cheese Danishes without the hassle of making dough from scratch. Just be sure to follow the package instructions for thawing and handling to achieve those wonderfully flaky layers!

Cheese Danish Recipe You'll Actually Make and Love
Ingredients
Equipment
Method
- In a medium bowl, combine softened cream cheese, granulated sugar, vanilla extract, lemon juice (if using), egg yolk, and salt. Blend until smooth.
- Preheat your oven to 400°F (200°C) and line a baking sheet with parchment paper. Roll out the puff pastry into eight squares.
- Spoon the prepared cream cheese filling into the center of each puff pastry square, then brush the edges with egg wash.
- Bake for 15 to 18 minutes until golden brown. Remove from oven and let cool slightly.
- Prepare the glaze by whisking powdered sugar with milk or lemon juice until smooth. Drizzle over the cooled pastries.
- Serve warm with coffee or tea.
Leave a Reply