
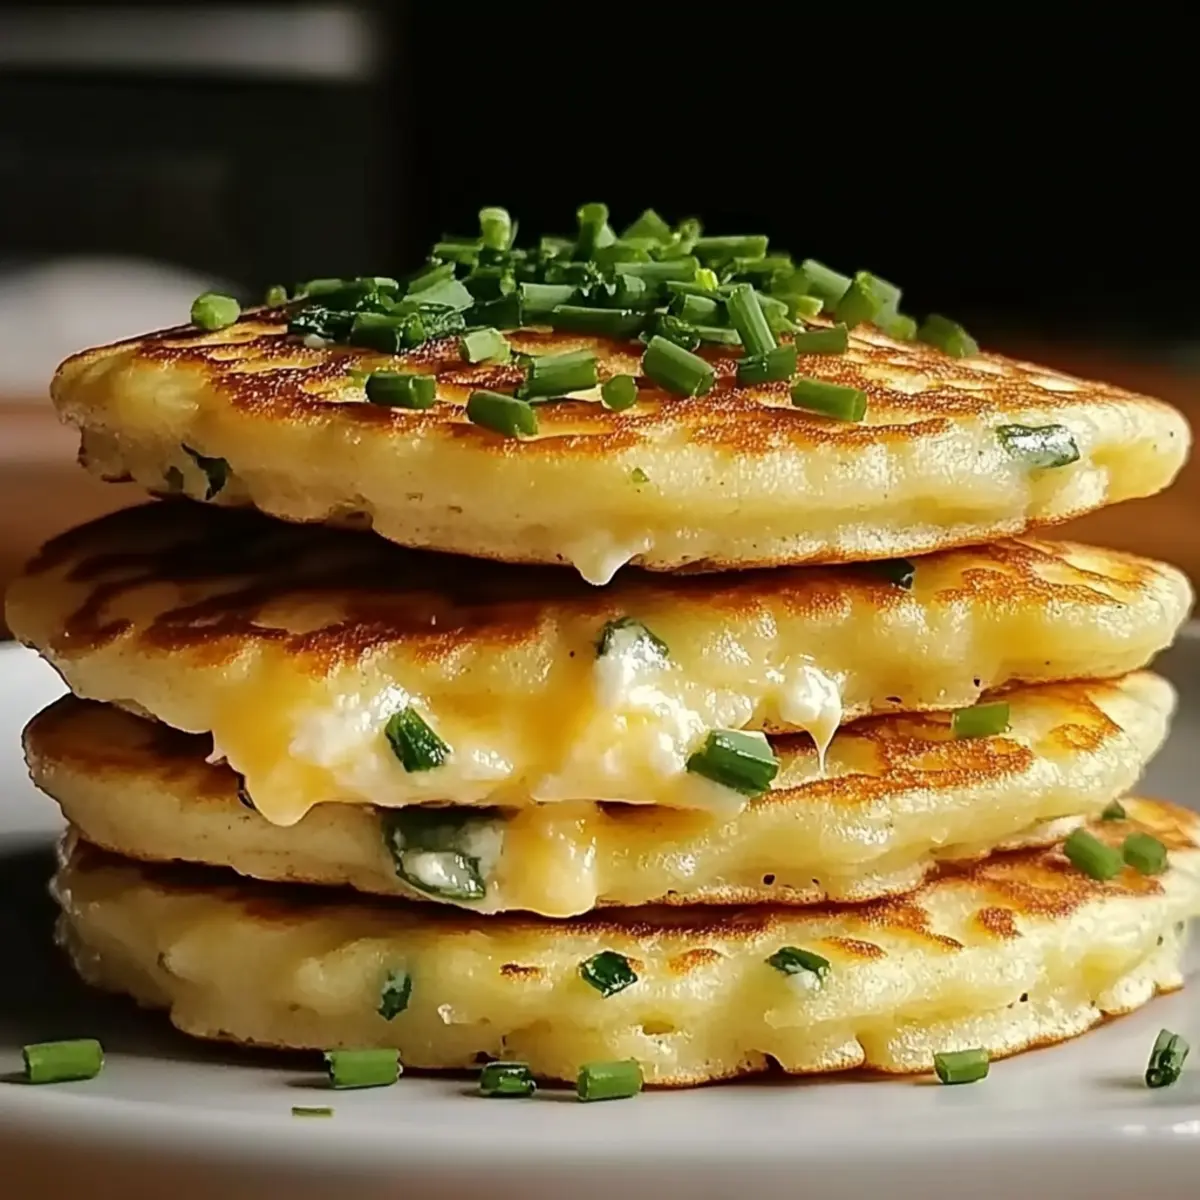
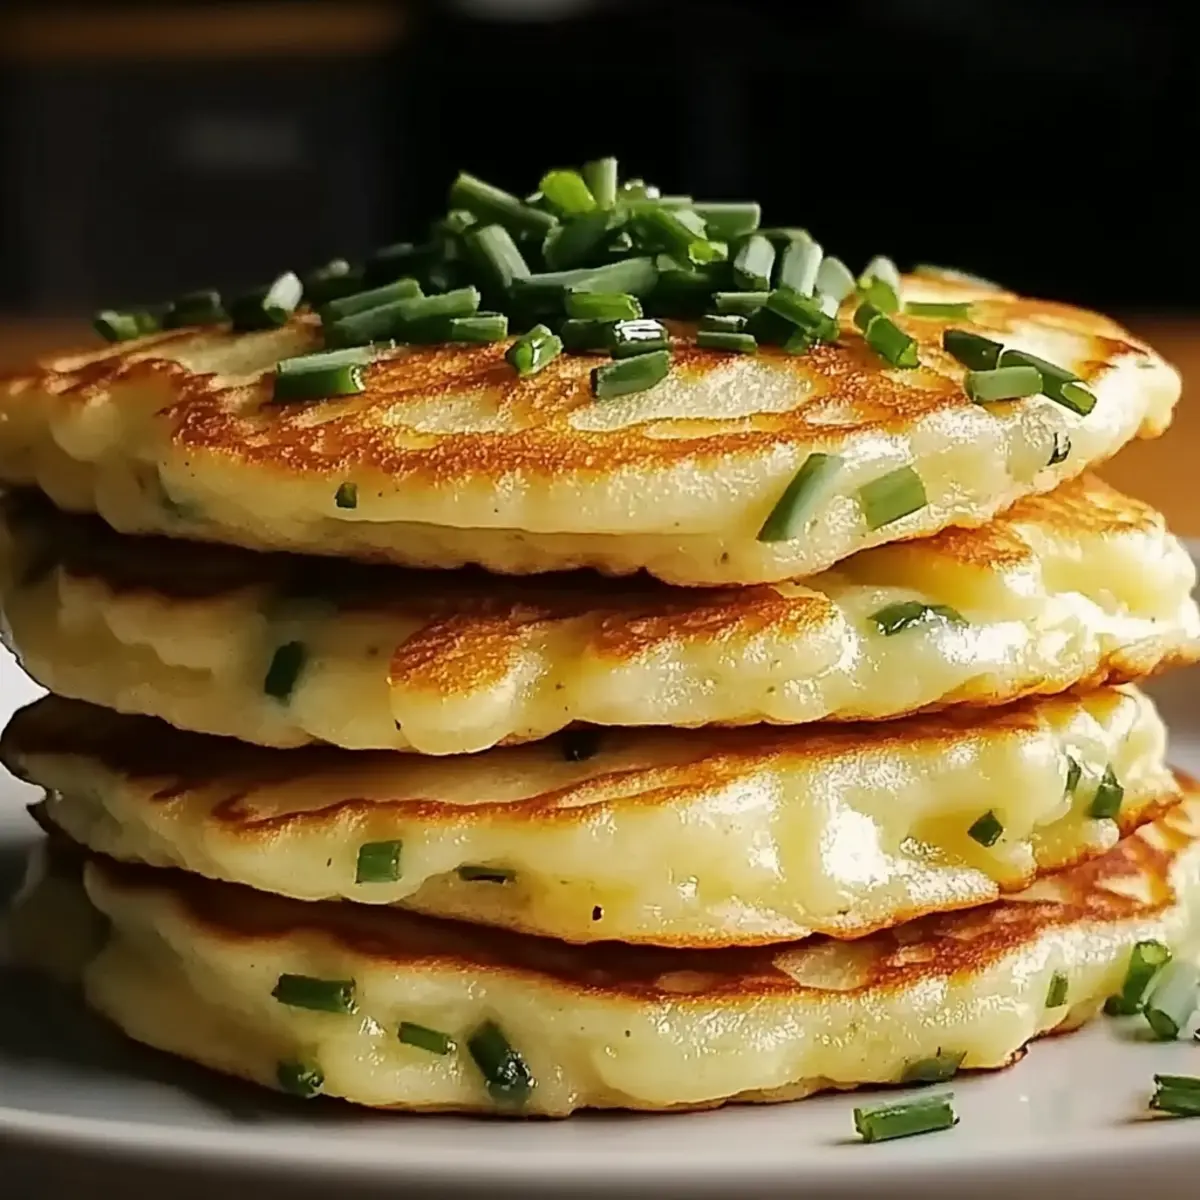
As I flipped the last pancake, the kitchen filled with an irresistible aroma of melted cheese and fresh chives, transforming a simple breakfast into a savory celebration. My family always gets excited when I whip up my Cheese & Chive Pancakes; they are not just a fantastic brunch option but also a delightful twist on the usual routine. The fluffy texture paired with the rich, cheesy flavor makes them a crowd-pleaser any time of day, whether it’s a lazy Sunday morning or a quick dinner fix. Best of all, these pancakes are incredibly versatile; you can experiment with different cheeses or serve them with a dollop of sour cream for an extra treat. Ready to elevate your pancake game? Keep reading to discover how to make these irresistible creations!
Why Are Cheese & Chive Pancakes Unique?
Fluffy, Savory Delight: These Cheese & Chive Pancakes are a game-changer for brunch lovers, featuring a perfect balance of fluffy texture and rich cheese flavor.
Versatile and Customizable: Whether you prefer cheddar, feta, or mozzarella, you can easily tailor these pancakes to suit your taste.
Quick and Easy: Whip them up in no time—ideal for busy mornings or spontaneous brunch gatherings!
Crowd-Pleasing Option: They’re sure to impress family and friends, making your meals feel special, any day of the week.
Perfect Pairing: Serve them alongside a fresh salad or even these delicious Strawberry Cream Cheese muffins for a delightful spread!
Cheese & Chive Pancakes Ingredients
For the Batter
- Flour – Base for the pancakes; provides structure. Note: Can substitute with whole wheat flour for a hearty option.
- Baking Powder – Leavening agent; ensures pancakes rise and become fluffy. No substitutions recommended.
- Salt – Enhances flavor; adds balance to the sweetness of the pancakes. Can reduce for lower sodium diets.
- Egg – Binds ingredients; adds richness. Substitute with a flax egg for a vegan option.
- Milk – Hydrates the batter for lighter pancakes. Use almond milk for a dairy-free version.
For the Flavor
- Cheese (e.g., Cheddar) – Adds richness and savory flavor. Other cheeses like feta or gouda can alter the taste profile.
- Chives – Introduces a fresh, herbal note; enhances overall flavor. Substitute with green onions if chives are unavailable.
For Cooking
- Butter – Creates a non-stick surface and adds flavor. Use a cooking spray for a lighter option.
Dive into making the delightful Cheese & Chive Pancakes that are sure to elevate your brunch game!
Step‑by‑Step Instructions for Cheese & Chive Pancakes
Step 1: Combine Dry Ingredients
In a medium mixing bowl, whisk together 1 cup of flour, 1 tablespoon of baking powder, and ½ teaspoon of salt until evenly mixed. This creates the base for your Cheese & Chive Pancakes, ensuring they’re fluffy. Make sure there are no lumps for a smooth batter, as this will impact the final texture of your pancakes.
Step 2: Mix Wet Ingredients
In a separate bowl, crack in 1 large egg and pour in ¾ cup of milk. Whisk the egg and milk together until well combined and frothy, which takes about 1 minute. This mixture will add richness and moisture to the pancakes, so ensure it’s fully incorporated before adding to the dry ingredients.
Step 3: Combine Wet and Dry Mixtures
Gently pour the wet mixture into the bowl containing the dry ingredients. Using a spatula, stir until just combined, which should take about 30 seconds. It’s important to keep a few lumps in the batter for fluffy Cheese & Chive Pancakes, so avoid overmixing at this stage.
Step 4: Fold in Cheese and Chives
Carefully fold in 1 cup of shredded cheese and ¼ cup of chopped chives into the batter. Use a spatula to gently combine until evenly distributed without overworking the batter. The melted cheese and fresh chives are what make your pancakes irresistible, giving them a savory twist that everyone will love.
Step 5: Heat the Skillet
Place a non-stick skillet over medium heat and add 1 tablespoon of butter. Allow the butter to melt and bubble—this should take about 1-2 minutes. Once bubbling, the butter creates a golden surface for cooking your Cheese & Chive Pancakes, so be sure the skillet is properly heated before moving on.
Step 6: Cook the Pancakes
Pour a ladleful of pancake batter onto the skillet. Cook for about 2-3 minutes, or until bubbles form on the surface and the edges look set. Flip the pancake gently, then cook for an additional 2-3 minutes until golden brown. Repeat this process with the remaining batter, adding more butter as needed to ensure a non-stick surface.
Step 7: Serve and Enjoy
Once cooked, stack the warm Cheese & Chive Pancakes on a plate. They are best enjoyed fresh off the skillet; consider serving with a dollop of sour cream or a drizzle of honey for an unexpected treat. Enjoy your delightful creation, perfect for any mealtime!

Cheese & Chive Pancakes Variations
Feel free to unleash your creativity and customize these delicious pancakes to suit your taste preferences!
-
Cheese Swap: Use feta for a tangy kick or mozzarella for a mild, creamy twist.
-
Herb Infusion: Try adding fresh parsley or dill for a unique flavor profile. Each herb brings its own aromatic touch to the dish.
-
Spice It Up: Incorporate a pinch of cayenne pepper or paprika for a mild heat that complements the cheese beautifully. Imagine that warm, zesty flavor elevating each bite.
-
Chive Alternatives: Substitute with green onions if chives aren’t available, adding a slightly different culinary flair without losing the freshness.
-
Dairy-Free Delight: Use almond milk and a flax egg for a vegan version that maintains the pancakes’ deliciousness without the dairy.
-
Savory Toppings: Serve with a dollop of Greek yogurt or a drizzle of maple syrup for a sweet-savory combination that will wow your taste buds.
-
Vegetable Variations: Fold in spinach or zucchini for added nutrition and a hearty texture. The veggies will make every pancake a little more filling and colorful.
-
Gourmet Touch: Enhance your serving by adding a sprinkle of fresh herbs like basil or a handful of arugula on the side for an elevated brunch experience.
For more delightful cheese recipes that you’ll love, consider mixing it up with these Pomegranate Feta Cheese dips or even these wonderful Cheese Danish Actually for a touch of sweetness!
How to Store and Freeze Cheese & Chive Pancakes
Fridge: Store leftover Cheese & Chive Pancakes in an airtight container for up to 3 days. This keeps them fresh and moist, ready for your next meal.
Freezer: Freeze pancakes by laying them flat in a single layer on a baking sheet before transferring them to a freezer-safe bag. They can be stored for up to 2 months.
Reheating: Reheat pancakes in a skillet over medium heat for 1-2 minutes on each side, or microwave them for 30-60 seconds until warm. This preserves their fluffy texture and savory flavor.
Tips for Best Results: When reheating, consider adding a little butter to the skillet for extra flavor and moisture.
Expert Tips for Cheese & Chive Pancakes
-
Mind the Mixing: Avoid overmixing the batter; a few lumps are perfectly fine, leading to fluffy Cheese & Chive Pancakes.
-
Heat Matters: Allow your skillet to preheat properly for a golden-brown crust, ensuring each pancake cooks evenly.
-
Cheese Variety: Experiment with different cheeses like feta or gouda to enhance flavors, but always choose high-quality cheese for the best taste.
-
Adjust the Salt: If you’re reducing sodium, remember that cheese already adds saltiness, so you might need less in the batter.
-
Topping Choices: Try serving with various toppings like Greek yogurt or even a sprinkle of fresh herbs for a gourmet touch!
Make Ahead Options
These Cheese & Chive Pancakes are perfect for meal prep enthusiasts looking to save time during busy mornings! You can prepare the batter up to 24 hours in advance by mixing the dry ingredients and combining them with the wet ones; just be sure to store it in an airtight container in the refrigerator to maintain freshness. Alternatively, you can cook the pancakes ahead of time and refrigerate them for up to 3 days. When ready to serve, simply reheat them on a skillet or in the microwave; they will be just as delicious! This approach not only speeds up your brunch but also allows you to enjoy the delightful flavor of Cheese & Chive Pancakes any day of the week.
What to Serve with Cheese & Chive Pancakes
As you savor the cheesy goodness of these fluffy pancakes, consider delightful pairings that elevate your meal experience.
- Creamy Avocado Toast: The buttery richness of avocado complements the savory notes of the pancakes for a satisfying bite.
- Fresh Garden Salad: A light salad adds crunch and freshness, balancing the flavors while enhancing your brunch spread beautifully.
- Crispy Bacon or Sausage: The salty, savory profile of crispy bacon or sausage creates a delightful contrast with the cheese in your pancakes.
- Smoky Tomato Soup: A warm bowl of smoky tomato soup offers a comforting touch, perfect for dipping or enjoying on a chilly day.
- Poached Eggs: Adding perfectly poached eggs on top brings a rich, creamy element that takes your brunch to the next level.
- Herbed Yogurt Sauce: A dollop of tangy herbed yogurt adds a refreshing zing, enhancing the overall flavor without overwhelming the dish.
- Sparkling Lemonade: A glass of sparkling lemonade refreshes your palate and brightens up the savory flavors of the pancakes.
- Fruit Compote: A sweet-tart fruit compote provides a tasty contrast, inviting a unique flavor profile to your brunch experience.

Cheese & Chive Pancakes Recipe FAQs
What type of cheese should I use for Cheese & Chive Pancakes?
Absolutely! While cheddar is a popular choice, feel free to experiment with other cheeses like feta for a tangy bite or gouda for a creamier texture. Each cheese brings its own character to the pancakes, so have fun exploring what you like best!
How long can I store leftover Cheese & Chive Pancakes?
You can store your leftover pancakes in an airtight container in the refrigerator for up to 3 days. This keeps them fresh and convenient for a quick meal. Just reheat them in a skillet or microwave before serving to enjoy their delightful flavors again!
Can I freeze Cheese & Chive Pancakes?
Yes, freezing is a great option! Lay the cooked pancakes flat in a single layer on a baking sheet for about 30 minutes, until frozen. Then, transfer them to a freezer-safe bag. They can be stored for up to 2 months! Just remember to defrost them in the refrigerator overnight before reheating.
How do I reheat Cheese & Chive Pancakes properly?
To reheat, take your pancakes out of the fridge or freezer. If frozen, allow them to thaw first. Heat a non-stick skillet over medium heat and add a bit of butter, then warm each pancake for about 1-2 minutes on each side. This method helps retain their fluffy interior and delicious savory flavors!
What can I do if my pancake batter is too thick?
If your batter seems too thick, don’t worry! Simply add a splash of milk, one tablespoon at a time, until you reach your desired consistency. The batter should be pourable but still thick, helping create those fluffy stacks you’ve been dreaming of. Just remember to keep a few lumps for the best texture!
Are there any dietary considerations I should be aware of?
If you’re hosting someone with dietary restrictions, you can easily adapt the recipe. For a vegan option, substitute the egg with a flax egg (1 tablespoon of ground flaxseed mixed with 2.5 tablespoons of water), and use almond milk instead of regular milk. Just be mindful of cheese; using nut-based cheese can be a great alternative for those avoiding dairy!
Cheese & Chive Pancakes: A Savory Brunch to Savor
Ingredients
Equipment
Method
- In a medium mixing bowl, whisk together 1 cup of flour, 1 tablespoon of baking powder, and ½ teaspoon of salt until evenly mixed.
- In a separate bowl, crack in 1 large egg and pour in ¾ cup of milk. Whisk together until well combined and frothy.
- Gently pour the wet mixture into the dry ingredients. Using a spatula, stir until just combined, ensuring to keep a few lumps.
- Fold in 1 cup of shredded cheese and ¼ cup of chopped chives into the batter, ensuring not to overwork it.
- Place a non-stick skillet over medium heat and add 1 tablespoon of butter. Allow the butter to melt and bubble.
- Pour a ladleful of pancake batter onto the skillet. Cook for about 2-3 minutes, then flip and cook for another 2-3 minutes.
- Once cooked, stack the pancakes and serve with a dollop of sour cream or a drizzle of honey.
Leave a Reply