
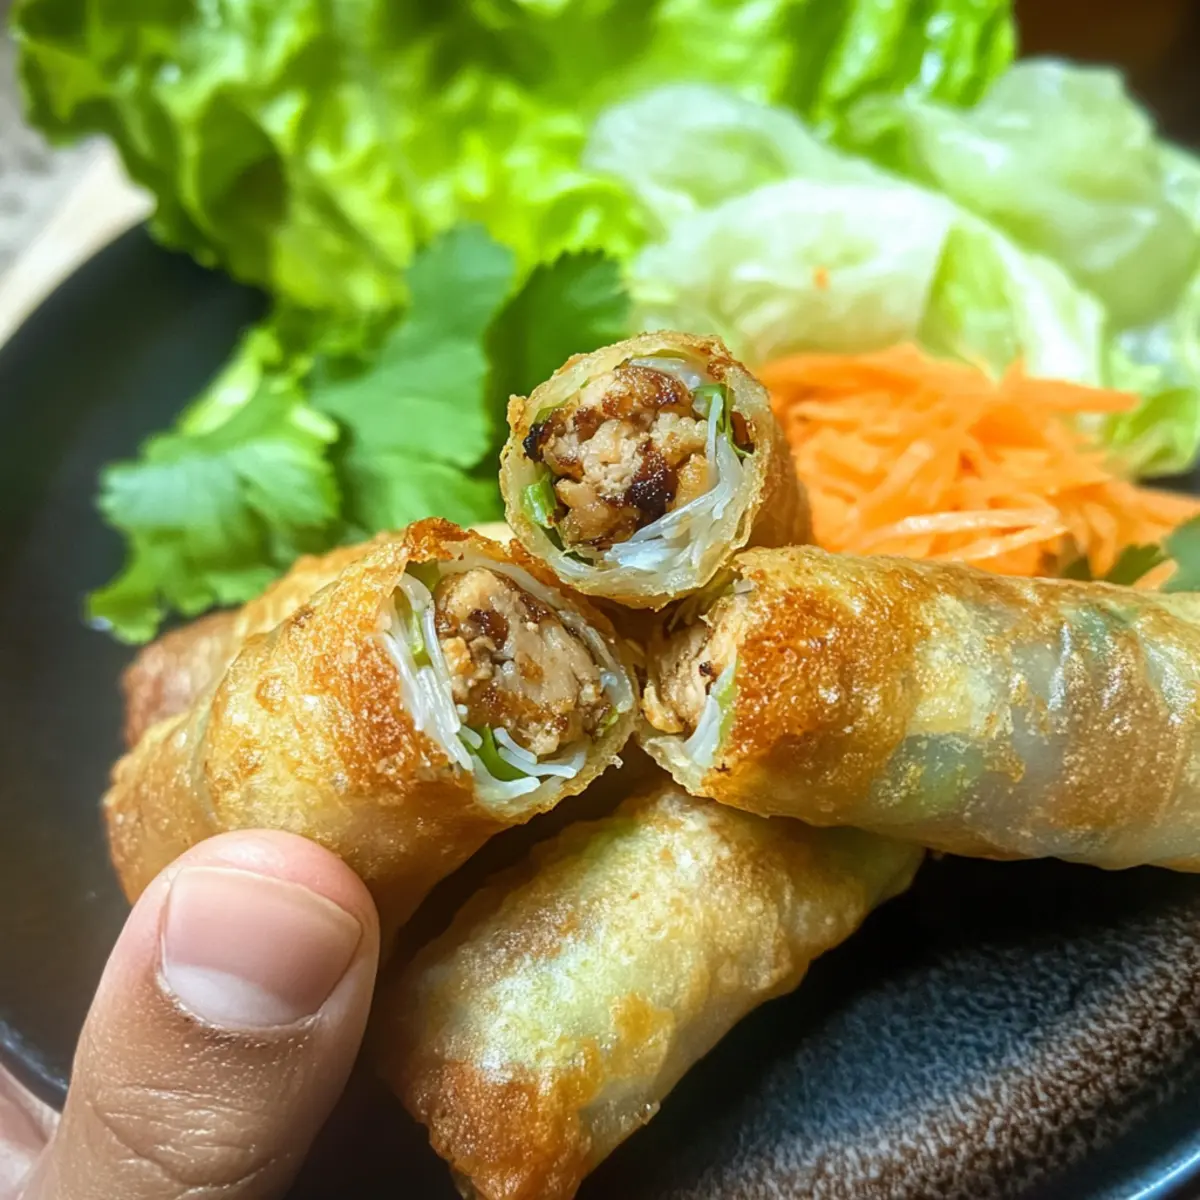
The aroma of sizzling spring rolls fills my kitchen, transporting me straight to the bustling streets of Vietnam, where Chả Giò reigns supreme. These crispy Vietnamese Fried Spring Rolls are more than just a treat; they are a delightful canvas for presentation and creativity, perfect for whipping up with friends or family. Filled with savory ground chicken, fresh veggies, and glass noodles, they pack a satisfying crunch that’s hard to resist. Not only are they quick to make, but they are also wonderfully versatile—customizable for meat lovers and vegetarians alike, and freeze beautifully for those unexpected snack attacks. Curious how to achieve that dream crispiness? Let’s dive into this easy recipe and discover the joy of making Chả Giò at home!
Why is Chả Giò a Must-Try?
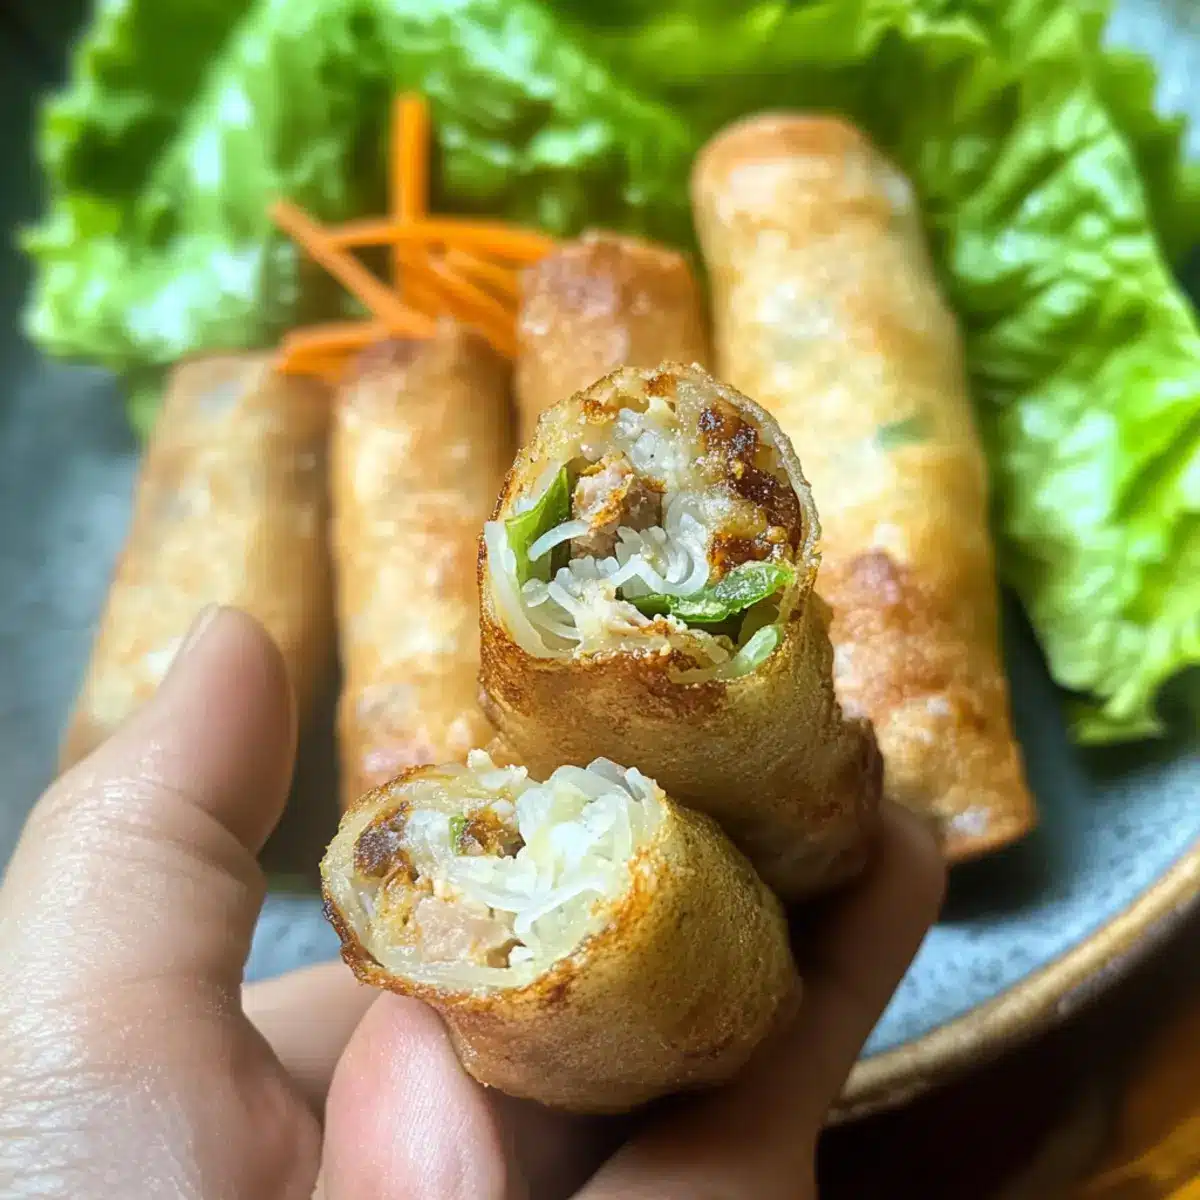
Crispy Perfection: Achieving that amazing crunch is easier than you think! These spring rolls are double-fried for an unbeatable texture that you’ll crave.
Customizable Fillings: Whether you’re a meat lover or a vegetarian, you can fill these with ground chicken, pork, shrimp, or even tofu! The possibilities are endless, mirroring the delicious variations found in authentic Vietnamese cuisine.
Quick and Easy: Ideal for weeknight dinners or entertaining guests, these rolls come together in no time. Simply mix, wrap, and fry for a satisfying dish that impresses without all the fuss.
Wonderful for Freezing: Make a big batch and freeze un-fried rolls for up to a month. When cravings hit, just fry them straight from the freezer for a speedy snack!
Crowd-Pleasing Delight: Serve them at your next gathering with homemade Nuoc Cham sauce and watch them disappear faster than you can say “Chả Giò.” They are sure to be a hit with everyone around your table!
Chả Giò Ingredients
• The essential components for Crispy Vietnamese Fried Spring Rolls!
For the Wrappers
- Rice Paper Wrappers – These are light and gluten-free essentials for wrapping Chả Giò.
For the Filling
- Ground Chicken – Provides protein and flavor; can substitute with pork, shrimp, or tofu for a vegetarian option.
- Carrot (shredded) – Adds crunch and sweetness; zucchini can be a delightful variation.
- Glass Noodles (vermicelli) – Offers texture; soak in warm water or swap for cooked rice or quinoa.
- Dried Wood Ear Mushrooms (soaked and chopped) – Adds umami and texture; replace with shiitake mushrooms if needed.
- Onion (finely chopped) – Enhances flavor; shallots or green onions are excellent substitutes.
- Garlic (minced) – Infuses aromatic depth; you can use powdered garlic as an alternative.
- Brown Sugar – Balances flavors perfectly; white sugar or honey works in moderation.
- Fish Sauce – Adds a salty, umami flavor; use soy sauce for a vegan version.
Optional for Serving
- Fresh Lettuce and Herbs – Perfect for wrapping spring rolls for a fresh crunch; mint and cilantro elevate the dish.
- Nuoc Cham Sauce – A tangy dipping sauce that brings all the flavors together beautifully!
Now you have all the ingredients ready to create the perfect Chả Giò. Let’s get cooking!
Step‑by‑Step Instructions for Cha Gio (Vietnamese Fried Spring Rolls)
Step 1: Prepare the Filling
In a large mixing bowl, combine ground chicken, shredded carrot, chopped glass noodles, soaked wood ear mushrooms, finely chopped onion, and minced garlic. Season the mixture with brown sugar, fish sauce, salt, and pepper. Stir everything well until all ingredients are evenly incorporated—this should take about 3–4 minutes. The fragrant mixture will be the heart of your delicious Cha Gio.
Step 2: Soak the Rice Paper
Fill a shallow dish with warm water. Take one rice paper wrapper and gently dip it into the water for about 10–15 seconds or until it becomes pliable. Carefully lift the wrapper out and let any excess water drip off, then place it on a clean, flat surface. This step is crucial, as the wrapper must be flexible for wrapping your spring rolls.
Step 3: Assemble the Rolls
Lay the soaked rice paper wrapper flat and spoon 1-2 tablespoons of the filling mixture into the center. Fold the sides over the filling, then roll the wrapper tightly from the bottom up, tucking in the filling as you go. Ensure it’s secure to avoid any filling escaping during frying. Repeat this process with the remaining wrappers and filling until all Cha Gio are assembled.
Step 4: First Frying
In a deep frying pan, heat vegetable oil to 170°C (340°F). Carefully add a few spring rolls to the hot oil in batches, ensuring not to overcrowd the pan. Fry for about 6-7 minutes, turning occasionally until they turn a light golden brown and are crisp on the outside. Using a slotted spoon, remove the rolls and place them on paper towels to drain excess oil.
Step 5: Second Frying for Extra Crispiness
Increase the oil temperature to 180°C (350°F). Return the partially-fried rolls to the oil in batches and fry for an additional 2-3 minutes. This second frying will give your Cha Gio an irresistible deep golden color and extra crunch. Again, use a slotted spoon to remove the rolls and drain them on paper towels.
Step 6: Serve and Enjoy
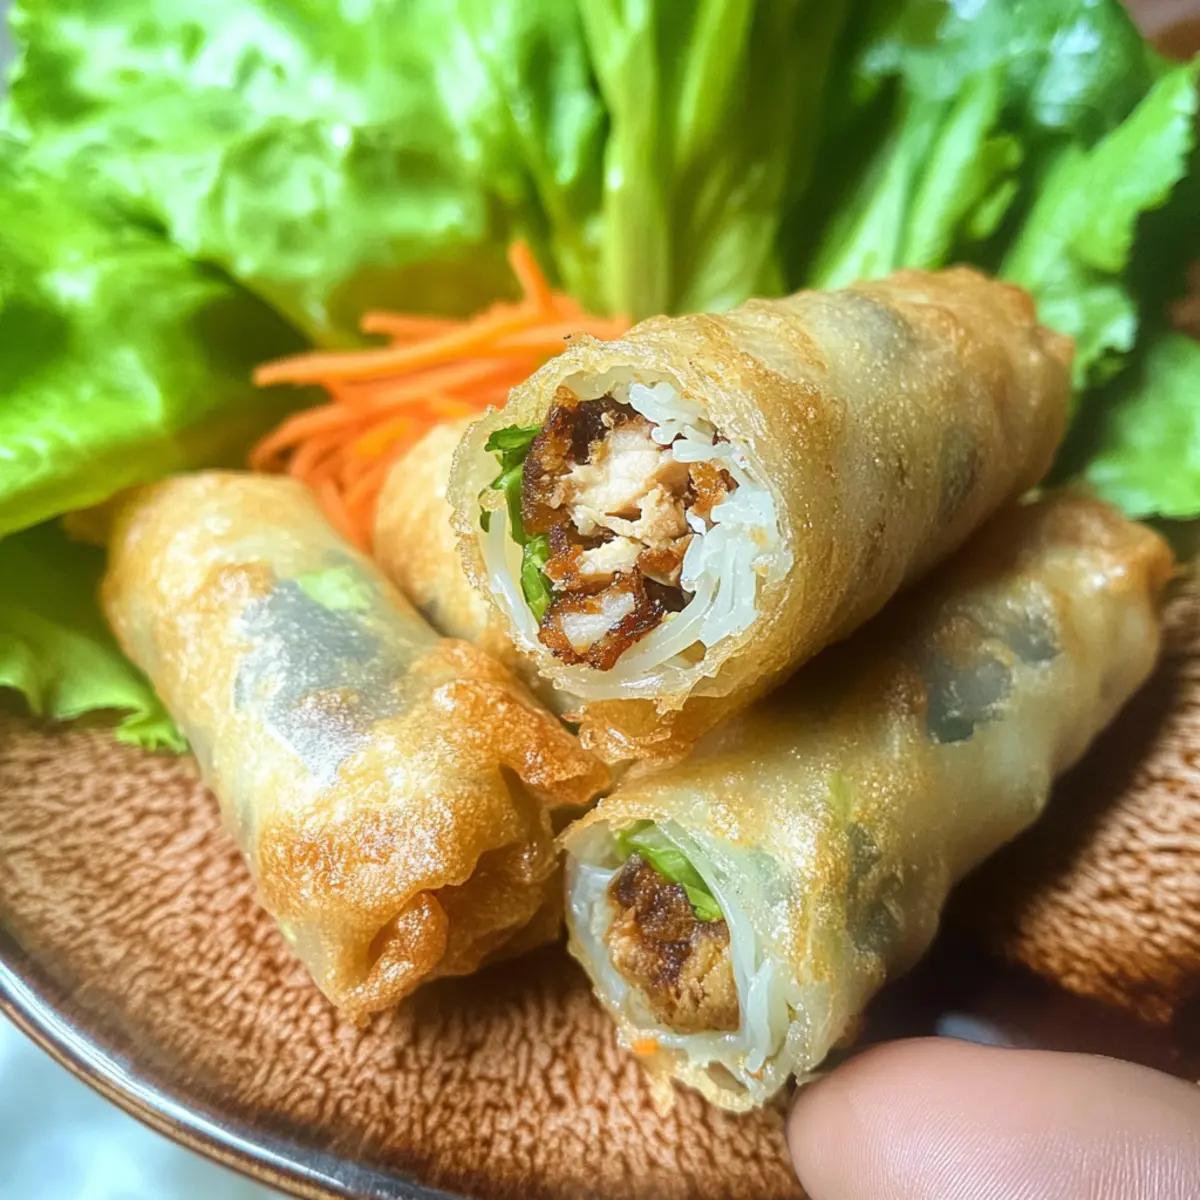
Arrange the hot, crispy Cha Gio on a serving platter. Pair them with fresh lettuce leaves and herbs for wrapping, along with a side of tangy Nuoc Cham sauce for dipping. This vibrant presentation not only enhances the visual appeal but also adds freshness to every bite, making your homemade Vietnamese Fried Spring Rolls perfect for any gathering.
What to Serve with Crispy Vietnamese Fried Spring Rolls?
The delightful crunch and savory filling of these spring rolls can be perfectly complemented by a variety of sides and drinks that enhance your meal experience.
-
Fresh Herb Salad: A light, crisp salad with mint and cilantro provides a refreshing contrast to the rich spring rolls, enhancing every bite.
-
Lemongrass Chicken Skewers: Grilled skewers drenched in lemongrass marinade offer a smoky flavor that pairs beautifully with the delicate crunch of Cha Gio.
-
Rice Noodle Salad: A cool salad of rice noodles, fresh veggies, and a zesty dressing brings brightness and texture to your meal, balancing the heavier fried rolls.
-
Sweet and Sour Dipping Sauce: While Nuoc Cham is a must, a sweet and sour sauce adds an extra layer of tanginess that perfectly complements the savory flavors of the spring rolls.
-
Kimchi: The tangy spices from this fermented classic introduce a delightful sharpness, adding depth to your plate and a conversation starter for your guests.
-
Iced Green Tea: This aromatic drink refreshes your palate, offering a soothing counterpoint to the crispy fried goodness, making every bite even more enjoyable.
-
Mango Sticky Rice: For dessert, this sweet and creamy treat adds a hint of tropical flavor that wraps up your meal wonderfully, contrasting with the savory Cha Gio.
-
Garlic Fried Rice: A simple side of garlic fried rice brings earthy notes and its own crunch, giving a comforting, hearty balance to the meal.
-
Sriracha or Chili Sauce: For those who like it spicy, simply serve a side of Sriracha or your favorite chili sauce to add a kick to each delectable bite of spring roll!
-
Coconut Water: Rehydrating and refreshing, coconut water cleanses the palate, balancing the richness of the crispy rolls for a truly satisfying dining experience.
Make Ahead Options
These crispy Cha Giò (Vietnamese Fried Spring Rolls) are perfect for meal prep enthusiasts! You can assemble the rolls and refrigerate them up to 24 hours in advance, ensuring they’re ready for a quick frying session when you’re short on time. Just be sure to cover them with a damp cloth to prevent the rice paper from drying out. Alternatively, you can freeze un-fried spring rolls for up to a month; simply fry them straight from the freezer, adding an extra minute or two to achieve that coveted golden crunch. When you’re ready to serve, a quick double fry will deliver the same delicious results just like they were made fresh!
Expert Tips for Making Cha Gio
-
Oil Temperature: Maintain precise oil temperatures at 170°C (340°F) and 180°C (350°F). This prevents the rolls from becoming soggy during frying.
-
Wrapping Technique: Don’t overfill the rice paper wrappers. Aim for 1-2 tablespoons of filling to allow for a tight seal and avoid leaks while cooking.
-
Batch Cooking: Fry spring rolls in small batches. Overcrowding the pan lowers the oil temperature, leading to uneven cooking and less crispiness in your Cha Gio.
-
Freezing Prep: For convenience, freeze un-fried rolls on a baking sheet before transferring them to a freezer bag. Fry from frozen for quick snacks!
-
Reheating Tips: To restore crispiness, reheat cooked spring rolls in the oven rather than the microwave. This keeps them crunchy!
How to Store and Freeze Cha Gio
Fridge: Store cooked Cha Gio in an airtight container for up to 2 days. To reheat, place them in the oven at 350°F (175°C) for about 10 minutes to regain their crispness.
Freezer: Freeze un-fried Cha Gio on a baking sheet, then transfer to a freezer bag for storage up to 1 month. Fry directly from frozen when cravings hit, adding an extra minute or two in the hot oil.
Room Temperature: Keep fried spring rolls at room temperature for a maximum of 2 hours. If you’re serving them for a gathering, it’s best to leave them covered lightly so they stay warm and inviting.
Reheating: For best results, reheat any leftover cooked rolls in the oven instead of the microwave to maintain that irresistible crunch that makes Cha Gio so delightful!
Cha Gio Variations & Substitutions
Feel free to make these delightful spring rolls your own with these fun tweaks and substitutions—your taste buds will thank you!
- Meat Options: Substitute ground chicken with pork or shrimp for varied flavors. Each meat offers its unique twist, bringing new life to your Cha Gio.
- Vegetarian Delight: Use tofu as your protein base and pack with a variety of colorful vegetables. A medley of fresh veggies adds wonderful nutrition and flavor.
- Gluten-Free: Opt for rice paper wrappers and check sauces like soy to ensure they’re gluten-free. These simple swaps allow everyone to enjoy this dish worry-free!
- Flavor Enhancer: Incorporate herbs like cilantro or mint into the filling for a refreshing twist. A hint of fresh herbs elevates every bite and brings a delightful aroma.
- Baked Version: Skip the frying and bake at 400°F (200°C) for 20-25 minutes for a lighter approach. Golden and crispy, these baked rolls are a healthier alternative without sacrificing flavor.
- Heat Factor: Add a pinch of red pepper flakes or sliced jalapeños to your filling for those who like a kick. This subtle heat complements the savory ingredients beautifully!
- Alternative Noodles: Swap glass noodles for cooked rice or quinoa for a different texture. Your Cha Gio still shines with satisfying, hearty filling as you play around with base ingredients.
- Sweet Touch: Consider adding a side of sweet chili sauce for dipping instead of Nuoc Cham. The sweet and spicy combination is adored by many and adds a gourmet flair!
Ready to unleash your creativity in the kitchen? Find inspiration in other delectable recipes like Pineapple Chicken Fried, or check out my guide on Freakin Fried Rice to add even more variety to your meal adventures!

Cha Gio (Vietnamese Fried Spring Rolls) Recipe FAQs
How do I choose the best rice paper wrappers?
Absolutely! When selecting rice paper wrappers, look for ones that are smooth, unbroken, and labeled as “spring roll” or “bánh tráng.” They should feel flexible and slightly chewy, which ensures they wrap beautifully without tearing. The size is also important; larger wrappers are better for larger rolls, while smaller ones suit bite-sized portions. Freshness is key, so check the expiration date!
What’s the best way to store leftover spring rolls?
Very! Cooked Cha Gio can be stored in an airtight container in the fridge for up to 2 days. I recommend reheating them in the oven at 350°F (175°C) for about 10 minutes to revive their crispy texture. Avoid microwaving them, as it can make them soggy.
Can I freeze Cha Gio?
Indeed! To freeze un-fried Cha Gio, arrange them in a single layer on a baking sheet and place them in the freezer for 1-2 hours until solid. Once frozen, transfer them to a freezer bag for up to 1 month. When you’re ready to enjoy, fry them straight from the freezer, allowing an extra minute or two in the hot oil for that perfect crunch.
What should I do if my spring rolls become soggy?
Oh no! If your rolls turn out soggy, it’s often due to inaccuracy in oil temperature or overcrowding the pan. To troubleshoot, make sure to fry in batches in hot oil—maintain your temperatures at 170°C (340°F) for the first fry and 180°C (350°F) for the second fry. This will help achieve that crispy golden exterior you desire!
Are Cha Gio suitable for everyone, including those with allergies?
Certainly! You can customize Cha Gio to accommodate dietary restrictions. If gluten is a concern, use only rice paper wrappers (which are naturally gluten-free). For individuals with shellfish allergies, omit shrimp and use chicken or tofu instead. Cooking with fresh ingredients allows you to cater to various dietary needs while still enjoying delicious flavors!
Crispy Cha Gio (Vietnamese Fried Spring Rolls) Made Easy
Ingredients
Equipment
Method
- Prepare the Filling: In a large mixing bowl, combine ground chicken, shredded carrot, chopped glass noodles, soaked wood ear mushrooms, finely chopped onion, and minced garlic. Season with brown sugar, fish sauce, salt, and pepper. Mix well for 3-4 minutes.
- Soak the Rice Paper: Fill a shallow dish with warm water. Dip one rice paper wrapper for 10-15 seconds until pliable. Remove and let excess water drip.
- Assemble the Rolls: Spoon 1-2 tablespoons of filling into the center of the soaked rice paper. Fold the sides over and roll tightly from the bottom, securing the filling.
- First Frying: Heat vegetable oil to 170°C (340°F) in a deep frying pan. Fry spring rolls in batches for 6-7 minutes until golden brown. Drain on paper towels.
- Second Frying for Extra Crispiness: Increase oil temperature to 180°C (350°F). Fry the partially-fried rolls for another 2-3 minutes until deep golden. Drain again on paper towels.
- Serve and Enjoy: Arrange crispy Cha Gio on a platter with fresh lettuce leaves and Nuoc Cham sauce for dipping.
Leave a Reply