
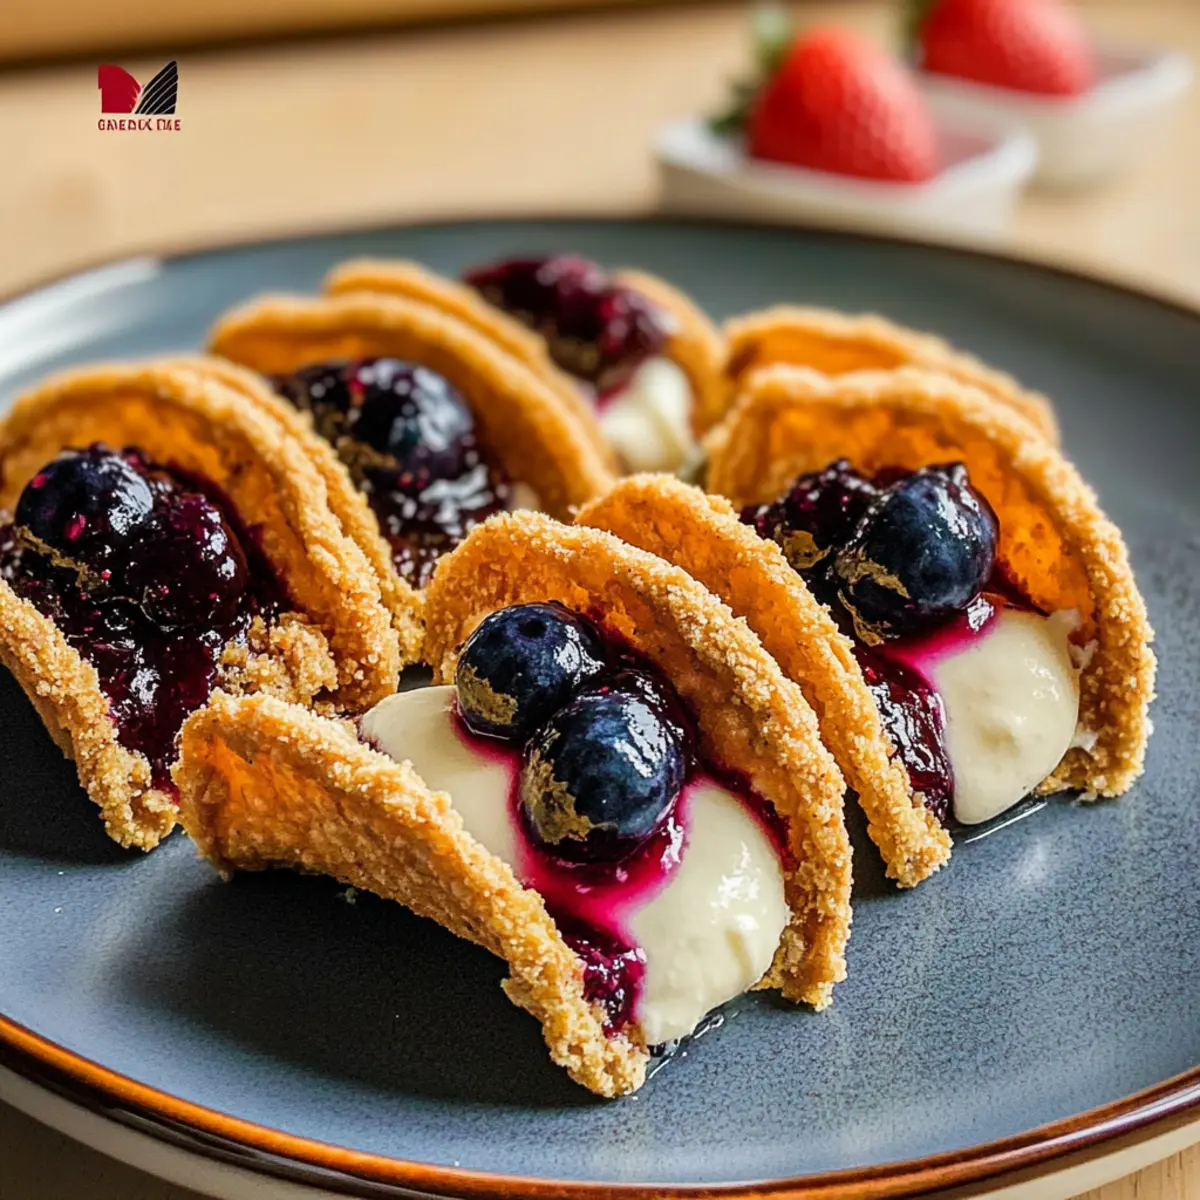
As I sank my teeth into a sweet taco filled with creamy goodness, a wave of happiness washed over me. These Berrylicious Cheesecake Tacos offer a delightful reimagining of your favorite dessert, combining the buttery crunch of graham cracker crusts with a luscious cheesecake filling. Imagine a fun dessert that’s not just delicious but also incredibly easy to whip up! Perfect for summer soirées, gatherings, or even a treat on a quiet weekend, this recipe is sure to impress your friends and family. With their vibrant colors and portable nature, these tacos not only elevate your dessert game but also encourage creativity—feel free to mix and match your favorite fruits! Ready to take a delicious detour into dessert tacos? Let’s get started!
Why Are They So Irresistible?
Unique Concept: Cheesecake meets taco in a fun fusion that delights the senses.
Easy to Make: Simple steps make these tacos a breeze, perfect for any cooking skill level.
Colorful Presentation: The vibrant toppings add a visual appeal, making them a stunning addition to any dessert table.
Versatile Flavors: Feel free to customize with your favorite jams or fresh fruits—each bite can be a new adventure! Experience the joy of these Crunchy Asian Tacos or Blackened Shrimp Tacos for sweet and savory options.
Crowd-Pleaser: These creative treats are sure to impress guests at any gathering, sparking conversations and smiles.
Indulgent Yet Light: The creamy filling balanced with the crunch creates a perfect dessert dichotomy.
Berrylicious Cheesecake Tacos Ingredients
• Dive into the delightful world of Berrylicious Cheesecake Tacos with these mouthwatering ingredients!
For the Taco Shells
- Tortillas – Use 5, 8-inch tortillas to create the perfect taco base.
- Graham Cracker Crumbs – Provide a crunchy texture reminiscent of cheesecake crust; can substitute with crushed biscotti or cookies for different flavors.
- Unsalted Butter (⅓ cup) – Binds graham cracker crumbs to create the shell; make sure it’s melted for easy coating.
For the Cheesecake Filling
- Cream Cheese (9 ounces) – The main ingredient for a rich, creamy center; ensure it’s at room temperature for smooth blending.
- Heavy Cream (1 cup) – Adds lightness to the filling; you can substitute with whipped coconut cream for a dairy-free version.
- Powdered Sugar (⅓ cup) – Sweetens the cheese filling for the right consistency.
- Lemon Juice (1 tsp) – Brightens the flavor, cutting through the richness of the filling.
- Vanilla Extract (1 tsp) – Enhances sweetness and adds depth to the tasty filling.
For the Toppings
- Blueberry Jam & Strawberry Jam – Adds colorful fruity toppings for an appealing finish; feel free to use fresh fruit for a healthier option!
These Berrylicious Cheesecake Tacos promise to be a hit, showcasing indulgence wrapped in a fun taco format. Enjoy crafting this sweet treat!
Step‑by‑Step Instructions for Berrylicious Cheesecake Tacos
Step 1: Preheat the Oven
Begin by preheating your oven to 400℉ (200℃). This initial step ensures that when you bake the taco shells, they’ll come out perfectly golden and crisp. While the oven heats, you can prepare other components of the Berrylicious Cheesecake Tacos, making the process more efficient.
Step 2: Prepare Tortillas
Stack your 8-inch tortillas and use a 1.5-inch cookie cutter to cut out 5 circles. Next, take a fork and pierce each circle a few times to prevent air bubbles during baking. This simple preparation will create a sturdy base for the delicious cheesecake filling that will soon follow.
Step 3: Coat Tortillas
Melt your unsalted butter in a small bowl, then dip each tortilla circle into the butter, ensuring both sides are coated. Once buttered, roll the circles in graham cracker crumbs until they have an even, crunchy coating. This step adds a delightful texture that mimics the classic cheesecake crust in your Berrylicious Cheesecake Tacos.
Step 4: Shape Tortillas
Now it’s time to shape your tortillas into taco shells. Place each coated circle between the cups of an upside-down cupcake pan. This technique will help them hold their taco shape while baking, ensuring that the filling fits perfectly once they’re ready for the scrumptious cheesecake mixture.
Step 5: Bake
Place the taco-shaped tortillas in the preheated oven and bake for 10–12 minutes, or until they turn a beautiful golden brown. Keep an eye on them toward the end of baking; you want them to be crispy but not burnt—this is key for the perfect Berrylicious Cheesecake Tacos.
Step 6: Make Cheesecake Filling
While the taco shells cool, prepare the cheesecake filling. In a mixing bowl, combine the room-temperature cream cheese, lemon juice, and vanilla extract. Use a hand mixer to blend until smooth and creamy. In another bowl, whip the heavy cream with powdered sugar until stiff peaks form, then gently fold this mixture into the cream cheese to maintain the lightness.
Step 7: Fill & Top
Once the taco shells are completely cool, it’s time to assemble your Berrylicious Cheesecake Tacos. Use a piping bag to fill each shell with the rich cheesecake mixture. After filling, generously top each taco with blueberry and strawberry jam for a vibrant, fruity finish that enhances the flavor and visual appeal.
Step 8: Serve Immediately
Your Berrylicious Cheesecake Tacos are now ready to enjoy! For the best texture and flavor, serve immediately after filling. The contrast of the crispy shell with the creamy filling and fruity toppings makes these tacos an irresistible dessert treat everyone will love!
Berrylicious Cheesecake Tacos Variations
Feel free to get creative and adjust these taco recipes to suit your tastes!
-
Dairy-Free: Substitute cream cheese with whipped coconut cream for a delightful, lighter filling.
Experience the tropical twist that will elevate your dessert to new heights! -
Fruit Fiesta: Switch up the jams with fresh raspberries, peaches, or even mixed berry compote for a different flavorful zing!
Each fruit brings its unique sweetness, giving your tacos a refreshing change of pace. -
Nutty Twist: Add chopped walnuts or pecans to the cheesecake filling for a crunchy element that contrasts beautifully with the smooth texture.
This nutty contrast will delight those who love an added bite to their dessert! -
Chocolate Lovers: Fold in mini chocolate chips into the cheesecake filling for a sweet, chocolaty surprise in each bite.
Who can resist that perfect blend of chocolate and berry flavors? -
Syrupy Elegance: Drizzle warm chocolate or caramel sauce over finished tacos before serving for an indulgent touch that will wow your guests.
The warm drizzle adds an irresistible richness that takes your dessert to the next level! -
Spicy Kick: Dust the taco shells with a hint of cayenne pepper before baking for an unexpected spicy contrast against sweet toppings.
This twist surprises the palate and leaves your guests intrigued! -
Zesty Lemon: Incorporate lemon zest into the cream cheese filling for a bright, citrusy kick that adds complexity to the flavors.
A touch of citrus always enhances sweetness, making each bite feel even more refreshing!
If you’re curious about exploring more delicious taco recipes, hungry for a savory option, consider these delightful Crunchy Asian Tacos or try some flavorful Blackened Shrimp Tacos as well!
How to Store and Freeze Berrylicious Cheesecake Tacos
Room Temperature: These tacos are best enjoyed fresh, but if left out, they can stay at room temperature for up to 2 hours.
Fridge: Store any leftovers in an airtight container in the fridge for up to 3 days. However, the taco shells may soften, so only fill them right before serving for the best texture.
Freezer: You can freeze the unfilled taco shells for up to a month. Wrap them tightly in plastic wrap and place in a freezer bag. When ready to use, bake directly from frozen until crispy.
Reheating: If you’ve stored filled tacos, reheat them in the oven at 350°F (175°C) for about 5 minutes to warm them slightly, but be cautious to prevent sogginess.
Expert Tips for Berrylicious Cheesecake Tacos
- Room Temperature Cheese: Make sure your cream cheese is at room temperature for a silky smooth filling; cold cream cheese can lead to lumps.
- Perfect Peaks: Be careful not to over-whip the heavy cream; aim for stiff peaks to keep your filling light and fluffy.
- Bake Wisely: Check your taco shells early; they should be golden brown but not burnt—a few minutes can make a big difference!
- Freshness Matters: To enjoy the best texture, serve the Berrylicious Cheesecake Tacos immediately after filling; they can become soggy if left too long.
- Customize Freely: Feel encouraged to experiment with your favorite jams or fresh fruits; each variation can give a unique twist to this delightful dessert!
What to Serve with Berrylicious Cheesecake Tacos
These delightful tacos create a sweet spectacle that pairs perfectly with side dishes that enhance their fruitiness and appeal.
- Fresh Fruit Salad: A mix of seasonal berries and melons offers a refreshing contrast to the creamy cheesecake filling, enhancing your dessert experience.
- Vanilla Ice Cream: Creamy ice cream provides a delightful temperature contrast, cooling and complementing the sweet, tart flavors of the tacos.
- Chocolate Drizzle: A rich chocolate drizzle over the tacos can elevate their decadence, bringing a luscious depth to each bite, allowing the chocolate to harmonize beautifully with the fruity toppings.
- Mint Leaves: A sprinkle of fresh mint adds a pop of color and a refreshing flavor note, enhancing the overall sensory experience and providing a lovely aromatic touch.
- Lemon Sorbet: This light sorbet delivers a zesty kick that plays well with the sweet flavors, cleansing the palate and leaving a crisp aftertaste.
- Sparkling Water with Lime: A refreshing drink choice that cleanses the palate between bites and enhances the fruity elements of the dessert, making your dining experience more vibrant.
- Whipped Cream: Adding a dollop of fluffy whipped cream can create extra indulgence, enhancing both the texture and sweetness, inviting everyone to dive into the delightful experience.
- Coconut Flakes: Toasted coconut flakes offer a bit of crunch and a tropical touch that pairs deliciously with the cheesecake’s richness.
- Chocolate-Covered Strawberries: For those looking to amp up the indulgence further, these fruity treats bring an elegant, romantic twist that complements the cheesecake tacos beautifully!
- Iced Matcha Latte: The earthy creaminess of matcha is a unique touch, enhancing the dessert’s profile while giving a refreshing balance to its sweetness.
Make Ahead Options
These Berrylicious Cheesecake Tacos are perfect for meal prep enthusiasts! You can prepare the taco shells up to 2 days in advance. Simply bake and allow them to cool completely, then store in an airtight container to maintain their crispy texture. The cheesecake filling can be made up to 24 hours before serving—just whip together the ingredients and refrigerate until you’re ready to use. Assemble the tacos by filling the shells and adding the jam just before serving to keep everything fresh and delightful. This way, you can effortlessly enjoy these indulgent treats on a busy weeknight or at your next gathering!
Berrylicious Cheesecake Tacos Recipe FAQs
What kind of tortillas should I use for Cheesecake Tacos?
I recommend using 8-inch flour or corn tortillas as a base. They provide the perfect texture and hold up well against the creamy filling. If you want to change things up, try using mini tortillas for bite-sized desserts!
How should I store leftover Berrylicious Cheesecake Tacos?
Store any leftovers in an airtight container in the fridge for up to 3 days. Be aware that the taco shells can become soft, so it’s best to fill them just before serving. If you need to keep them longer, consider freezing the shells unfilled.
Can I freeze the taco shells for future use?
Absolutely! You can freeze the unfilled taco shells for up to a month. Wrap them tightly in plastic wrap and place them in a freezer bag to keep them fresh. When you’re ready to use them, simply bake them from frozen at 400°F (200°C) for about 10 minutes until they’re crispy.
What can I do if my heavy cream doesn’t whip up properly?
If your heavy cream isn’t whipping well, ensure it’s cold, and your mixing bowl is also chilled. Start at a low speed until frothy and then gradually increase the speed to medium-high until stiff peaks form. If it starts to curdle, you’ve over-whipped it, so be gentle!
Are there any allergies I should consider with this recipe?
Yes, please be mindful of common allergens! The Berrylicious Cheesecake Tacos contain dairy from cream cheese and heavy cream, as well as gluten from the tortillas. For a dairy-free option, you can substitute the cream cheese with a plant-based cream cheese, and use whipped coconut cream instead of heavy cream! Always check ingredient labels for potential allergens.
Berrylicious Cheesecake Tacos: Fun, Fruity Dessert Delight
Ingredients
Equipment
Method
- Preheat the oven to 400℉ (200℃).
- Stack the tortillas and use a cookie cutter to cut out 5 circles. Pierce each circle to prevent air bubbles.
- Melt the unsalted butter, dip each tortilla circle, and coat with graham cracker crumbs.
- Shape the tortillas into taco shells by placing them between the cups of an upside-down cupcake pan.
- Bake the taco-shaped tortillas in the oven for 10–12 minutes until golden brown.
- In a bowl, combine room-temperature cream cheese, lemon juice, and vanilla extract. Blend until smooth. In another bowl, whip the heavy cream with powdered sugar until stiff peaks form, then gently fold this into the cream cheese mixture.
- Once the taco shells are cool, fill each shell with the cheesecake mixture using a piping bag, and top with blueberry and strawberry jam.
- Serve immediately for best texture and flavor.
Leave a Reply