
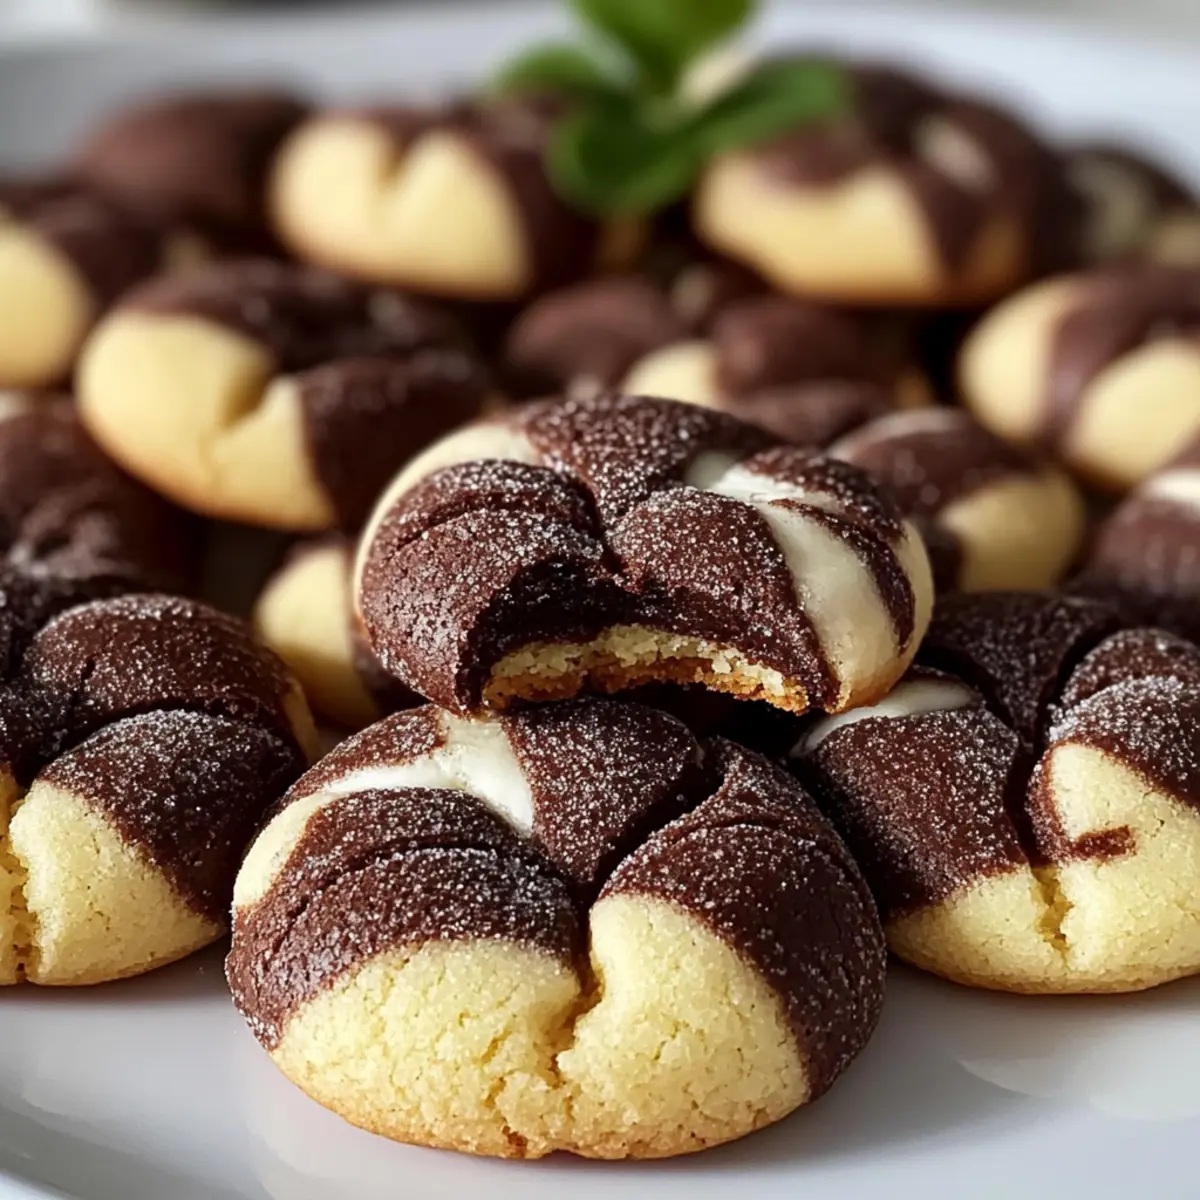
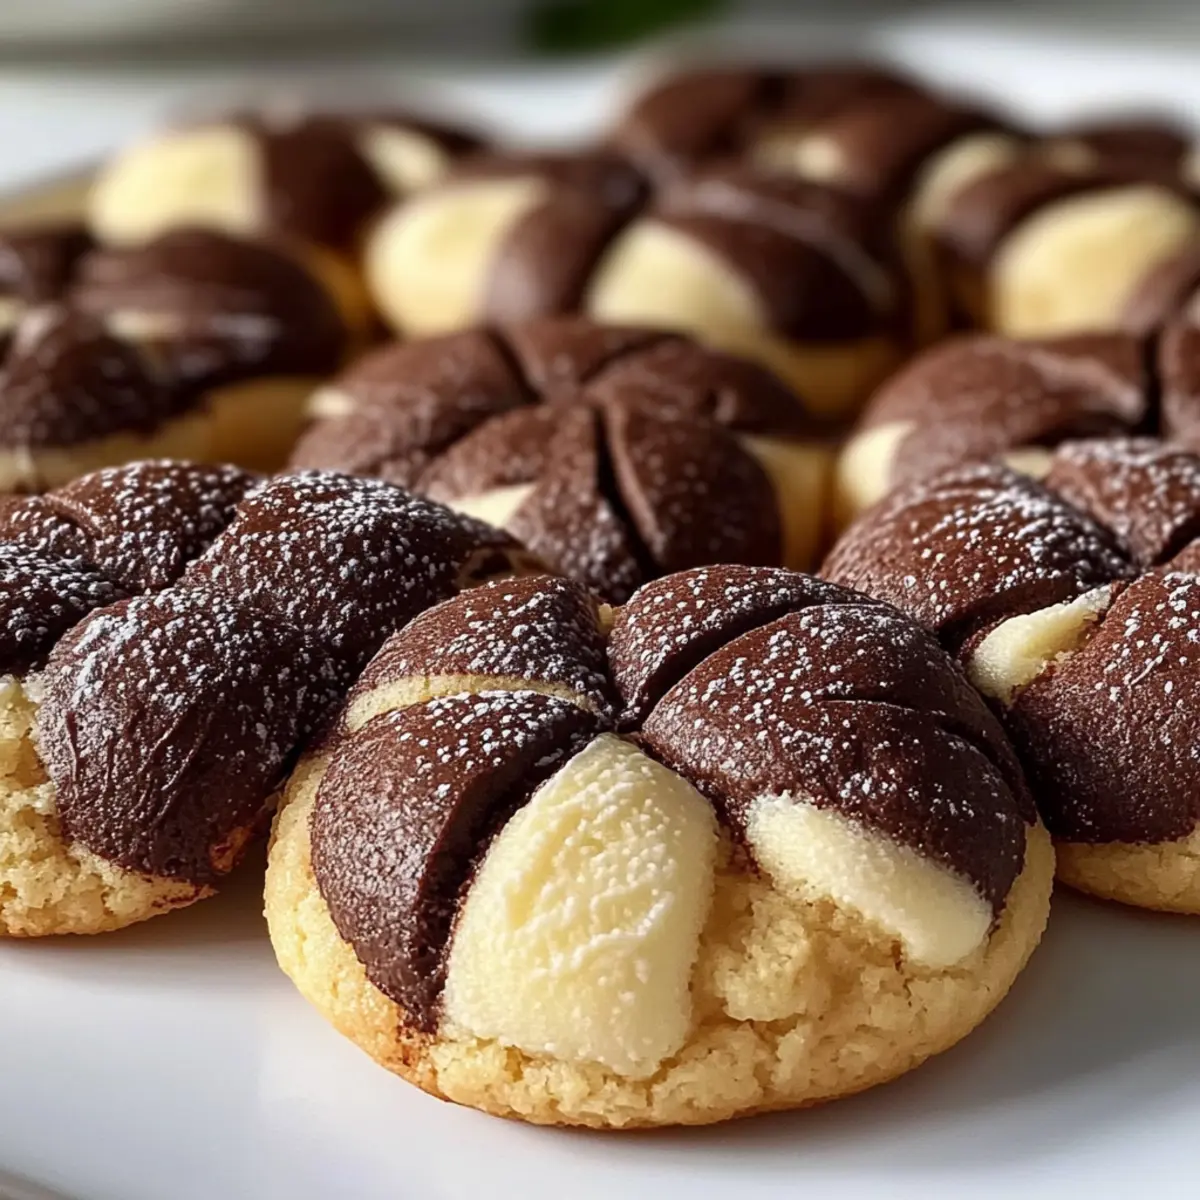
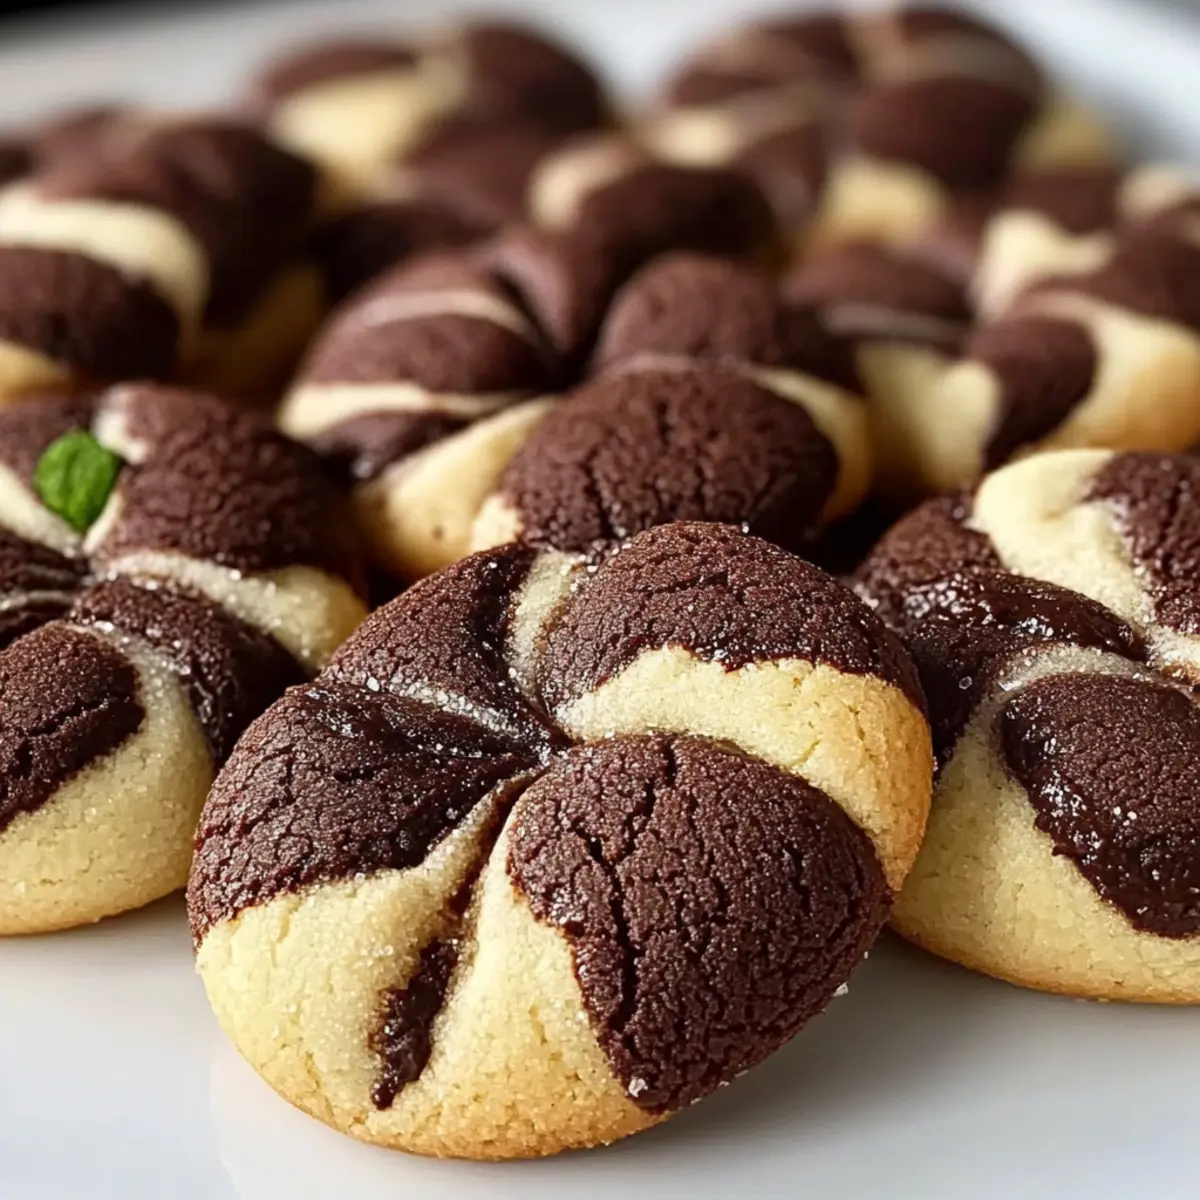
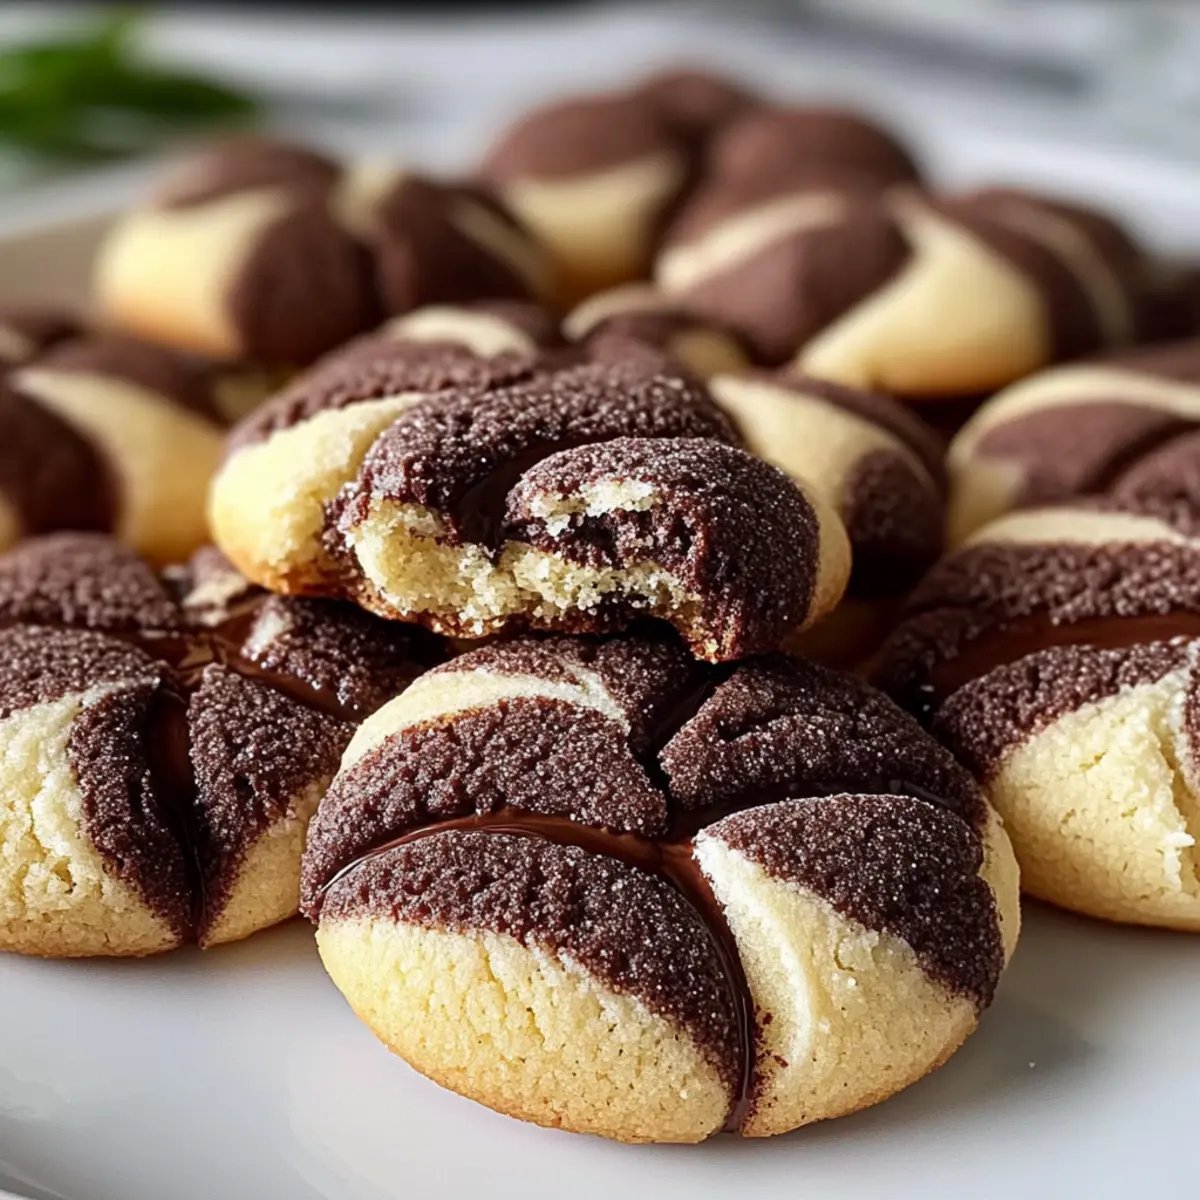
In the heart of my kitchen, I stumbled upon an old family recipe that whisked me away to delightful childhood memories—Marmorplatzchen Die Im Mund Schmelzen, or Melting Marble Cookies. These cookies are not just a sweet treat; they are a cozy embrace of rich chocolate and creamy vanilla, prettily swirled into a marbled masterpiece. What I adore about this melting cookies recipe is its simplicity; you can whip up a batch in under an hour, making it the perfect quick fix for unexpected guests or a warm holiday gathering. Plus, their buttery softness will charm everyone, turning any occasion into a festive celebration. So, are you ready to dive into this baking adventure and transform your kitchen into a haven of sweet aromas? Let’s get started!
Why Are These Cookies So Irresistible?
Melt-in-your-mouth texture: Each bite of these Marmorplatzchen delivers a soft, buttery experience that’s simply divine.
Easy to make: With just a handful of ingredients and under an hour, you can create these delicious cookies without the hassle.
Versatile flavors: The rich chocolate and vanilla combination allows for creative personalization; try adding nuts or white chocolate chips for a unique touch!
Crowd-pleaser: Perfect for any occasion, they’re sure to impress at parties or family gatherings, just like my Sweet Sour Chicken does!
Wonderful aroma: Baking these cookies fills your kitchen with an irresistible sweet scent, making it a cozy spot for loved ones to gather.
Melting Marmorplatzchen Recipe Ingredients
For the Dough
- Butter – Adds richness and moisture; ensure it’s softened for easier mixing.
- Granulated Sugar – Provides sweetness and helps with texture; consider using brown sugar for a deeper flavor.
- Eggs – Binds ingredients together and contributes to tenderness; can substitute with flaxseed meal mixed with water for a vegan alternative.
- All-Purpose Flour – Forms the structure of the cookies; whole wheat flour can be used for a nuttier flavor.
- Baking Powder – Leavening agent that helps cookies rise; baking soda could be a substitute with slight adjustments.
- Vanilla Extract – Enhances flavor; opt for pure extract for the best results.
- Cocoa Powder – Adds chocolate flavor; using Dutch-processed cocoa can provide a milder taste.
Optional Add-Ins
- Nuts (e.g., walnuts or pecans) – Add crunch and flavor; great for personalizing your cookies!
- White Chocolate Chips – Offer a sweeter contrast to the chocolate and vanilla; perfect for those with a sweet tooth.
- Flavored Extracts (e.g., almond or hazelnut) – Experiment for a unique twist on the classic melting Marmorplatzchen recipe.
Step‑by‑Step Instructions for Melting Marmorplatzchen Recipe
Step 1: Prepare Dough
Begin by creaming together 150g of softened butter and 150g of granulated sugar in a mixing bowl until the mixture is light and fluffy, which should take about 3-4 minutes. Next, crack in two eggs and add a teaspoon of vanilla extract, mixing well until fully combined. You should achieve a smooth, creamy texture that fills your kitchen with a delightful aroma.
Step 2: Combine Dry Ingredients
In a separate bowl, sift together 200g of all-purpose flour, one teaspoon of baking powder, and 30g of cocoa powder. Gently whisk the dry ingredients to remove any lumps and ensure even distribution. This mixture will be responsible for the delicious structure of your Melting Marmorplatzchen, so be attentive to the consistency as you prepare for the next step.
Step 3: Mix Dough
Gradually add the dry ingredients to your wet mixture, stirring gently with a spatula until just combined. Avoid overmixing to keep the cookies tender and light. Once the dough is formed, it should be soft and slightly sticky, promising that perfect melt-in-your-mouth experience when you bake the cookies.
Step 4: Create Marble Effect
Divide the dough into two equal parts: one should remain as the plain vanilla mixture and the other will incorporate the cocoa. Gently fold the cocoa dough into the vanilla dough, creating swirls without completely mixing them together. This will give your cookies that beautiful marbled appearance, making your Melting Marmorplatzchen truly eye-catching.
Step 5: Shape Cookies
Preheat your oven to 350°F (175°C) and line a baking sheet with parchment paper. Roll the marbled dough into small balls, about one tablespoon in size, and place them evenly spaced on the prepared baking sheet. As you position them, the cookies will spread slightly while baking, so give them enough room to breathe.
Step 6: Bake & Cool
Place the baking sheet in the preheated oven and bake the cookies for 10-12 minutes or until the edges are set and the tops appear slightly cracked. Keep an eye on them, as you want them to remain soft and chewy. Once baked, remove from the oven and let them cool on the tray for a few minutes before transferring them to a wire rack to cool completely.
Melting Marmorplatzchen Recipe Variations
Feel free to get creative with these delightful melting cookies, enhancing their flavors and textures to suit your taste!
- Dairy-Free: Substitute butter with coconut oil for a rich taste without dairy.
- Nutty Crunch: Add chopped walnuts or pecans into the dough for a satisfying bite! The added texture perfectly complements the soft, buttery cookies.
- Sweet Surprise: Incorporate white chocolate chips to bring a sweeter dimension. These creamy morsels create a lovely contrast to the chocolate and vanilla blend.
- Whole Grain Twist: Use whole wheat flour instead of all-purpose for a nuttier flavor and a touch of wholesome goodness. Your cookies will still melt in your mouth!
- Vegan Delight: Swap eggs for flaxseed meal mixed with water to keep it vegan-friendly while maintaining softness and moisture in every bite.
- Flavor Burst: Experiment with flavored extracts like almond or hazelnut for a unique take on these classic cookies. Just a tablespoon can transform the flavor profile entirely.
- Chili Chocolate: For a kick, add a pinch of cayenne pepper to the cocoa dough. The heat will surprise your taste buds in the most delightful way!
- Icing Drizzle: Once cooled, drizzle some melted dark chocolate or a simple glaze over cookies for an extra touch of sweetness and glamour.
These variations not only enhance the original melting Marmorplatzchen but also invite a world of delightful possibilities, just like my beloved Moist Banana Bread or the crowd-favorite Freakin Fried Rice. Enjoy your culinary adventure!
What to Serve with Melting Marmorplatzchen Recipe
Nothing pairs better with these delightful cookies than a few tasty side dishes to elevate your sweet baking adventure.
-
Creamy Vanilla Ice Cream: A scoop of velvety ice cream complements the rich flavors of the cookies, creating a delightful dessert experience.
-
Fresh Berries: Sweet-tart strawberries or raspberries add a refreshing contrast to the buttery cookies, balancing the sweetness beautifully.
-
Hot Chocolate: A warm, rich mug of hot chocolate enhances the chocolatey notes, making it feel like a cozy treat on a chilly day.
-
Coffee or Espresso: The bold flavor of coffee pairs perfectly, allowing you to savor each bite while enjoying a comforting drink.
These pairings are not just options; they create a memorable experience full of texture and flavor that everyone will cherish.
Make Ahead Options
These Melting Marmorplatzchen cookies are perfect for meal prep, allowing you to enjoy sweet, homemade goodness with minimal last-minute fuss! You can prepare the cookie dough and refrigerate it for up to 24 hours; just be sure to wrap it tightly in plastic wrap to maintain its freshness. Alternatively, roll the dough into balls and freeze them for up to three months—this way, you can bake fresh cookies whenever the craving strikes! When ready to bake, simply place the frozen cookie dough on a baking sheet and add an extra minute or two to the baking time. This method ensures you savor these delightful cookies just as deliciously as if they were made fresh that day!
How to Store and Freeze Melting Marmorplatzchen
Room Temperature: Store cookies in an airtight container at room temperature for up to 7 days to maintain their soft, buttery texture.
Fridge: If you prefer a chilled cookie, keep them in the fridge for up to 10 days. Just remember to let them come back to room temperature before enjoying!
Freezer: For longer storage, freeze the cookies in a single layer on a baking sheet before transferring them to an airtight container or freezer bag. They will last up to 3 months.
Reheating: To enjoy them warm again, simply preheat your oven to 350°F (175°C) and bake for about 5 minutes. The melting Marmorplatzchen will taste freshly baked again!
Expert Tips for Melting Marmorplatzchen Recipe
- Room Temperature Butter: Ensure butter is softened at room temperature; this allows for easier mixing and a smoother cookie dough.
- Don’t Overmix: Gently combine wet and dry ingredients; overmixing can result in tough cookies instead of the desired tender melting texture.
- Perfect Baking Time: Keep a close watch on the baking time and remove the cookies when the edges are set; they’ll continue to firm up while cooling.
- Swirl Technique: For beautiful marble patterns, fold dough gently; avoid mixing completely to preserve distinct layers of chocolate and vanilla.
- Flavor Variations: Feel free to get creative! Experiment with different flavored extracts, nuts, or chocolate chips to enhance your melting Marmorplatzchen recipe.
Melting Marmorplatzchen Recipe FAQs
What’s the best way to select the ripeness of butter for this recipe?
Absolutely! To ensure your cookies turn out perfectly, use butter that is softened to room temperature, which should feel slightly cool and give to the touch. This allows for easier mixing with sugar, creating that light and fluffy texture that will make your cookies melt-in-your-mouth.
How should I store my Melting Marmorplatzchen?
Very easy! Keep your cookies in an airtight container at room temperature for up to 7 days. If you’re not planning to finish them quickly, refrigerate them for up to 10 days for an even fresher taste. Just remember to let them sit at room temperature for about 15 minutes before indulging again!
Can I freeze Melting Marmorplatzchen? How?
Absolutely! To freeze, first, lay your cookies in a single layer on a baking sheet and place them in the freezer for about 2 hours until solid. Then, transfer them to an airtight container or a freezer bag, separating layers with parchment paper, and they’ll keep well for up to 3 months. When you’re ready to enjoy them, simply preheat your oven to 350°F (175°C) and bake for about 5 minutes for that fresh-baked taste.
What if my cookies turn out too hard?
No worries! If you find that your cookies have become hard, it’s possible you may have overbaked them or overmixed the dough. Make sure you watch the baking time closely; as soon as the edges are set, take them out! To bring back some softness, try placing a slice of bread in the container with the cookies. The cookies will absorb moisture from the bread, returning to a tender state!
Any dietary considerations I should keep in mind?
Yes! If you or your guests have allergies, be sure to inform them that this recipe contains eggs, dairy (butter), and gluten (flour). For a vegan option, substitute the eggs with a flaxseed meal mixed with water (1 tablespoon flaxseed meal + 2.5 tablespoons water = 1 egg) and use coconut oil instead of butter. This way, everyone can savor your delicious Melting Marmorplatzchen!
What if I want to add different flavors or ingredients?
The more the merrier! Feel free to get creative with your Melting Marmorplatzchen recipe! You can incorporate nuts like walnuts or pecans for added crunch, or toss in white chocolate chips for a delightful contrast to the chocolate and vanilla flavors. Additionally, experimenting with flavored extracts, like almond or hazelnut, can give a unique spin to these cookies!
Melting Marmorplatzchen Recipe: Irresistibly Buttery Bliss
Ingredients
Equipment
Method
- Cream together the butter and sugar until light and fluffy, then add the eggs and vanilla, mixing until combined.
- In a separate bowl, sift together flour, baking powder, and cocoa powder.
- Gradually combine the dry ingredients with the wet mixture, stirring gently until just mixed.
- Divide the dough, keeping one part vanilla and folding cocoa into the other for a marbled effect.
- Preheat oven to 350°F (175°C) and line a baking sheet. Roll the dough into balls and space them on the sheet.
- Bake for 10-12 minutes until edges are set with slight cracks. Cool on tray for a few minutes before transferring to a rack.
Leave a Reply