
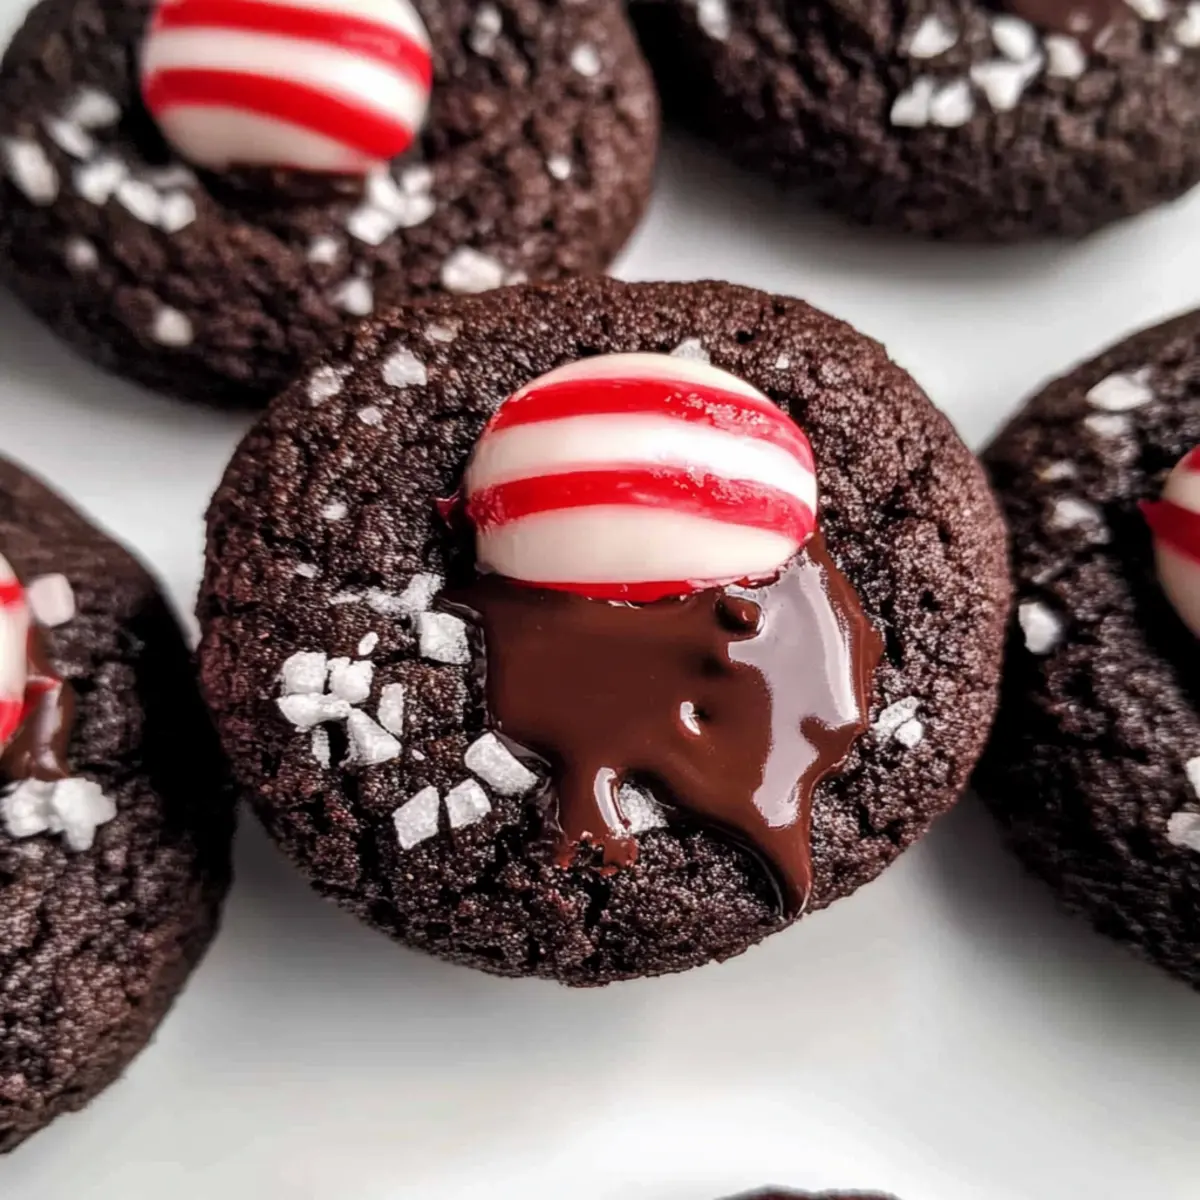
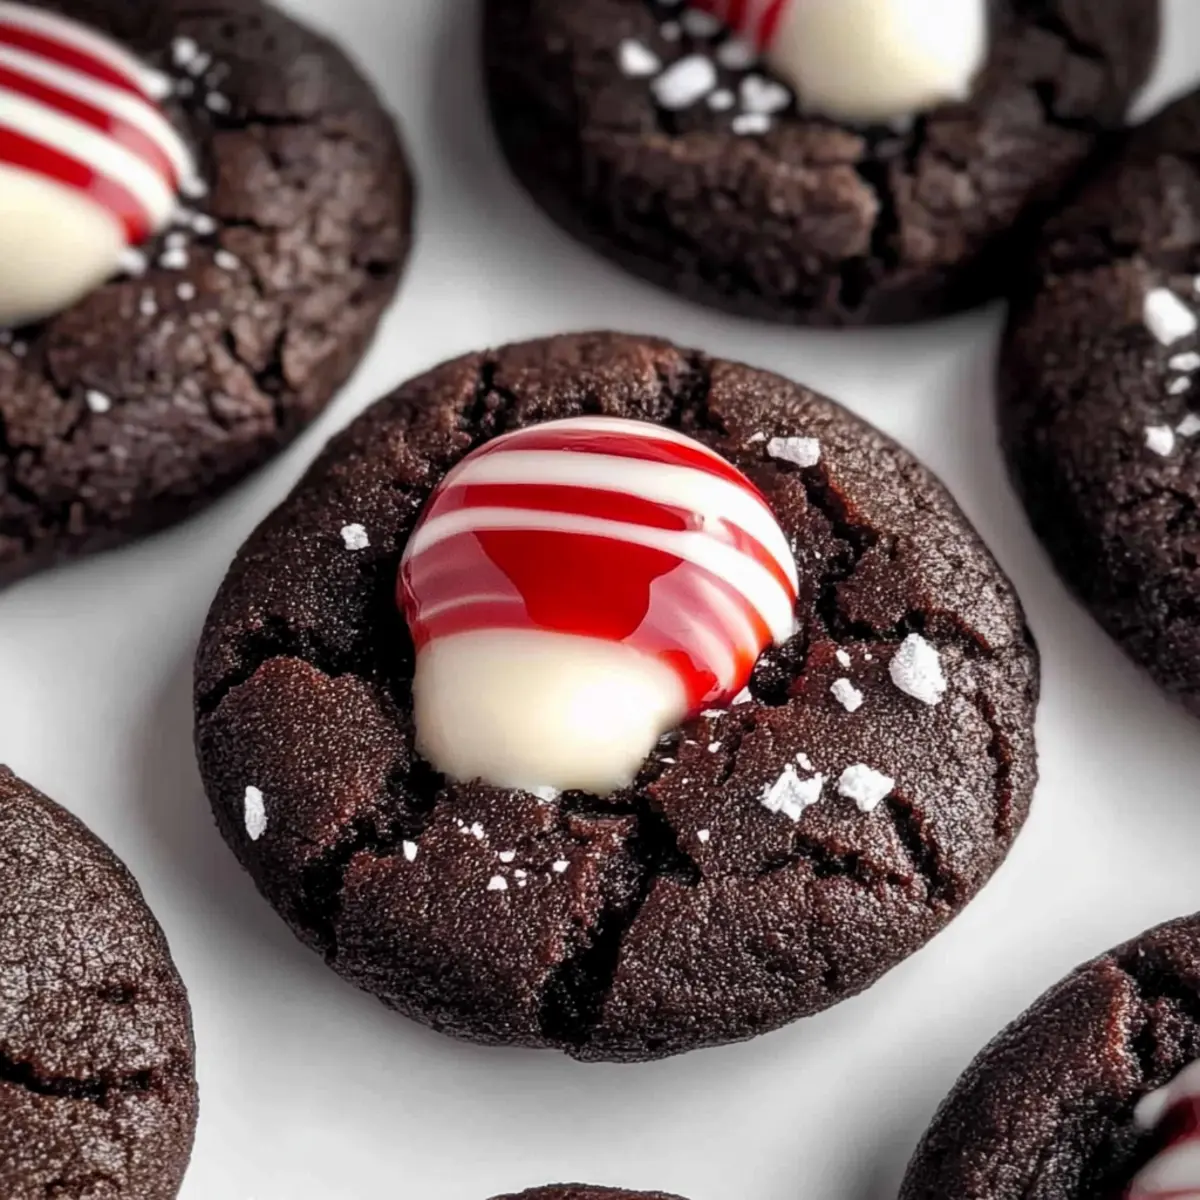
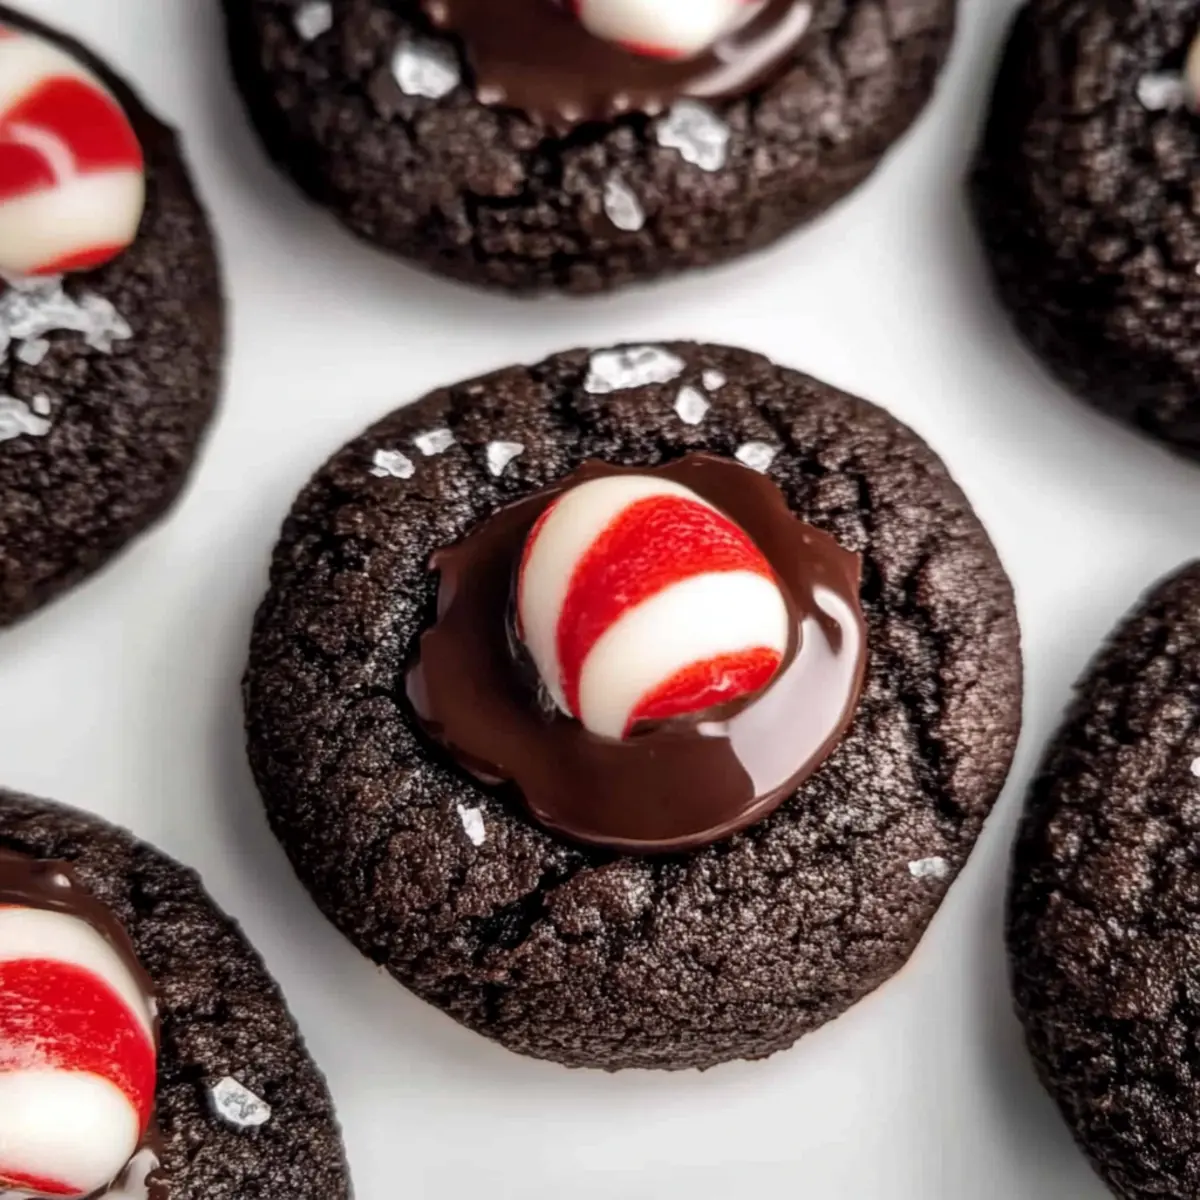
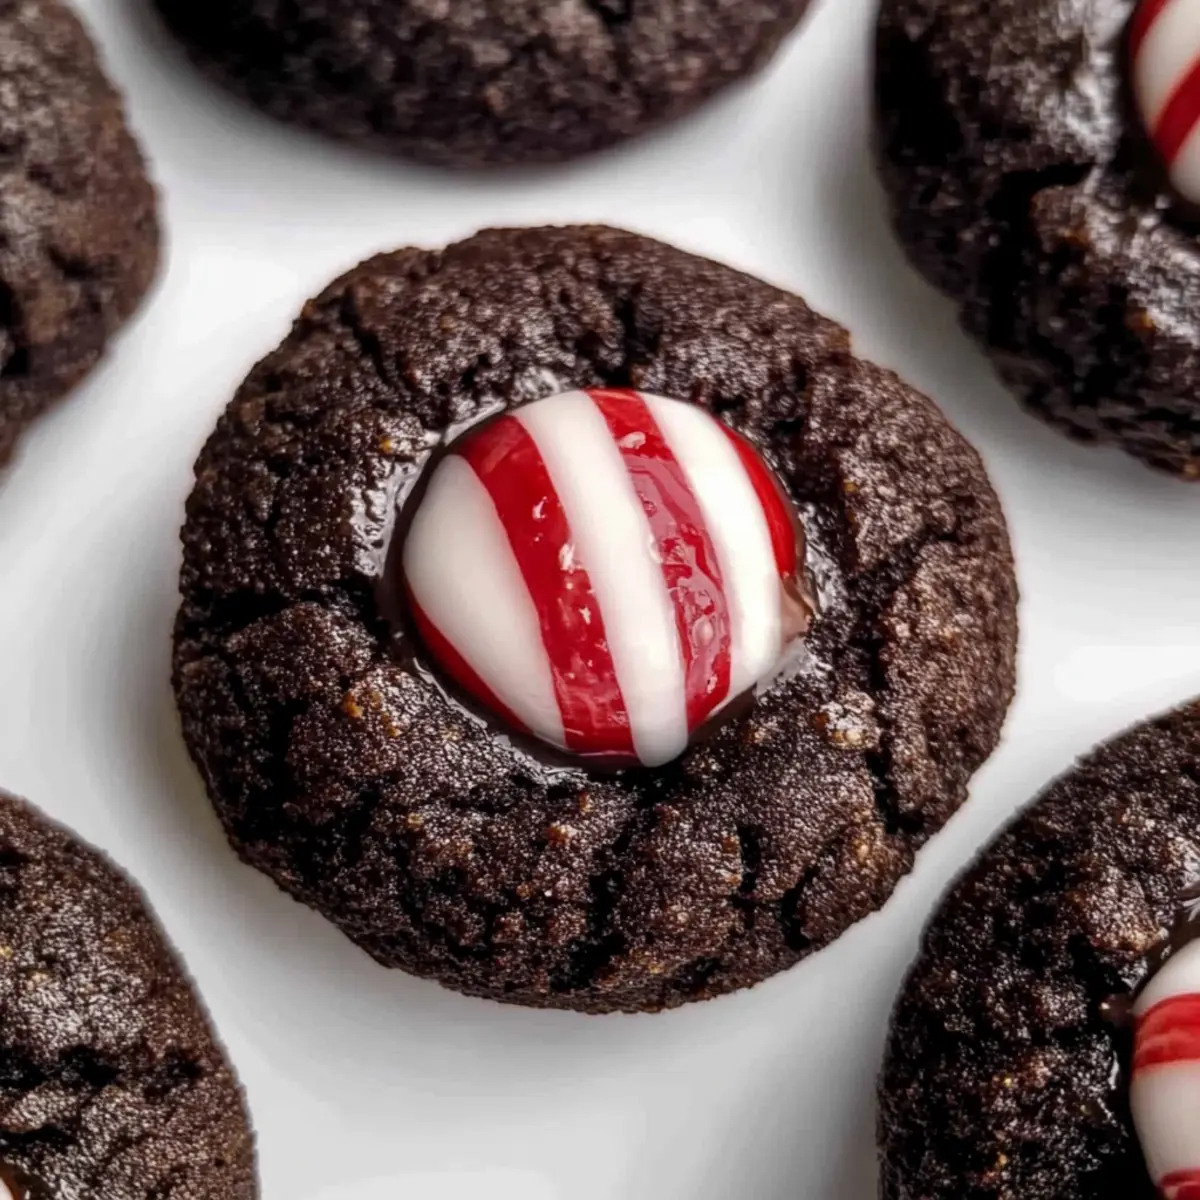
As the holidays approach, the scent of chocolate and peppermint fills the air, inviting us into a world of cozy comforts and festive treats. I’m excited to share my recipe for Chocolate Peppermint Blossoms—chewy dark chocolate cookies crowned with a delightful peppermint kiss. These cookies are not only a breeze to whip up but also add a unique twist to traditional holiday goodies, making them a perfect crowd-pleaser at any gathering. With their fudgy texture and enticing aroma, they are sure to evoke warm memories while satisfying your sweet tooth. Ready to sprinkle a bit of holiday magic into your kitchen? Let’s dive into this festive recipe that will have everyone asking for seconds!
Why Are These Cookies So Magical?
Irresistible Combination: The blend of dark chocolate and peppermint creates a flavor explosion that is perfect for the holiday season.
Chewy Delight: Each cookie has a fudgy texture that melts in your mouth, making them a delightful treat for everyone.
Festive Presentation: Topped with a Candy Cane Hershey Kiss, these cookies not only taste incredible but look festive too, adding a pop of color to your dessert table.
Quick and Easy: With minimal prep and baking time, you can whip up these delicious cookies in no time—ideal for holiday gatherings!
Versatile Twist: Feel free to experiment with other Hershey Kisses or even substitute them for gluten-free options for wider accessibility, just like with my Chocolate Pretzel Cupcakes or indulgent Chocolate Chip Banana recipes.
With these irresistible Chocolate Peppermint Blossoms, you’ll have a new go-to cookie that’s sure to impress!
Chocolate Peppermint Blossoms Ingredients
For the Cookie Dough
- All-purpose flour – Provides the structure for the cookies; measure properly to avoid excess.
- Cocoa powder, Dutch process – Adds rich chocolate flavor and color; don’t substitute with regular cocoa as it affects texture.
- Baking powder – A leavening agent to help cookies rise slightly.
- Baking soda – Works with acidic ingredients for proper leavening.
- Salt – Enhances overall flavor.
- Unsalted butter, softened – Provides moisture and richness; ensure it’s at room temperature for easy mixing.
- Light brown sugar – Adds moisture and a hint of caramel flavor; pack it well for accurate measurement.
- Granulated sugar – Contributes sweetness; reserve some for rolling the cookie balls.
- Egg yolks, at room temperature – Adds richness and helps bind the cookie dough; room temperature aids emulsification.
- Vanilla extract – Deepens the flavor profile of the cookies.
For the Peppermint Centers
- Candy Cane Hershey Kisses, frozen – The star of the cookie, providing a refreshing peppermint flavor; freeze before use to maintain shape.
With these Chocolate Peppermint Blossoms ingredients, you’ll be well on your way to creating a delightful holiday treat that will have everyone smiling!
Step‑by‑Step Instructions for Chocolate Peppermint Blossoms
Step 1: Prepare Kisses
Unwrap the Candy Cane Hershey Kisses and place them in the freezer for at least 30 minutes. This crucial step ensures that the Kisses maintain their shape during baking, preventing them from melting excessively. Gather your baking sheets and parchment paper, as you’ll need them shortly.
Step 2: Preheat Oven
Preheat your oven to 350°F (175°C), which is the perfect temperature to create fudgy Chocolate Peppermint Blossoms. While the oven is heating, line two baking sheets with parchment paper to prevent the cookies from sticking and to aid in easy cleanup later.
Step 3: Mix Dry Ingredients
In a medium bowl, whisk together the all-purpose flour, Dutch cocoa powder, baking powder, baking soda, and salt until fully combined. This dry mixture provides the structure and rich chocolate flavor that makes these cookies so special. Get a smooth blend that showcases the dark cocoa beautifully, ready for the upcoming steps.
Step 4: Cream Butter and Sugars
In a large mixing bowl, beat the softened unsalted butter, packed light brown sugar, and granulated sugar together until the mixture is light and fluffy, about 1-2 minutes. The mixture should appear creamy and pale, indicating that it’s aerated and ready for the next step of adding richness to your Chocolate Peppermint Blossoms.
Step 5: Combine Wet Ingredients
Add the egg yolks and vanilla extract into the butter-sugar blend, mixing until the ingredients are well incorporated and the mixture is pale and fluffy, approximately 1-2 minutes. Ensure the yolks are at room temperature for the best emulsion, which contributes to the delicious texture of the cookies.
Step 6: Combine Mixtures
Gradually add the dry ingredient mixture into the wet ingredients, stirring until just combined and no flour streaks remain. The dough will be thick and chocolatey—this is the base of your Chocolate Peppermint Blossoms. Be careful not to overmix, as we want to keep that chewy texture.
Step 7: Shape Cookies
Using a tablespoon or cookie scoop, portion the cookie dough and roll each piece into a ball. Roll the balls in granulated sugar before placing them on the prepared baking sheets, ensuring they are spaced about 2 inches apart. This step adds a delightful crunch and sweetness to your cookies, enhancing their overall appeal.
Step 8: Bake
Place the baking sheets in the preheated oven and bake the cookies for 7-8 minutes, keeping an eye on them. If you prefer softer cookies, aim for the 7-minute mark—your Chocolate Peppermint Blossoms should look set but soft in the center when you remove them from the oven.
Step 9: Add Kisses
Immediately after taking the cookies out of the oven, press a frozen Candy Cane Kiss into the center of each cookie. The warmth of the cookie will slightly soften the Kiss without allowing it to melt completely. This adds that delightful peppermint touch central to your Chocolate Peppermint Blossoms.
Step 10: Cool
Allow the cookies to cool on the baking sheets until the Kisses are set and maintain their shape. This cooling time helps enhance the fudgy texture of the cookies, making them irresistibly chewy. Once cooled, transfer the cookies to a wire rack or enjoy directly from the sheet.
What to Serve with Chocolate Peppermint Blossoms?
A delightful array of pairings will enhance the cozy experience of your holiday cookie platter.
- Creamy Hot Cocoa: This rich beverage complements the chocolate and peppermint flavors, making each bite and sip feel like a warm hug.
- Vanilla Ice Cream: Creamy vanilla ice cream balances the rich dark chocolate, allowing the peppermint candy kiss to shine. Perfect for an indulgent dessert!
- Festive Peppermint Bark: This crunchy treat echoes the peppermint theme, delighting your senses and adding variety to your dessert spread.
- Chai Latte: Its warm spices and creamy texture contrast beautifully with the cookies, turning your snack into a cozy afternoon experience.
- Sparkling Cranberry Drink: The refreshing tartness cuts through the sweetness of the cookies, creating a refreshing pairing perfect for holiday gatherings.
- Chewy Gingerbread Cookies: These spiced cookies provide an interesting contrast in flavor and texture, fitting the holiday vibe perfectly while keeping the sweetness balanced.
Combine these delightful offerings, and you’ll create a festive table that encourages togetherness and joy, leaving everyone craving just one more bite!
Chocolate Peppermint Blossoms Variations
Feel free to get creative with these variations that will elevate your holiday baking experience and cater to different taste preferences!
-
Gluten-Free: Use a 1:1 gluten-free baking flour blend to make these cookies without compromising taste or texture. Many gluten-free flours mimic traditional flour beautifully, keeping those chewy delights intact.
-
Dairy-Free: Substitute the unsalted butter with coconut oil or a vegan butter alternative to create a deliciously dairy-free treat. These swaps keep the rich, fudgy flavor while accommodating dietary needs.
-
Add Spices: Introduce a hint of warmth by adding 1 teaspoon of cinnamon or a dash of nutmeg to the dough for a cozy, spiced chocolate twist. It’s a lovely surprise that enhances the holiday vibes.
-
Minty Flavor Boost: Incorporate 1 teaspoon of peppermint extract into the dough for an extra punch of flavor. It complements the Kisses beautifully and ramps up that holiday spirit!
-
Nutty Crunch: Fold in ½ cup of chopped walnuts or pecans into the cookie dough for added texture and flavor depth. The crunch pairs wonderfully with the softness of the cookies.
-
Alternative Centers: Instead of Candy Cane Kisses, use white chocolate or caramel-filled Kisses for a different delicious twist. Each variation offers a new, exciting flavor experience for your cookie platter.
-
Double the Chocolate: Swap half of the all-purpose flour with chocolate flour for a double-chocolate delight, enriching the chocolate flavor even further.
-
Presentation Twist: Drizzle melted dark chocolate over the cooled cookies for a show-stopping finish, perfect for sharing at holiday gatherings. It adds both elegance and extra flavor to each bite.
Feel free to explore these variations, much like I do with my favorite Chocolate Pretzel Cupcakes or rich Chocolate Chip Banana recipes! Enjoy the process and make it your own!
Expert Tips for Chocolate Peppermint Blossoms
Measure Flour Correctly: Use the spoon and level method instead of scooping straight from the bag. This prevents excessive flour, ensuring perfect chewy cookies.
Chill the Kisses: Freezing the Candy Cane Hershey Kisses before baking is crucial; unfrozen Kisses can melt too quickly and lose their shape.
Don’t Overmix: Once you combine the dry and wet ingredients, mix just until no flour streaks remain. This helps maintain the soft, fudgy texture in your Chocolate Peppermint Blossoms.
Bake Time Matters: Keep an eye on your cookies; for softer cookies, aim for 7 minutes. The centers should look slightly underbaked to stay chewy.
Experiment with Variations: Consider substituting the Kisses with different flavors for a fun twist. Dark chocolate Kisses work beautifully for a richer flavor profile.
Make Ahead Options
These Chocolate Peppermint Blossoms are perfect for busy holiday seasons when you’re juggling multiple tasks! You can prepare the cookie dough up to 24 hours in advance by mixing all the ingredients and rolling the dough into balls. Simply refrigerate the cookie balls in an airtight container. For even longer storage, you can freeze them for up to 3 months. When ready to bake, just add a couple of extra minutes to the baking time while pressing the frozen Kisses in. This prep-ahead method ensures that you can whip up these delightful cookies with minimal effort, maintaining their fudgy texture and peppermint flavor for that festive touch everyone loves.
How to Store and Freeze Chocolate Peppermint Blossoms
Room Temperature: Store your cookies in an airtight container at room temperature for up to 3 days to maintain their chewy texture and delightful flavor.
Fridge: If you prefer them chilled or want to prolong their freshness, keep the cookies in the fridge for up to a week, ensuring they’re well-covered to avoid drying out.
Freezer: For long-term storage, freeze your Chocolate Peppermint Blossoms in a single layer on a baking sheet first. Once solid, move them to a freezer-safe bag for up to 2 weeks.
Reheating: When ready to enjoy, reheat frozen cookies in the oven at 350°F (175°C) for about 5-7 minutes to restore their soft, fudgy texture.
Chocolate Peppermint Blossoms Recipe FAQs
What type of cocoa powder should I use for the cookies?
Use Dutch process cocoa powder in this recipe for those rich, chocolatey cookies. Regular cocoa powder can affect the texture and leavening process, so stick to Dutch process for optimal results!
How should I store my Chocolate Peppermint Blossoms?
Store your cookies in an airtight container at room temperature for up to 3 days for the best chewy texture and flavor. For longer storage, you can keep them in the fridge for up to a week, ensuring they’re well-covered to prevent drying out.
Can I freeze the cookie dough?
Absolutely! You can freeze the cookie dough formed into balls. Place the balls on a baking sheet in a single layer until solid, then transfer them to a freezer-safe bag. They can be stored for up to 3 months. When you’re ready to bake, just add an extra minute or two to the baking time.
What should I do if my cookies spread too much while baking?
If your cookies spread too much, it may be due to the butter being too soft or the dough not being chilled. To prevent this, ensure your butter is at the right temperature and consider chilling the dough for about 30 minutes before baking. This helps maintain their shape.
Are there any allergy considerations I should be aware of?
Yes! This recipe contains dairy (butter) and eggs, which may be allergens for some individuals. If you’re baking for someone with allergies, consider using dairy-free butter alternatives and aquafaba (chickpea water) instead of eggs as substitutes.
Can I use other types of Kisses?
Certainly! Feel free to experiment with other flavored Kisses like caramel or dark chocolate for a fun twist. Just remember to freeze them beforehand to keep their shape during baking!
Delicious Chocolate Peppermint Blossoms for Holiday Cheer
Ingredients
Equipment
Method
- Unwrap the Candy Cane Hershey Kisses and place them in the freezer for at least 30 minutes.
- Preheat your oven to 350°F (175°C) and line two baking sheets with parchment paper.
- In a medium bowl, whisk together the all-purpose flour, Dutch cocoa powder, baking powder, baking soda, and salt until fully combined.
- In a large mixing bowl, beat the softened unsalted butter, packed light brown sugar, and granulated sugar together until light and fluffy.
- Add egg yolks and vanilla extract into the butter-sugar blend, mixing until well incorporated.
- Gradually add the dry ingredient mixture into the wet ingredients, stirring until just combined.
- Using a tablespoon or cookie scoop, portion the cookie dough and roll each piece into a ball. Roll in granulated sugar before placing on baking sheets.
- Bake the cookies for 7-8 minutes. Remove when the centers look set but soft.
- Immediately press a frozen Candy Cane Kiss into the center of each cookie.
- Allow cookies to cool on the baking sheets until kisses are set, then transfer to a wire rack.
Leave a Reply